Article by: Gavin Ligget
Article applies to: all E32 and E34 BMW models equipped with Self-Leveling (LAD) suspension.
Having anticipated the dreaded leaky rear strut problem for some time, I acquired an old set of struts that had come off of an E32 of unknown model and vintage.
When my struts started leaving puddles in my garage I started looking at rebuilding the struts mainly because of the exorbitant price the dealer wanted for new ones and the fact that I had driven an E32 converted to conventional suspension and was not at all impressed with the resultant handling.
I originally assumed the struts were welded together.
I mistook the pressed marks on the lower spring retainers for spot welds and originally ground them off only to find that the spring retainers can be tapped off with a nylon mallet.
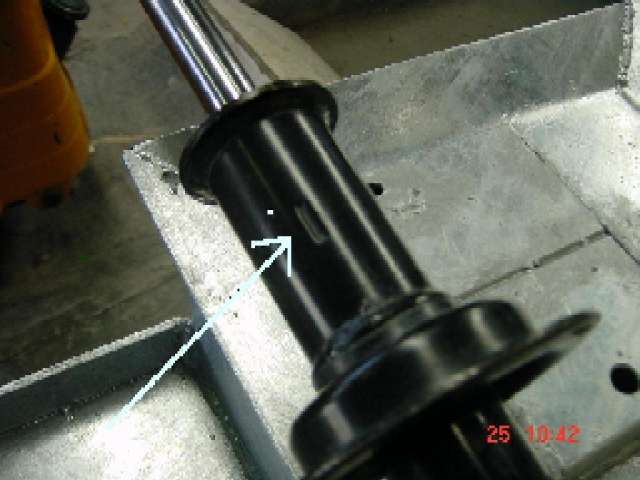
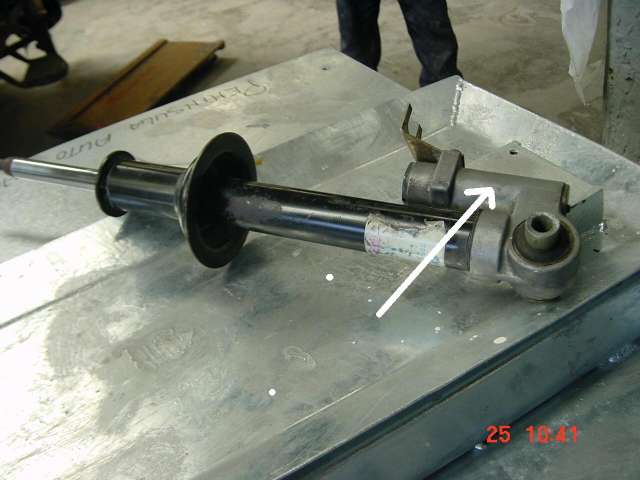
Remark from Sean:
“The arrow of the picture above shows the pressed marks. But I didn’t understand how Gavin separated both parts of the strut. So I asked Gavin more info about separating those:”
The three marks that look like welds are in fact just crimps to stop the retainer from rattling on the cylinder.
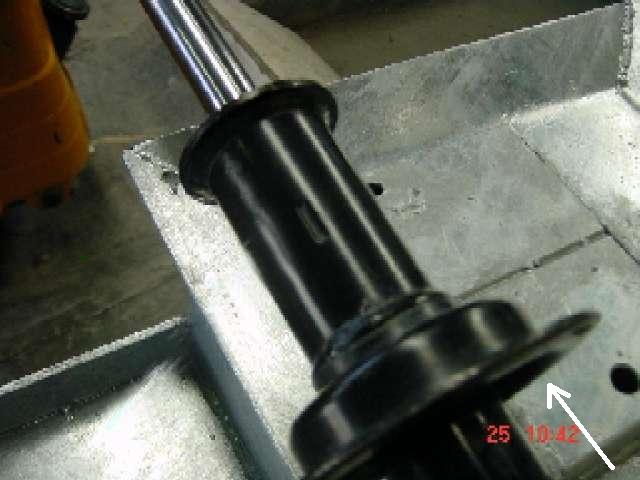
Hold the cylinder in one hand by the aluminum part and hit the spring retainer with a nylon mallet and it will slide off in the direction of the top of the strut.
In other words you hit on the bit sticking out below the nylon ring in your pic and the portion that the nylon ring is on will come off nylon ring and all.
See pic below and hit in direction of the arrow:
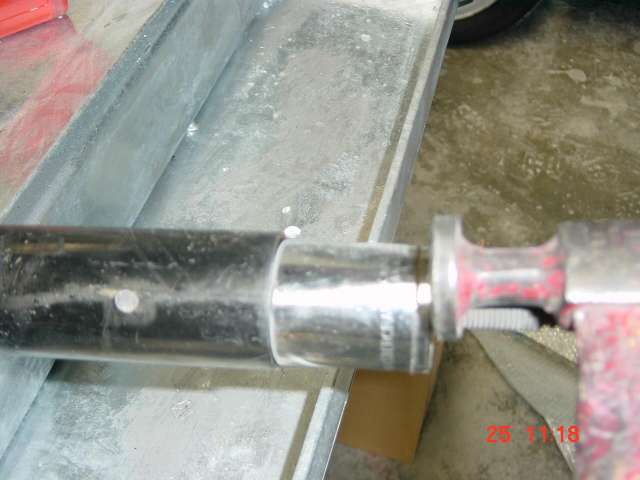
Once tapped off the seal block will be revealed which is retained by a spring clip.
You will need to use a suitably sized socket to tap the seal block down into the strut cylinder:
So that you can remove the spring clip using a small flat screwdriver:

With the clip removed pull smartly up on the strut shaft which will eject the seal block.
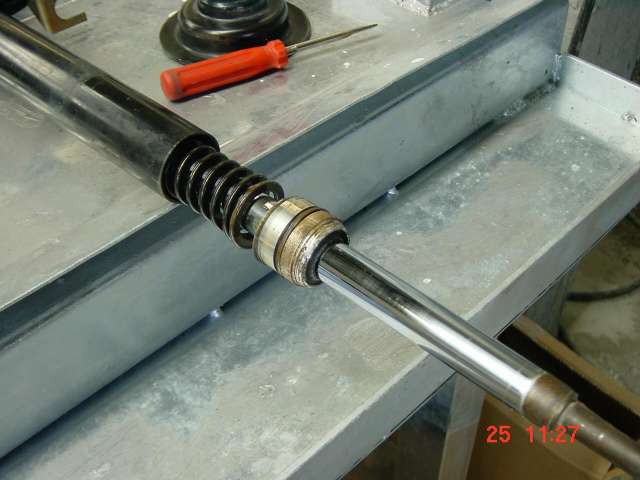
Be careful to keep the shaft aligned with the cylinder so as not to damage the piston seal on the bottom of the shaft.
There are two seals contained in the seal block. The upper one is simply a wiper seal which serves to keep crud out of the cylinder.
It is retained by a taper. This seal does not prevent the release of Pentosin.
Should you want to replace it you will need to machine a tapered tool with which to reverse the taper and another with which to re-taper the lip once you have replaced the seal.
Frankly given the hassle involved in removing these scraper seals and the difficulty involved in finding replacements I have not renewed these as long as they still display a wiping action on the shaft.
A few observations before continuing with the rebuild:
My car is a 1991 E32 730i (remark by Sean750: in some countries LAD was an expensive factory option and could be ordered on a standard i model.
Not in the US, where only iL models are equipped with LAD). I firstly rebuilt the spare struts I had found and once I had exchanged struts I rebuilt the original units. I found a number of differences, some incidental and some very pertinent the rebuilding process.
I do not know exactly what model my spare set of struts came from. The spare strut cylinders were longer as were the lower spring retainers ( by about 10mm).
There were significant differences internally as well. The spare struts were equipped with rebound springs which my originals didn’t have and the wiper seal dimensions were completely different making them harder to source and in part prompting me to not worry about replacing them.
The shock absorbing mechanism (indicated by the arrow in the first image) also had internal differences relating to the method of sealing.
The spare set utilized conventional (nylon) hydraulic seals and the originals an o-ring type design.
I couldn’t find anyone who could re-manufacture the nylon seals and I didn’t bother trying to dismantle the o-ring type shocks.
I found through trial and error that replacing the o-ring component of the nylon hydraulic seals was sufficient to prevent further leaking. (This worked on the top seals as well)
Turning the seal block over will reveal the nylon hydraulic seal that does all the work:
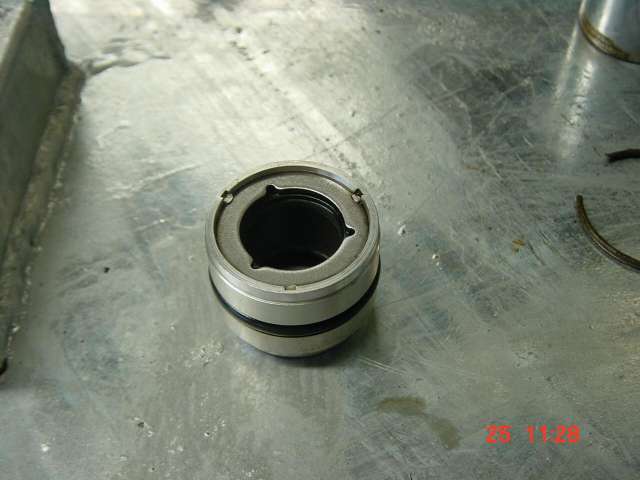
The u shaped cutouts in the retaining washers allow Pentosin to exert pressure on the nylon seal in proportion to the internal hydraulic pressure, thus improving the sealing action as pressure increases.
You will need to remove the three burred edges that retain the washers to reveal the seal and o-ring. On my original struts the washer was cupped and the burred edges were thus not evident.

The nylon seal I had machined by a specialist seal supplier who also supplied the o-ring. The o-ring is pressed over the nylon ring and both are then pressed simultaneously into the recess in the seal block.
The overall diameter of the two components when thus joined is the critical measurement.
I found that when the nylon ring was still a tight fit on the shaft, replacing just the o-ring solved the leaking problem.
However these seals are of a dimension well within the capabilities of specialist seal manufacturers so rather replace them along with the o-rings.
Moving to the bottom of the strut shaft you will find the piston ring:

The spare struts had a dual ring design, the original units the single as pictured. I have been told by those knowledgeable in hydraulics that these rings are not seals but guides for the piston.
Either way I did not replace these rings at all. Note that the rings have a groove on their inner face which corresponds to a groove in the piston. Take care to orientate correctly when assembling.
Assembly is a reverse procedure. Take care to keep the shaft aligned when inserting into the cylinder to avoid damage to the piston seal/guide. Lubricate sparingly with Pentosin when assembling.
Should you remove the shock units from the cylinders note that they screw off conventionally (right hand thread). Be careful what you use to turn the cylinders. The walls are relatively thin and dent easily.
I found a pipe wrench damaged the cylinder and used a strap spanner second time round applying the tool at the extreme top of the cylinder where the piton doesn’t travel.
There is an o-ring down there that provides the sealing, so disassemble only if you have a leak:
The struts may leak from a number of places:
- The top nylon seal in the seal block.
- The outer seal block o-ring.
- The lower o-ring where the shock assembly attaches.
- At the bottom shock assembly cap.(see following pic:)
All solved by the above rebuild.

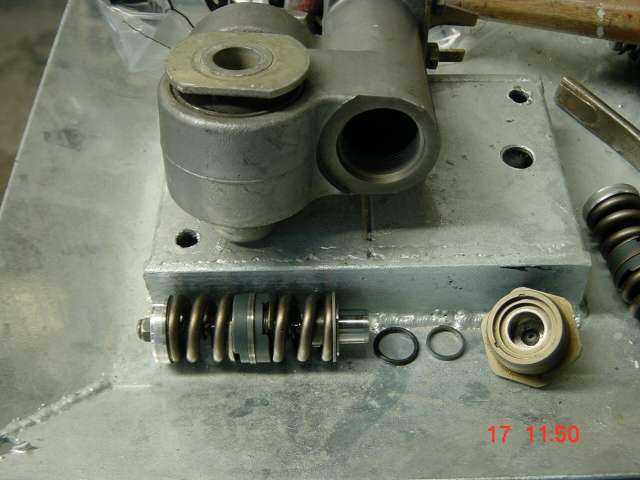
As noted previously I noted two sealing designs in the damping unit. The one pictured above utilities the same design as the top seal block i.e. nylon/ o-ring seal combo.
The other design was difficult to investigate given the fact that the assembly was not designed to be taken apart. Again given a tight fit on the shaft you will get away with just replacing o-rings.
I could not find anyone to make up these nylon seals because they are quite small. I’m sure someone will do it it will just take some time to find them. In the absence of a leak at the bottom of the strut I would leave well enough alone.
These seals don’t work as hard as the top ones.
Its important to note the orientation of the nylon seals when you remove them.
Pay attention to which way the inner lip faces as this provides the seal. This goes for the top seals as well.
My first rebuilds are doing well and the total cost was under $20.00 USD for seals and o-rings.