Article by: Johan
Applies to: all e32 and e34 models.
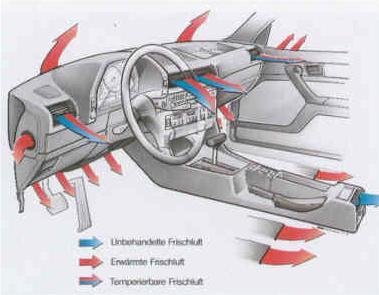
Problem: Only cold air comes from the center vents. There have been discussions on various message boards that this is supposed to be normal. Granted it’s not supposed to blow out hot air, like the demister and foot well vents, but the air should be warm as the image bellow indicates:
When this happens it’s more likely that there is a broken stepper-motor mount on the heater housing. The stepper-motors held by these mounts control the mixture of hot and cold air that comes through the center vents.
Background: There are 3 different heating systems used in the E32. One from Siemens, a heater unit from Behr and the climate control from Behr.
The proper way to fix a broken stepper motor mount is to replace the center housing of the heater unit. But since this requires taking the entire heater housing out of the car various “quick fixes” have been applied with success.
Quick Fix: To get to the motors you have to at least remove the radio. Removing the center console also helps getting better clearance to work.
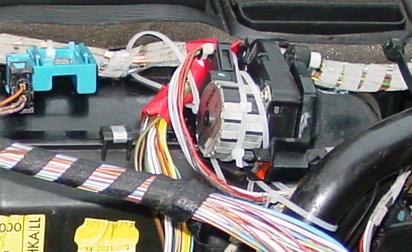
I tie wrapped the motor to anything within reach. This includes the metal support frame and the brackets on the heater housing that are used to attach the heater wiring.
In my case this solved the problem for a short time. After owning the car for about a year the center vents decided to blow only cold air. After checking the stepper-motor mounts and found that they where all in working order I removed the entire dash decided to find the problem.
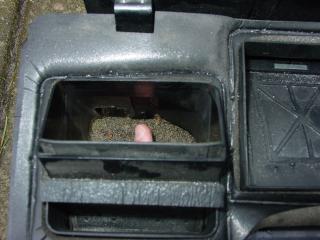
What happened in my case was that on the passenger side the plastic lever that controls the mixing flap had worked loose. This lever can be seen through the foot well air duct. To access the foot well flap remove the stepper motor for the flap. This allows you to open the flap by hand. After pushing the lever back the passenger center vent blow warm air again.
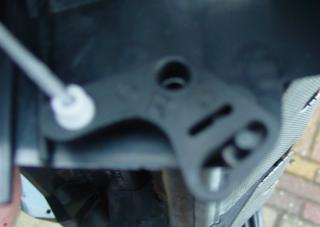
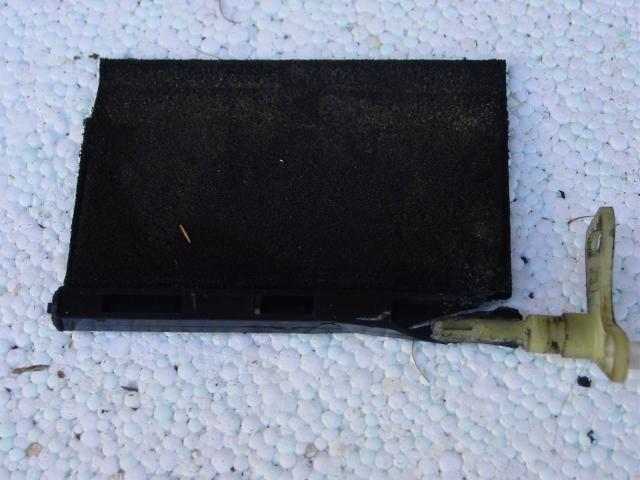
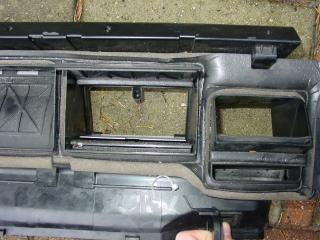
After removing the upper dashboard cover I found these pieces of plastic in the hinge area of the driver side mixing flap. As it turns out the mixing flap was broken. This may have happened during the last air conditioner refill when they inserted a temperature probe into the vents.
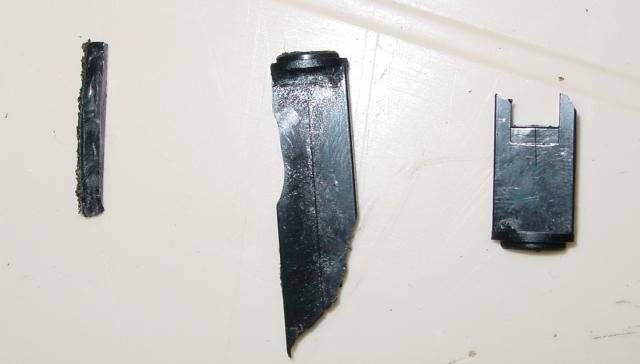
This is the mixing flap and the control lever. The flap is supposed to have a square hole where the lever fits into. But as you can see it’s broken.
Removing the heater housing from the car:
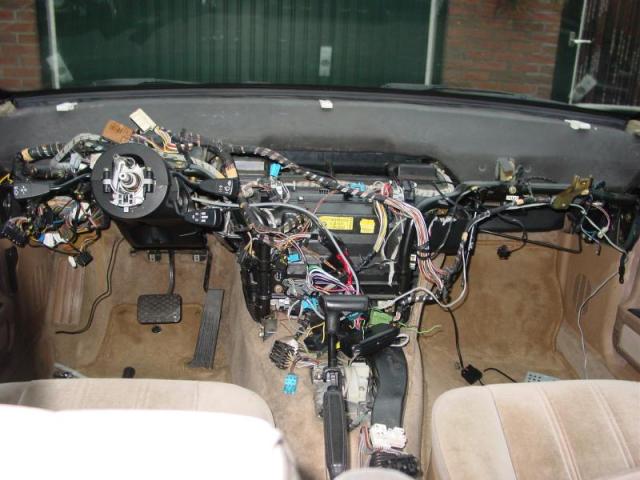
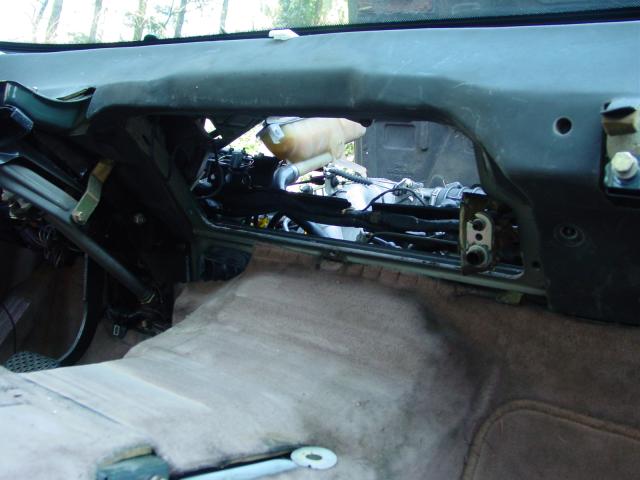
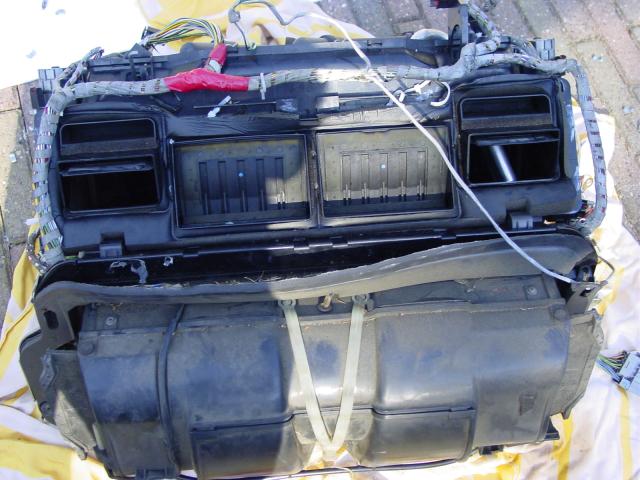
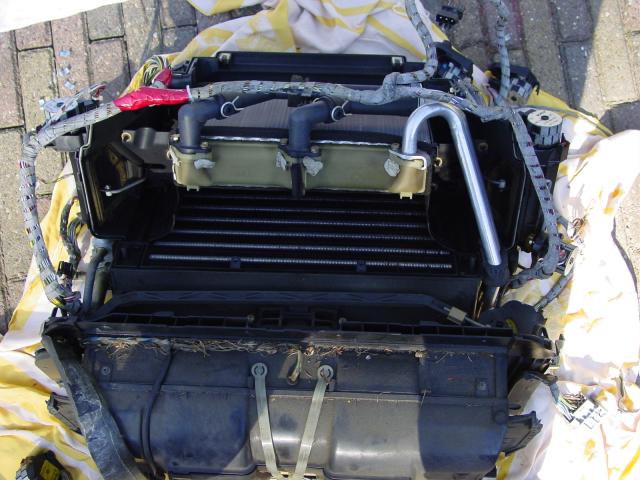
Let’s get the heater core out of the car! Follow the procedure “Dashboard removal” to get the interior of your car to look something like this:
First remove the metal frames around the heater:
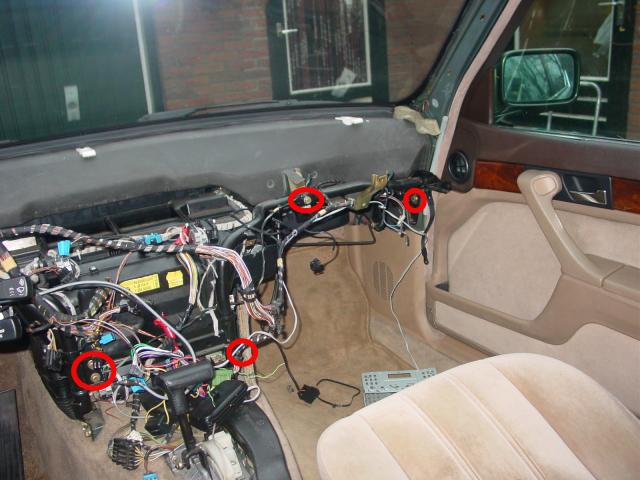
The passenger side frame is bolted to the car in four places:
The driver side frame is secured by bolts in three places:
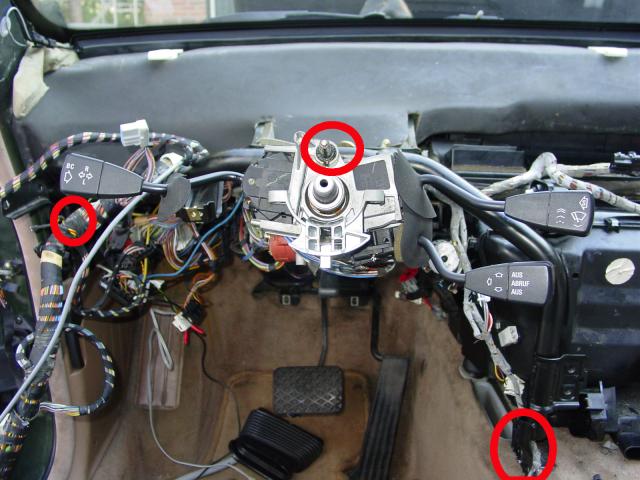
To remove the bolt in the middle you have to twist the bracket in front of it out of the way. To do this slacken the two nuts on the sides of the bracket:
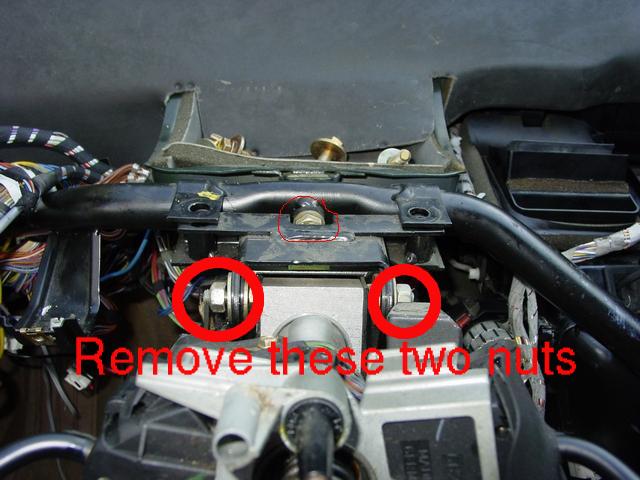
Remove the two nuts holding the IHKA box to the frames and remove both frames from the car.
Remove the connector that connects the IHKA wiring loom to the car. It’s the grey connector under the driver side glove box.
Now it’s time to start removing things under the hood. The first thing to do is remove the two plastic nuts holding the coolant expansion.
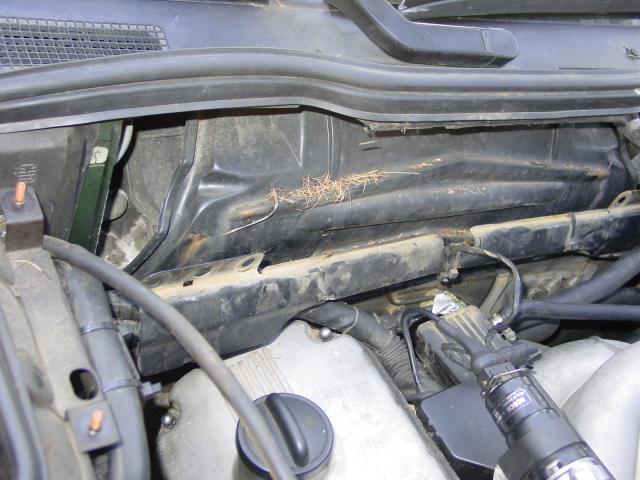
After that remove the four plastic nuts holding the metal wiring support.
After undoing the 5 screws shown in the picture below remove the bulkhead panel. Watch out for the brake line that’s in the way.

Now you will see a plastic cover over the blower motor housing. This cover is loose in there so carefully pull it out of the way without breaking it.
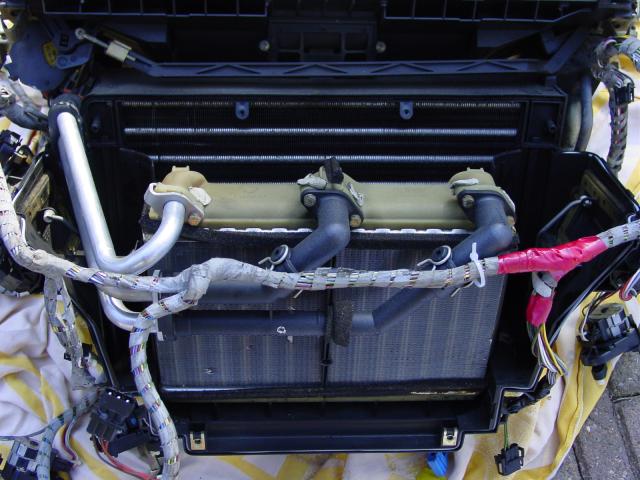
Now it gets messy so you best put a container under the car to catch the coolant that will flow out while removing the three hoses that go to the heater matrix.
I used a piece of garden hose to blow most of the coolant out of the heater matrix through these three pipes. If you don’t do this coolant will leak all over the interior of your car.
Time to remove the air conditioner pipes that connect to the heater housing. You did remember to have the gas removed from the air conditioning system didn’t you??
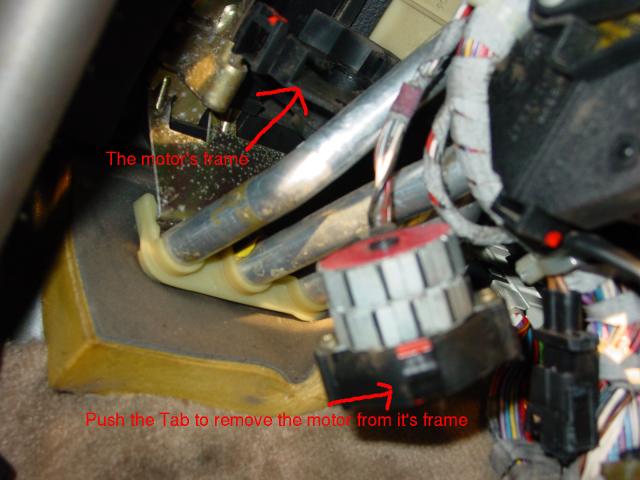
Chances are the outside air flaps on the left and right side of the blower motor are in the way of the screws you are about to undo. To get them to close you can remove the stepper motor from it’s frame inside the car.
Now remove the five screws that hold the heater core to the bulkhead. They have the same placing as the bulkhead panel that you removed earlier.
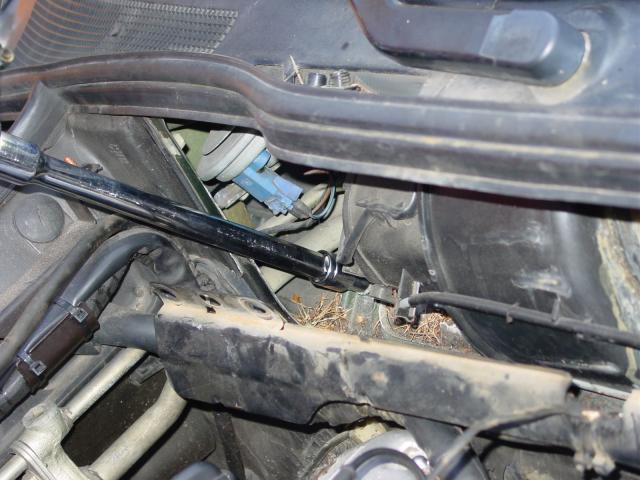
The upper screw on the driver side can only be reached by removing the plastic insert in the wiper assembly.

Remove the two plastic pieces connecting the housing to the air duct of the rear foot well. After that you are ready to lift the unit from the car.
I put the passenger seat all the way back and lifted the unit out on my own. You could have someone else hold a container under the three pipes that go to the heater matrix as coolant can still leak from there.
Now just sit back and enjoy the space and view you have created 🙂
Replacing the center housing on the heater housing:
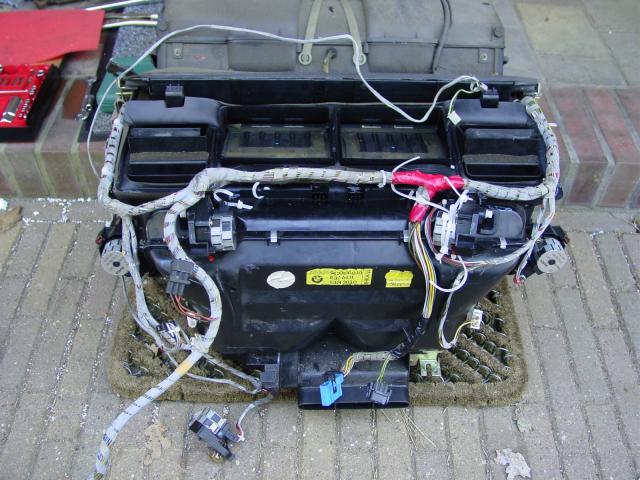
Now the heater box is out of the car you can start taking parts off so that the center housing can be removed from the box.
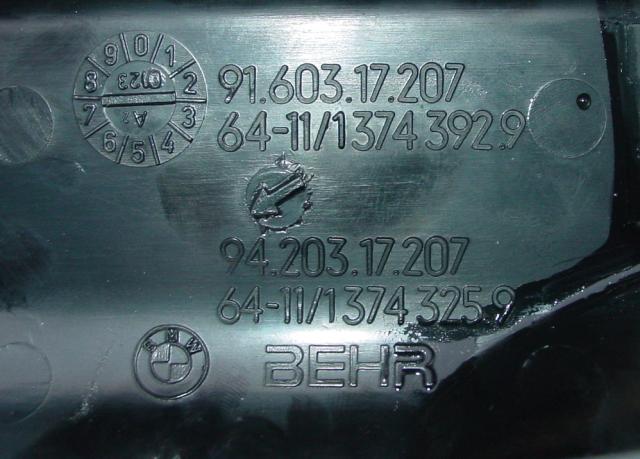
I bought a used panel for about 20 euro. A new panel will costs over 100 euro when bought from the dealer. The housing part is the same for the Behr heater and the Behr climate control.
The dealer might tell you otherwise as they are listed under two different part numbers, but the panel has both numbers stamped on it.
For starters remove the two stepper motors for the mixing flap (the ones with the broken bracket) to make some room. After that remove the front housing part of the heater core.
This panel is kept in place with metal clips. You can pry those off with a screw driver. Don’t forget to remove the brackets that connect the housing to the metal frame in the car.

Pull away the outer gasket. You will see four screws. These buggers are the reason you have to take the heater core out of the car as they can’t be reached with the housing in the car.
The center housing is fixed to the rest of the housing with the same metals clips that hold the front panel and eight screws.
Four you already seen under the gasket, and there are four more. To reach these you have top open the flaps on the panel.
Remove all four stepper motors from the panel (2 for the mixing flaps, 2 to open the center vent flaps) and remove the clip holding the rod to the stepper motor that operated the defroster vents.
Now remove all small metal clips holding the center housing part to the rest of the housing.
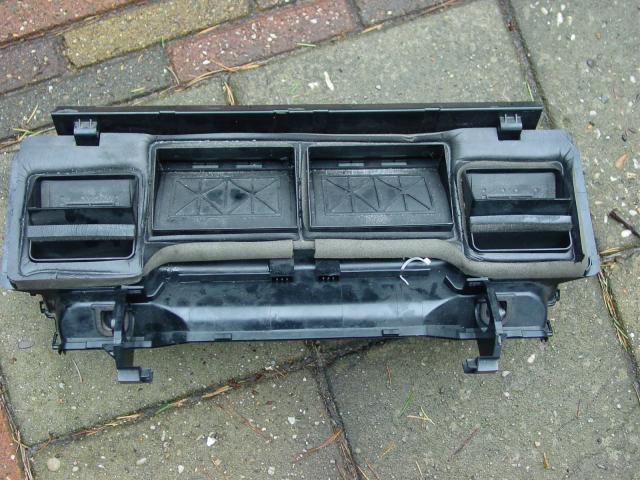
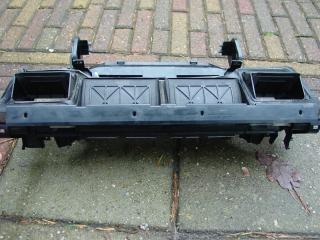
Now you can pull the center housing upwards. If like me you didn’t get a new seal to go around the heater pipes be careful not to break it. Your unit should look something like this:
Remove all the gasket leftovers between the main housing and the two panels. Put the new gasket in place.
Rebuild the heater core with the new panel. And of course re-installation is the reversal of removal 😉
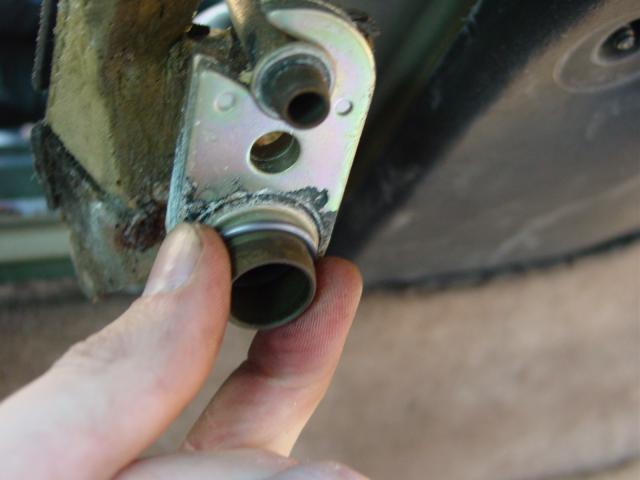
Before re-installing the heater core to the car it’s a good idea to replace the o-rings of the air conditioner pipes that were separated.
Total amount of parts and cost:
| BMW Part Number | Description | Price | QTY |
| 64111374325 | Center Housing* | $85.00 | 1 |
| 64111374358 | Gasket | $29.73 | 1 |
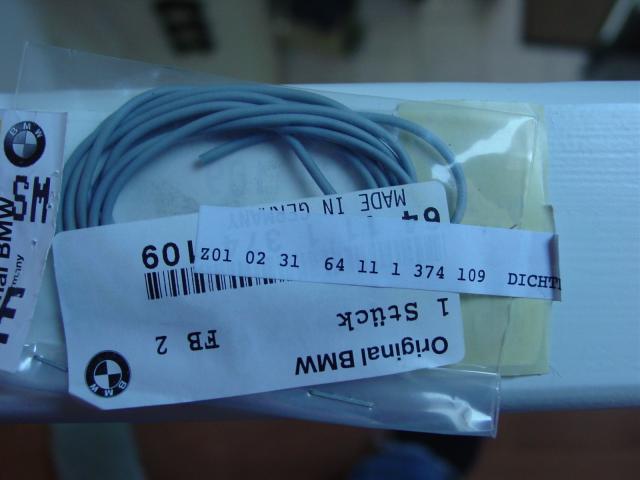
| 64111374109 | Seal** | $11.51 | 1 |
| 64508390602 | O-Ring 11.1mm | $1.92 | 1 |
| 64508390604 | O-Ring 17.17mm | $2.14 | 1 |
| 64111374369 | 7-Gasket Ring | $5.59 | 1 |
| 64111374357 | 7-Sealing Frame | $61.16 | 1 |
You will also need some coolant to refill the heating system and lots and lots of tie wraps.
Prices are USD and are excluding all taxes.
*The panel for the heater and climate control are identical. See previous note.
**I got a used panel with the foam gasket still attached to the panel I didn’t replace it.
Total amount of time:
About 1 weekend : )
Skills needed/difficulty level: The job looks harder than it is. You can do this yourself. Just take your time and remember where everything goes (take some notes and pictures if necessary).