Article by: Johan
Problem:Every time I went for a long drive I noticed a burned ATF smell when getting out of the car. I also had to fill the gearbox every 1500 km to keep it shifting smoothly.
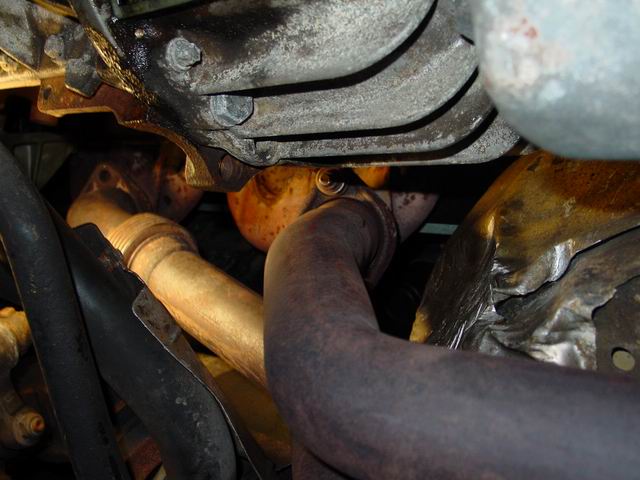
The underside of my car was completely covered with ATF. When I replaced the center bearing of my driveshaft some 3000 km ago I noticed the biggest spill was around the rear of the gearbox.
Models: This repair applies to all E23 / E24 / E28 / E32 / E34 models with a 4HP22 or 4HP24 automatic gearbox. However the exhaust removal will be different for all models.
The only exhaust removal described is of the E32 with M30 engine and catalytic converter. If you don’t feel comfortable removing the exhaust…don’t do the job!
Let’s get to work: Let’s start by getting the car on jack stands. I put the car on four jack stands but you should be able to get away with supporting it on one side as Sean described in his driveshaft repair.

Now let’s start removing the exhaust. If you are lucky you have friends as they make a handy tool in removing the heavy exhaust. If you don’t have any friends you can also use a jack to support the exhaust.
First remove the bolts that connect the catalytic convertor to the exhaust manifold. Be sure to use lots and lots of WD40.
When you turn it and it creaks let it creak no more than twice. Then use some more WD40 before turning it any further. As I’m a little stubborn and have little patience I had to learn this the hard way.
You guessed it I broke one of the studs on the manifold. Because of this I had to spend a lot of time drilling the stud out.
Undo the O2 sensor connector from the left side of the engine and undo the two plastic nuts holding the probe’s wiring guide.
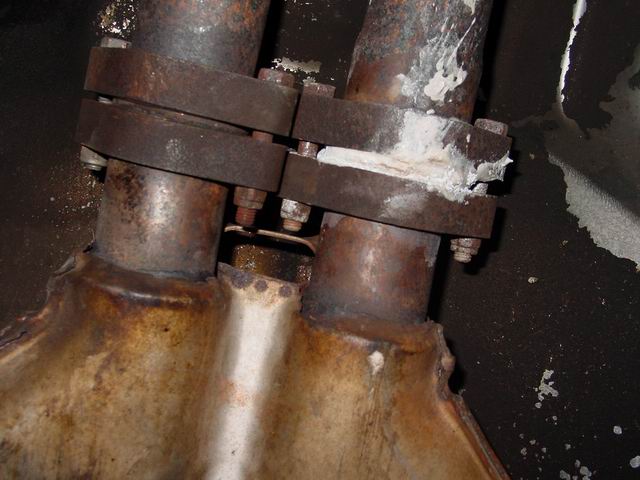
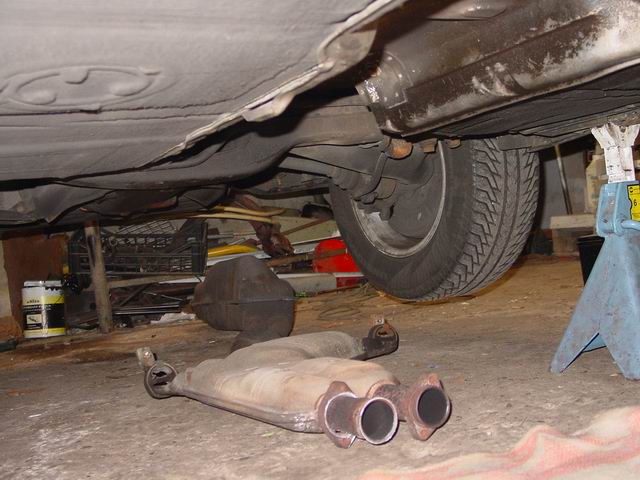
Next remove the catalytic converter from the rest of the exhaust. As you can see my exhaust’s gasket ring was worn last time I had the exhaust off and I smudged it with “Gum Gum” exhaust cement to keep the system from leaking.
Be sure to support the catalytic convertor as it’s only held in place by one bolt on the bracket under the gearbox.
Undo that nut and swing the catalyst out of the way. You don’t have to remove it all the way.
Now it’s time to get a friend (if you have kids they might work as well 😉 ) to help.
Remove the center section exhaust mounts by undoing the nut on one side and the bolt on the other side of the exhaust.
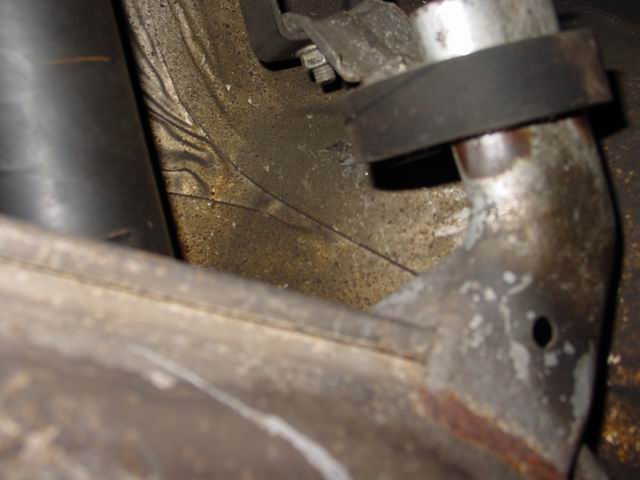
While you are removing the center section of the exhaust have your friend remove the rear part (two nuts) of the exhaust.
Now slowly lower the exhaust to the ground. If you don’t have any friends you can use a jack to support the exhaust. It will balance out nicely in the middle of the two mufflers.
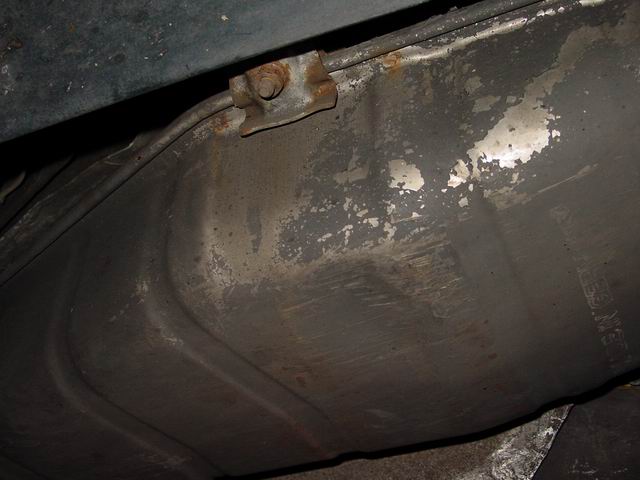
Now remove the heat shield covering the driveshaft. It is held in place by six bolts.
Support the transmission under it’s oil pan with a jack and a block of wood.
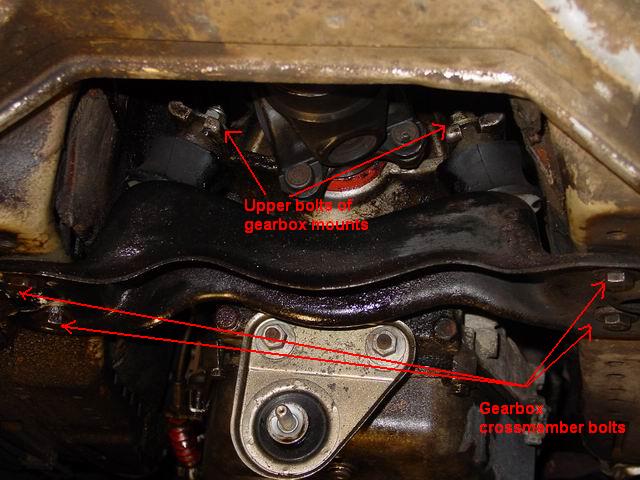
Now you can start to undo the transmission cross member. To do this slacken the transmission mounts by their top bolts.
Then undo the four bolts holding the cross member and slide it out to the back.
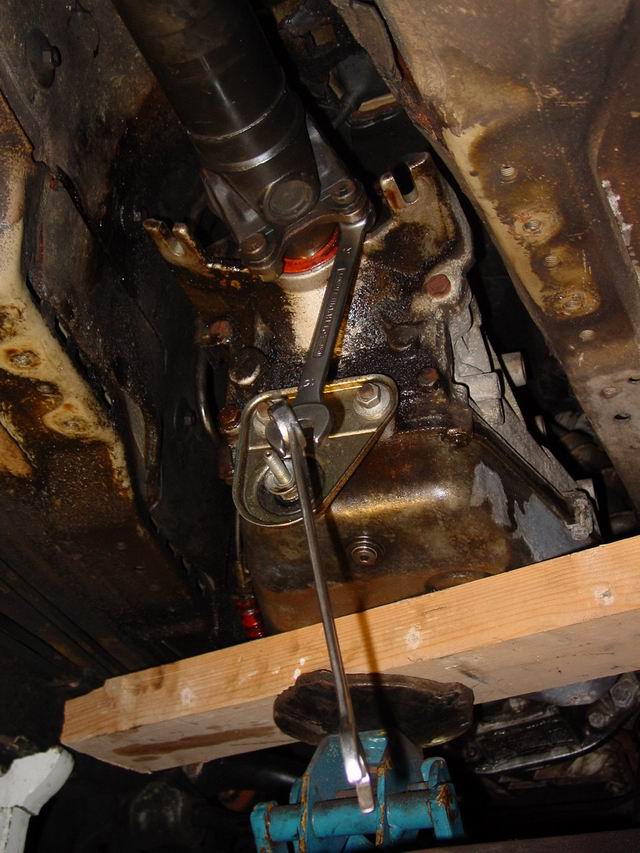
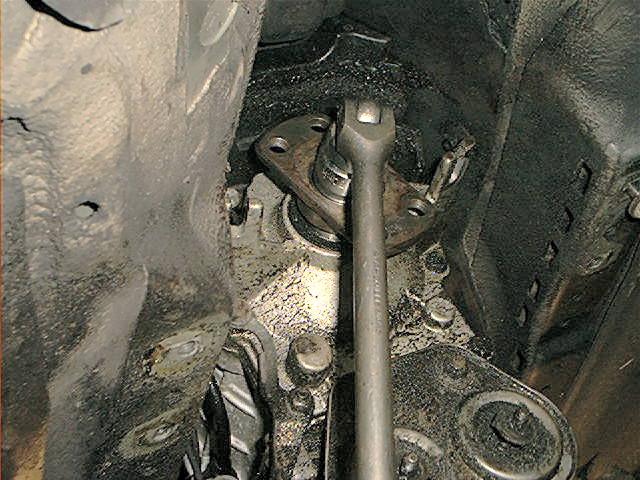
Time to remove and support the driveshaft. I abused my tools to create a bit more leverage to get those driveshaft bolts off.
You can undo two of them at a time. When turning the driveshaft it might help to put the gearbox in N and remove the handbrake.
Next undo the center bearing and flex the driveshaft out of the gearbox flange.
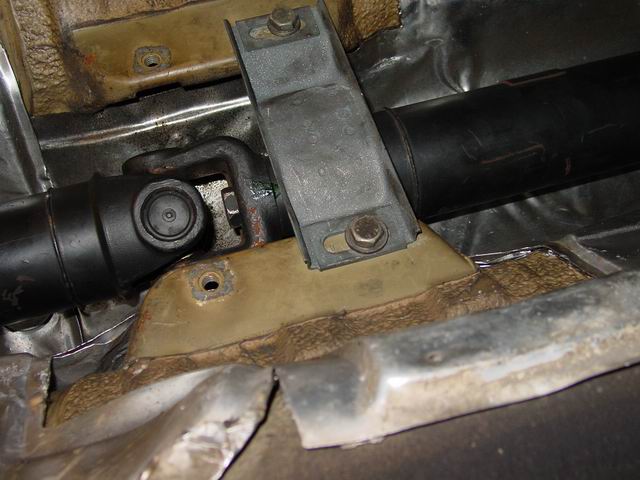
Of course you thought of supporting the driveshaft. Never leave the driveshaft hanging. As this will damage your CV-joint or one of the U-joints.
I used some electrical wiring to support the front of the drive shaft and I remounted the center bearing to carry the rest of the weight.

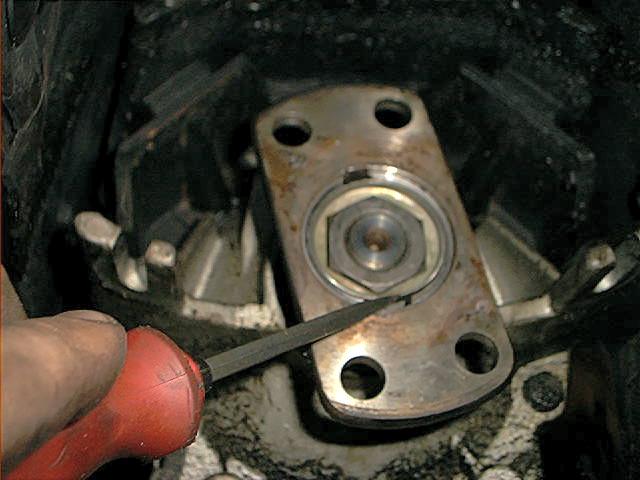
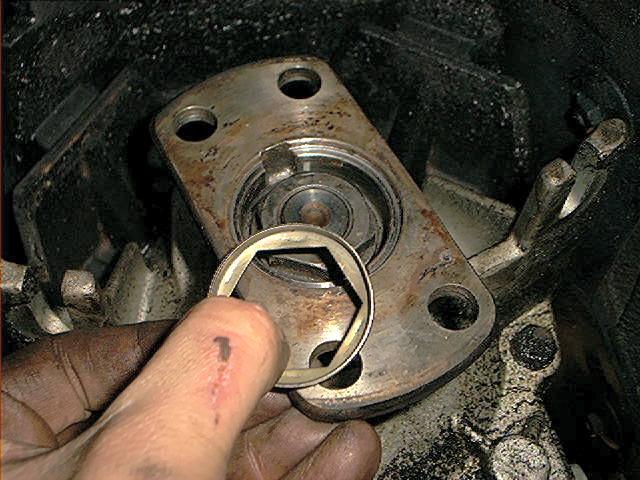
Now pry out the locking plate with a screwdriver. I didn’t have to be careful as I got a new one from the dealer. They are under 1 euro/US$ so why not replace it?
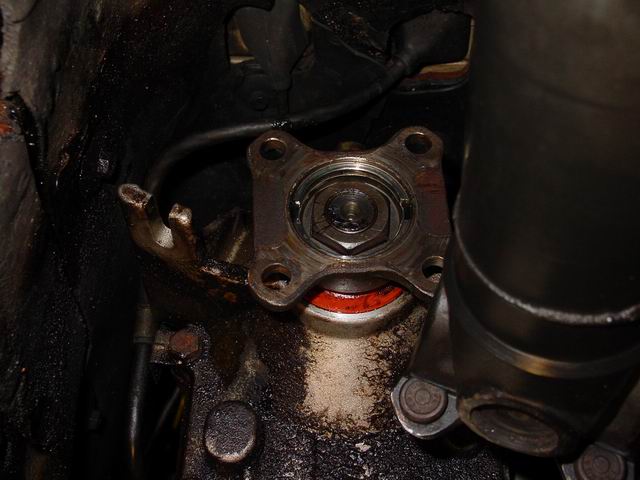
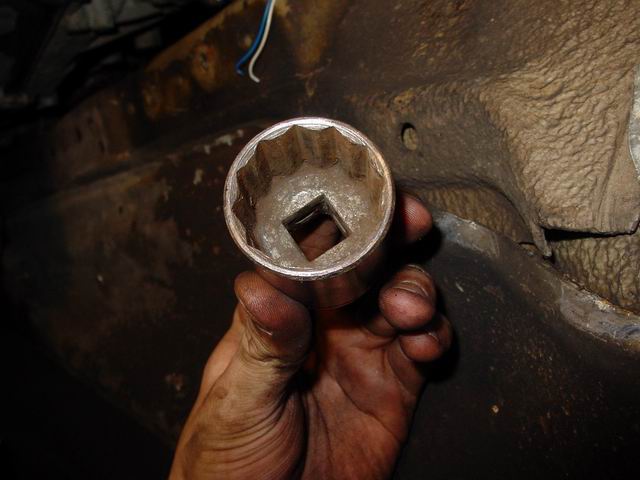
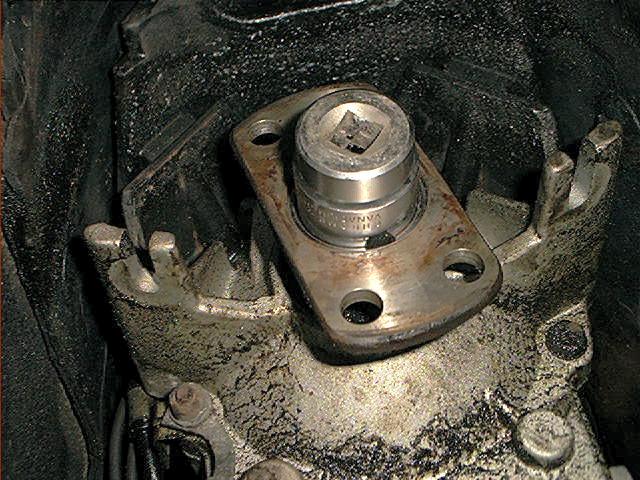
If you are lucky like me (usually I’m not) you have a 32mm socket with a thin wall. Only then it will fit into the flange.
Be careful as there might be some ATF coming out when removing the flange. My ATF level was too low so nothing came out.
The 32mm nut was only hand tight. When replacing it I over torqued the bolt to 140Nm so it might stay in place a little longer. Well at least you know the locking plate works.
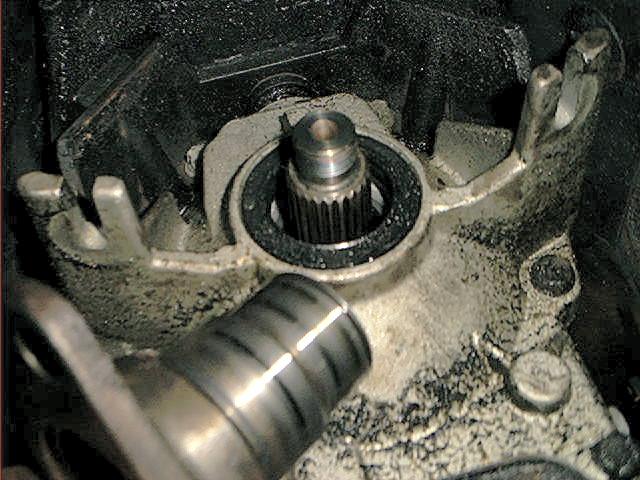
Pry out the seal and replace it with the new one. I carefully hammered it in with a small rubber hammer.
Some recommend using some sort of sealant on the outside of the seal but I found that out after replacing the seal. I did put some fresh ATF on the inside of the seal for lubrication.
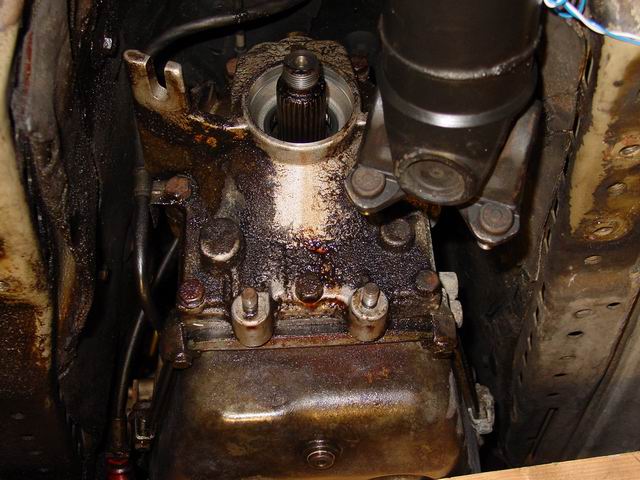
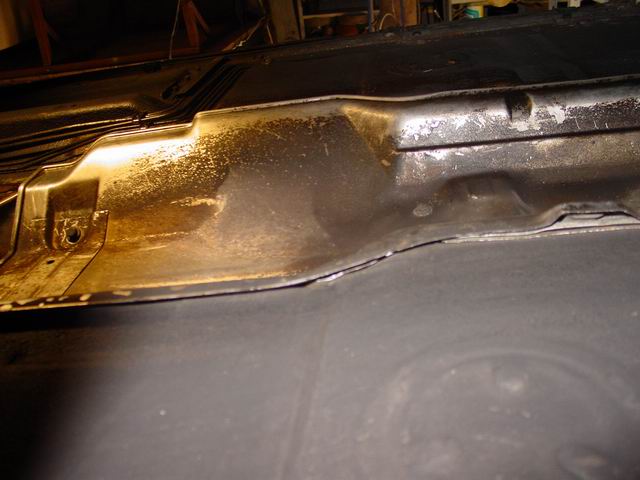
Now does this look like a leaking gearbox ?!? 🙂
Now all you have to do is piece everything back together. Don’t forget the anti-seize on the exhaust nuts and bolts.
The center bearing has to be reinstalled with app. 4 mm preload towards the front of the car. The mounts on the rear exhaust should also be preloaded about 1-1.5 cm to keep the system from rattling.
Parts used and costs:
I decided this was a very good time to replace the exhaust gaskets and nuts as well. So the part list includes the exhaust parts as well but these may not be required for the real cheap skates 🙂
You might consider replacing the transmission mounts if they are still the original ones. They aren’t dear and usually worn out after 11+ years. I already did this some time ago.
Remak 1: There seem to be M30 engines with M10 nuts instead of the M8 nuts on my car.
Remark 2: this is Europe. Some prices or part numbers may differ from country, model or year. Check out your dealer for the right part numbers for your car. Prices are in Euro without BTW/VAT or any other taxes.
| BMW Part Number | Description | Price | QTY |
| 24111218009 | Shaft output 40x58x10 | $7.91 | 1 |
| 23221201330 | Securing plate | $0.73 | 1 |
| 18111175311 | Gasket ring 47mm | $2.97 | 1 |
| 18111723540 | Gasket ring 50mm | $5.41 | 1 |
| 11621711954 | Hex nut M8 | $0.26 | 8 |
| 07119912524 | Hex bolt M8x55 | $0.26 | 4 |
Total amount of costs (incl. BTW/VAT/Taxes/or any other stealing from the government): 24 Euro
Total amount of time:5 hours
Skills needed/difficulty level: It’s not that complicated but you do have to remove the entire exhaust system which is most of the work. It seems to have solved the major leaking problems. Actually it hasn’t leaked in 400km (knock on wood) I wouldn’t be very happy when I have to replace the front seal as this means taking the entire transmission off.
This was added at June 2005 by Sean750: recently, I removed my driveshaft due to all sorts of driveshaft problems (see ‘driveshaft center bearing replacement‘). While you’re at it, it is a good opportunity to replace your rear transmission seal. Especially in my case, because it was leaking slightly. As usual, I ran into all sorts of problems while replacing it. A few pictures that I took are identical to Johan’s excellent story, so not everything is new in this part.
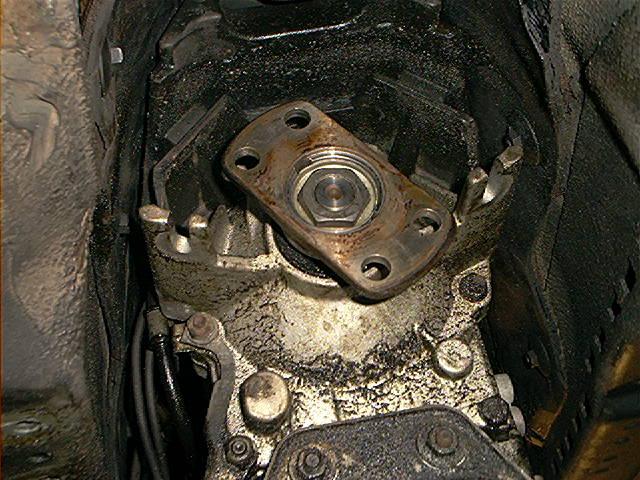
The back of my 4HP24 transmission with removed driveshaft and transmission cross member, notice the typical traces (and accumulated dirt) from a leaking rear seal, although not as bad as Johan’s transmission:
Prying out the locking plate of the 32mm nut holding the rear flange:
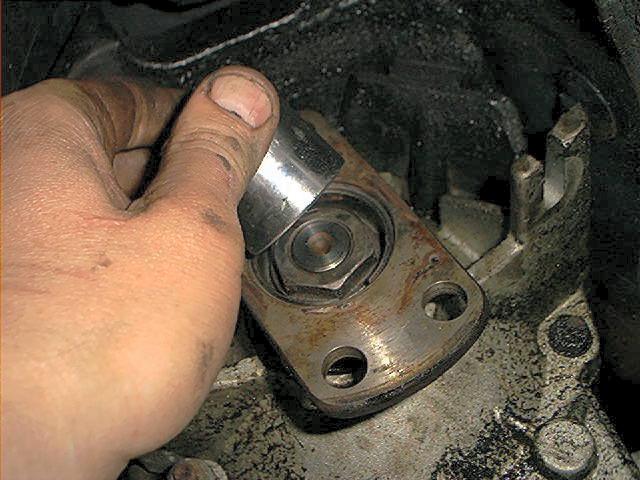
Mostly, a standard 32mm socket (1/2″) will fit into the bore, some reported they ground the socket a bit down to fit exactly:
Put transmission in P and use a large breaker bar to turn it loose (in my case, this took a few grunts):
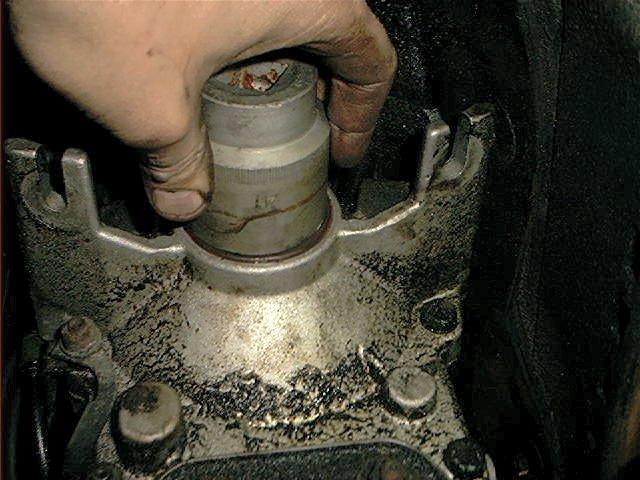
When the 32mm nut is removed, the flange slides easily out by hand:
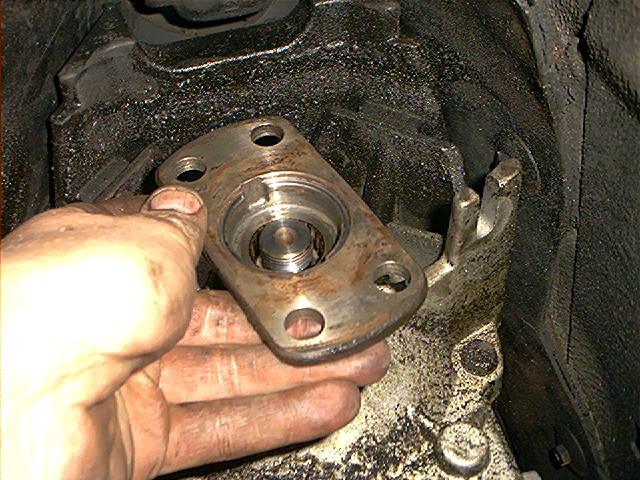
Check carefully the flange shaft surface for a wear groove where the old seal contacted the shaft. Needless to say that in my case a severe groove was present:
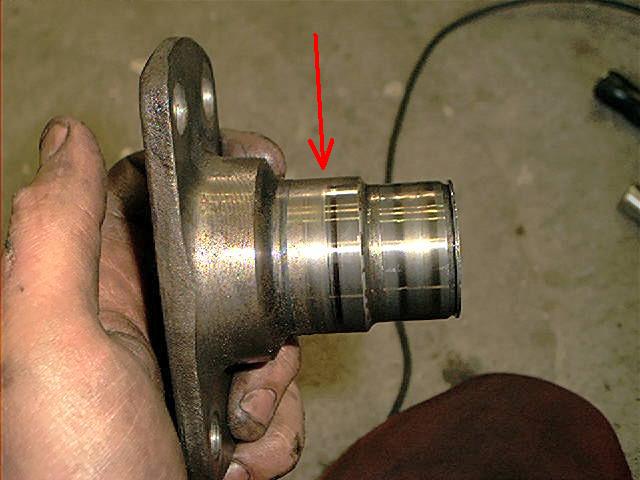
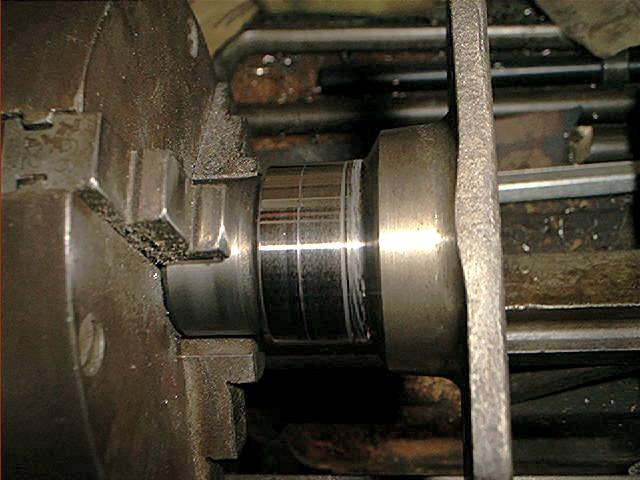
I gently polished the shaft surface on my lathe with some very, very fine sandpaper (nr 1000), but I couldn’t remove the wear groove.
This is a problem, because a new seal won’t last long and can’t seal properly:
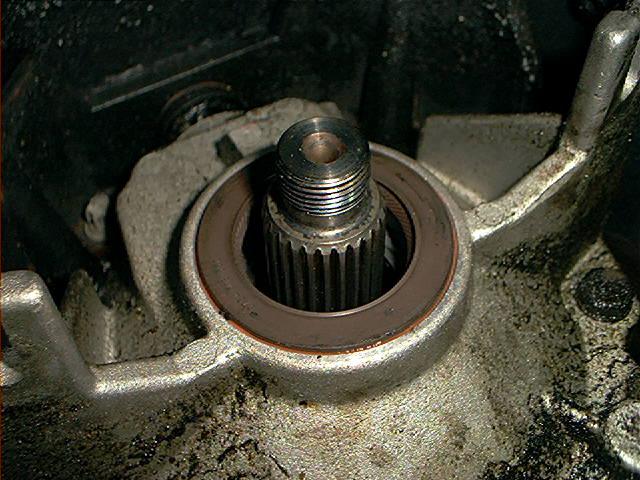
The solution is to install the new seal at a slightly different depth so that the new seal does not ride on the wear groove. Here you see I install the new seal with a large socket:
In this picture you see I installed the new seal not fully into the transmission bore.
To prevent possible leakage, I used sealant (the orange stuff) between the seal and the transmission housing:
While reinstalling the flange, don’t forget to lubricate the flange shaft surface with some ATF. This prevents damage to the new seal.
Comment(s) after a few thousand km/miles: no leaks! But the first day some smoke from underneath after a fast ride scared the hell out of me. Turned out to be the WD-40 on the exhaust…