Article by: Johan
Article applies to: all models with the ZF4HP22 automatic transmission.
Problem: The ZF4HP22 gearbox in my car has shifted a bit rough from 3rd to 4th for a while now. But a fluid change, the first time with a new filter, every now and then had prolonged the life of my gearbox.
But 2000km after replacing the engine it finally decided to die.
The last ride the gearbox assisted me on was to pick up a cylinder head for the car of a friend of mine. If was support to be a “simple” 300km drive to pick it up.
But on the way there it first seemed my driveshaft had lost it’s center bearing which I replaced just last year. It seemed to slam into the drive shaft tunnel at about 40km/h upon acceleration. After that there where just some vibrations.
So after a few loud curses from me we drove on.
On the way back about 100km before we got home a slow car in front of me finally decided to go back to the slow lane. So I hit the accelerator and instead of downshifting it just left gear and started revving….Oh oh….this seems like a bad thing!
So I carefully went back to the right lane. I hit the S-mode switch so see it would downshift as usual. But it didn’t. It just made the engine rev towards the rev limiter. Apparently I was stuck in 4th gear.
So I drove home at the usual speed accelerating slowly so it would stay in gear. But when we got off the highway turning onto a local road we had a staggering top speed of about 30km/h.
With that unimaginable speed I just managed to get around a roundabout at the end of the street stranding in a residential area. At this point the box had no forward and no reverse.
This means we had to push the car. And anybody who has ever pushed an e32 knows this is not an easy task. Luckily a friendly chap offered to tow us the last 5km to my friends house.
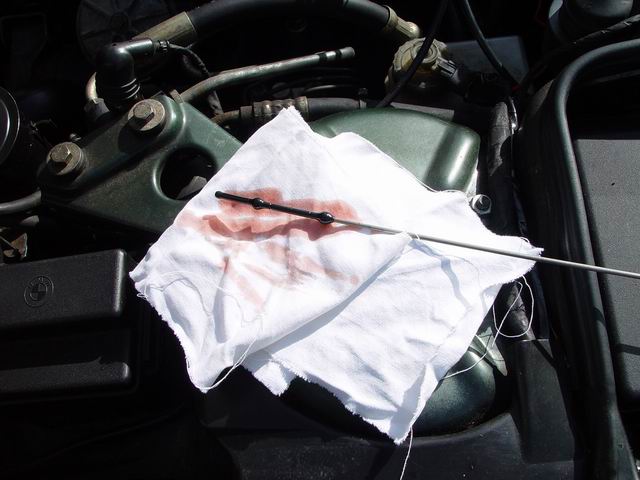
Let’s have a closer look: The next day I first checked the oil of the gearbox. To my surprise it was still red. But then again it was only 2000km old as all the oil came out of the gear box during the engine swap.
First I got the exhaust system and the driveshaft off. Just my luck the front U-joint of the driveshaft had seized just like Sean’s did. So now I needed a gearbox and a driveshaft.
I then decided if I was going to fix things under the car I might as well get that catalytic convertor from the 730i that has been in the scrapyard for over a year to replace the empty box under my car.
As I’ve already described how to get the exhaust and driveshaft off in the “gearbox real seal” repair I won’t bore you with the details again. Well…that and I didn’t take any new pictures.
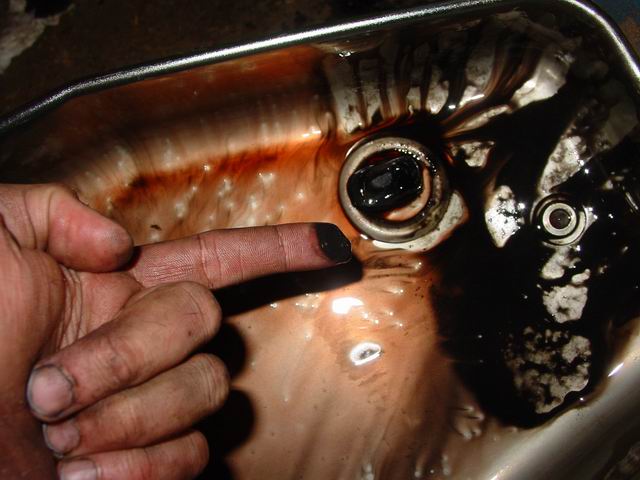
Now first drain the oil from the old gearbox:
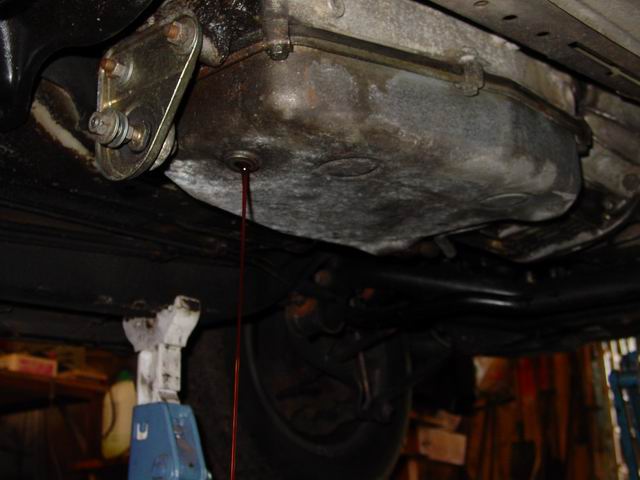
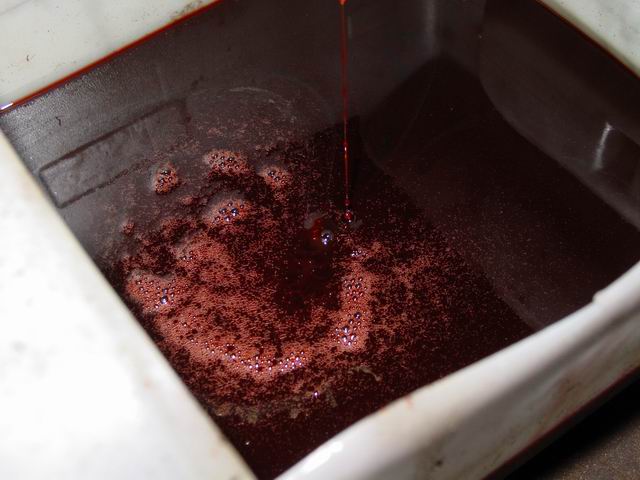
The rest of the oil also didn’t look or smell burnt.
Toni Kosec pointed out the following:
The oil on this picture seems to have gone bad to me. When I was buying an e30 325iA i was told that the thing to look for was ‘soapy bubbles’ in ATF oil, which meant big trouble 🙁
So there definitely seems that something got very wrong with the ATF oil in the transmission.
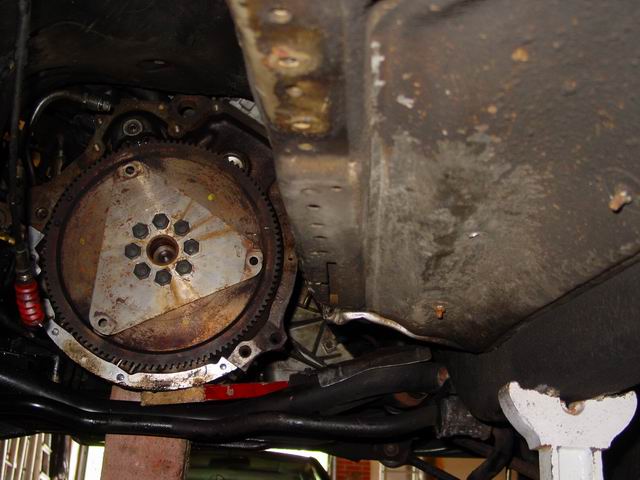
At this point use a floor jack and a piece of wood to support the weight of the engine at the back. And another floor jack with another piece of wood to support the transmission.
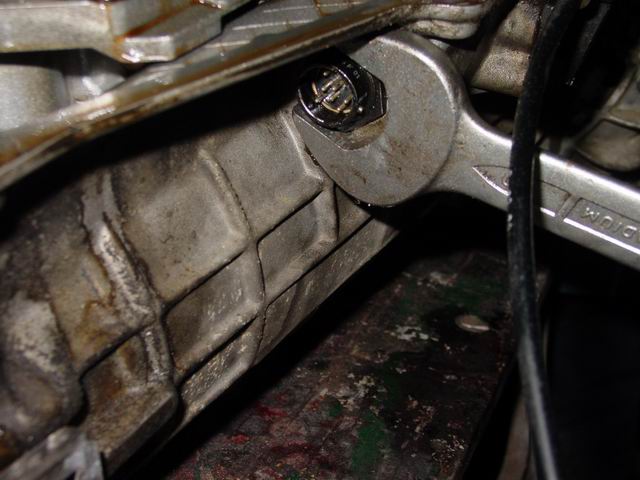
Then it’s time to remove the 11 bolts holding the gearbox to the engine. The 11 bolts are:
- 4x torx e12
- 2x 17mm bolts
- 5x 13mm bolts
The upper three 13mm bolts can be undone from the top of the engine when the coolant expansion reservoir is removed:
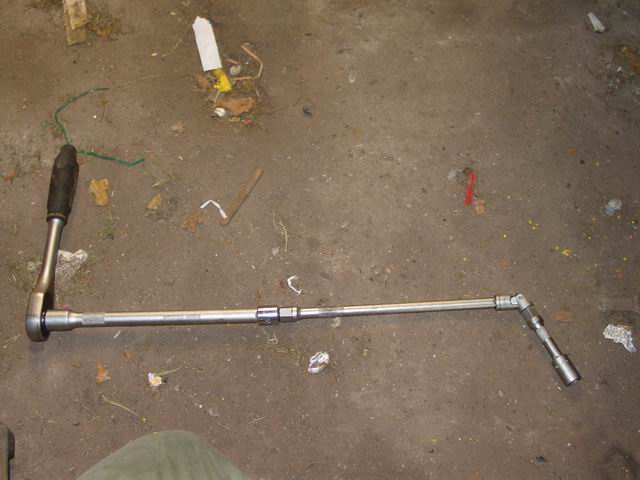
The rest have to be undone from under the car. For this you will need to get creative with extensions and swivel joints:
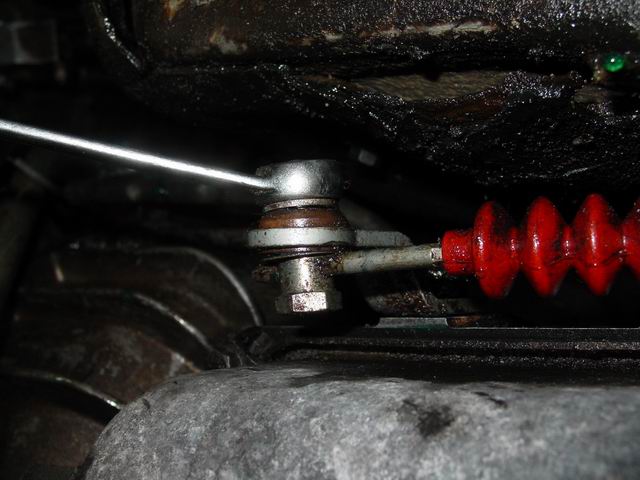
Undo the selector cable with two 13mm box wrenches:
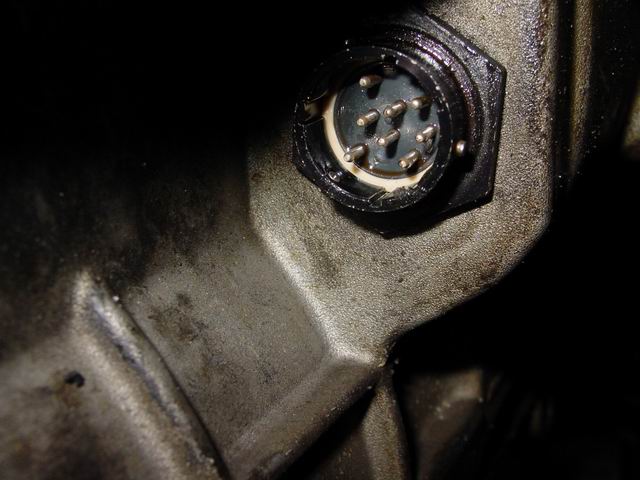
. . . and the electrical connector:
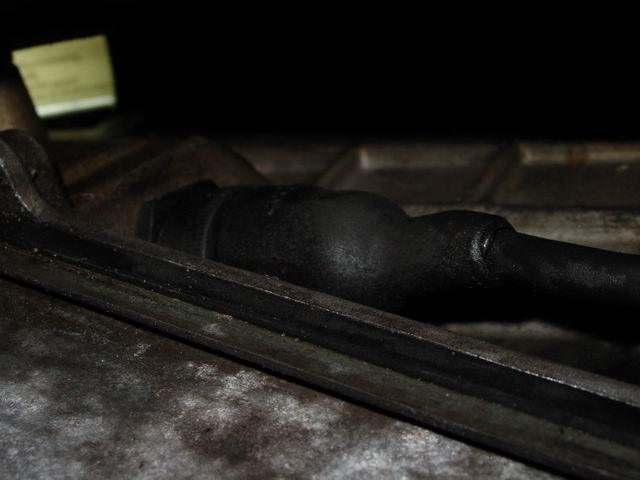
Also don’t forget the screw holding the filler neck to a bracket on the engine. If you are lucky you can remove the filter neck from the transmission.
But mine was really really tight so I left it on.
Now you are all ready to remove the transmission cross member and then the transmission.
It’s best to do this with two people so one can balance the tranny while the other lowers the jack.

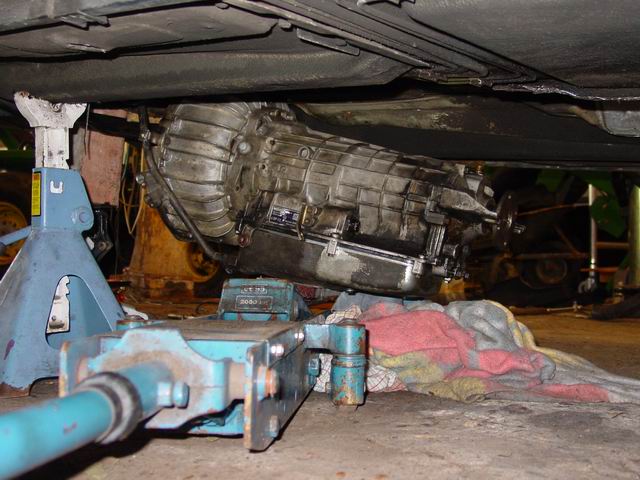
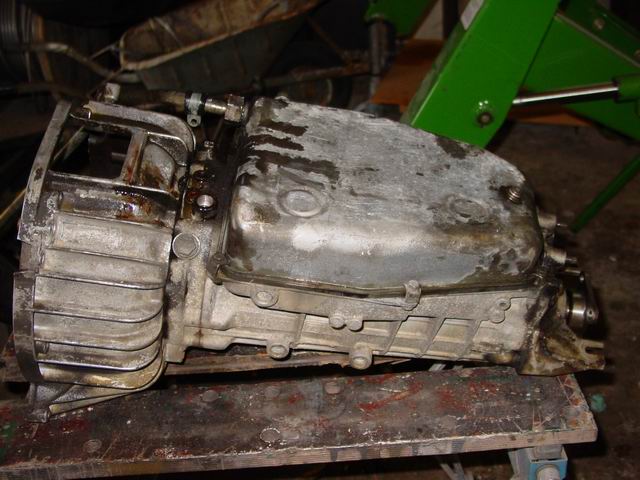
When the tranny was separated from the engine I first removed the torque converter. This greatly decreased the weight of the transmission.
I then rolled the transmission off the jack and pulled it from under the car on a blanket. I had to pull it out on it’s side as the filler neck was in the way.
Well the rear crankshaft seal I installed 2000km ago isn’t leaking. If yours hasn’t been replaced recently you might want to replace it now when you can get to it.
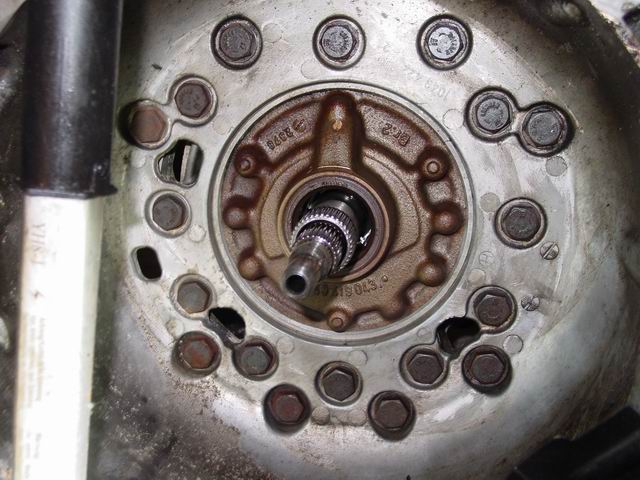
Count the pins:
Luckily I didn’t wait to play the game “count the pins” after I got the tranny off. So no surprises for me here.
Transmissions made before 09/88 have an electrical control unit inside the box that is controlled via 8-pins.
Transmissions after that have a control unit with 7-pins. And to complicate things even more for me transmissions before 02/88 had a different oil pan and filter screen.
I was told by a member of the German 7 series forum you can adapt the gearbox to fit by transplanting the electronics from one box to another.
So that’s exactly what I did.
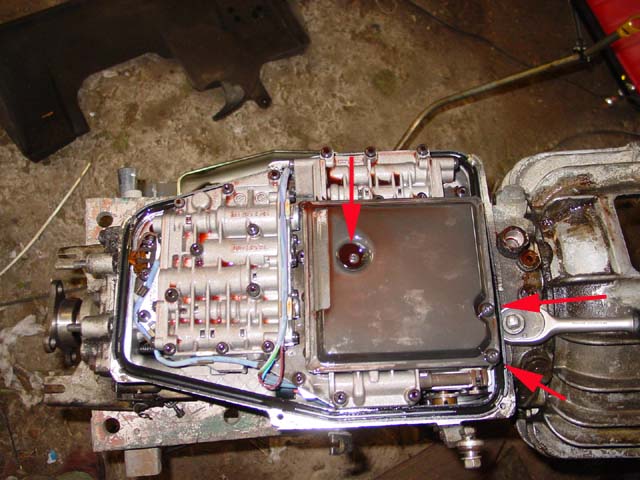
First, take off the oil pan. It’s held to the transmission with six bolts:
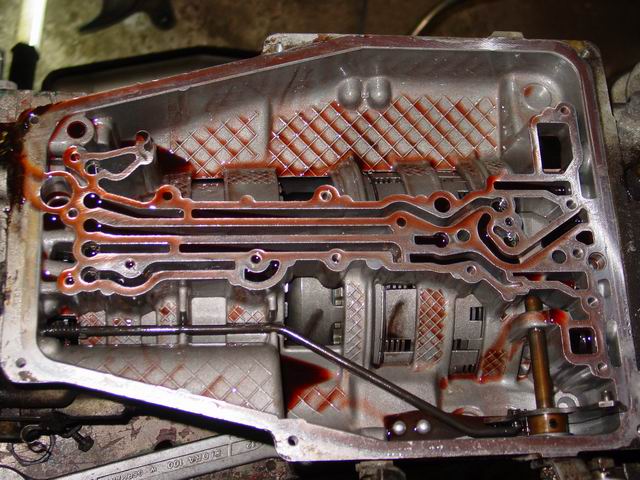
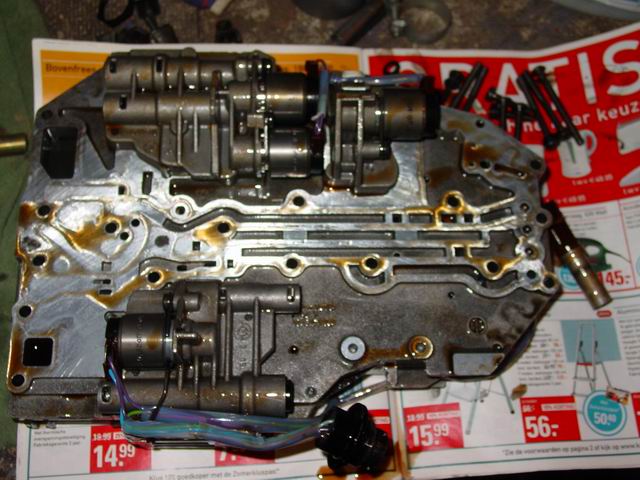
This exposes the filter screen and the valve body:

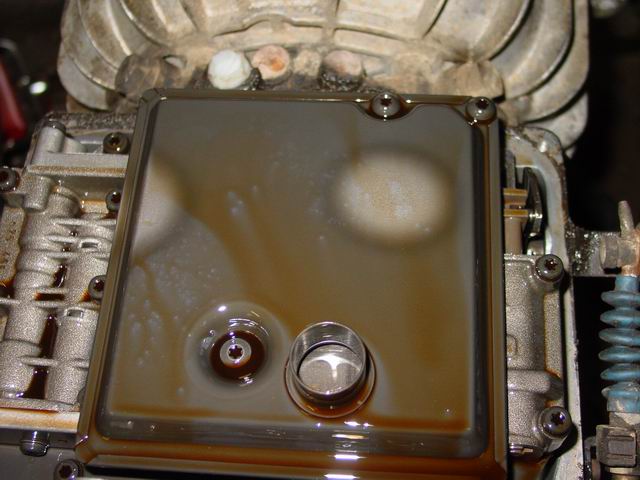
And then there is the oil pan with the pieces of burnt clutch:
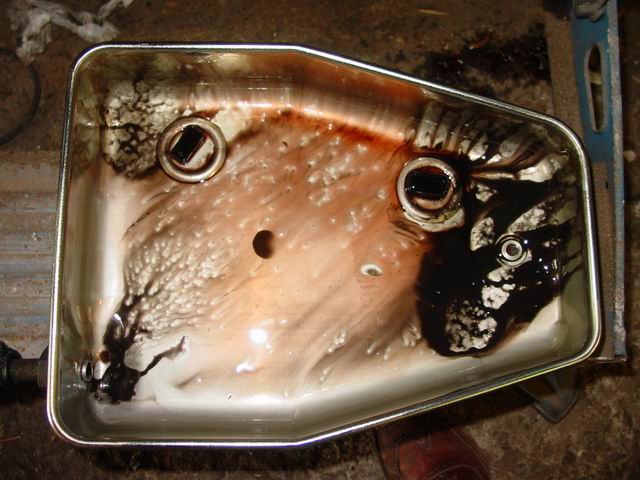
Very thick yucky stinky goo:
To remove the filter undo the three torx bolts as indicated:
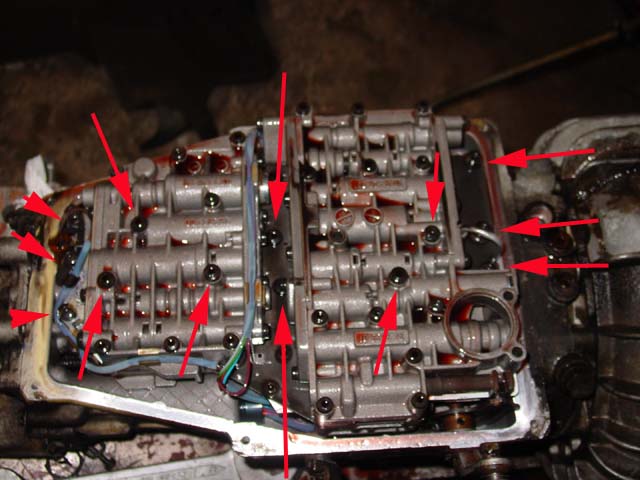
After taking off the filter you can remove the valve body by removing the torx bolts indicated:
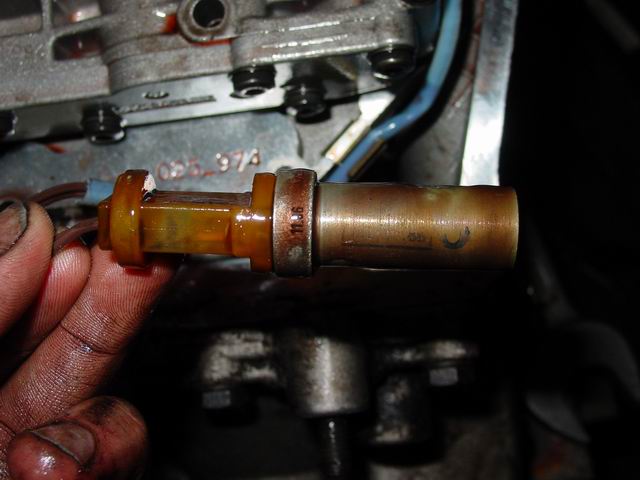
I couldn’t resist a close up of the speed sensor which often causes the dreaded “trans program” error:
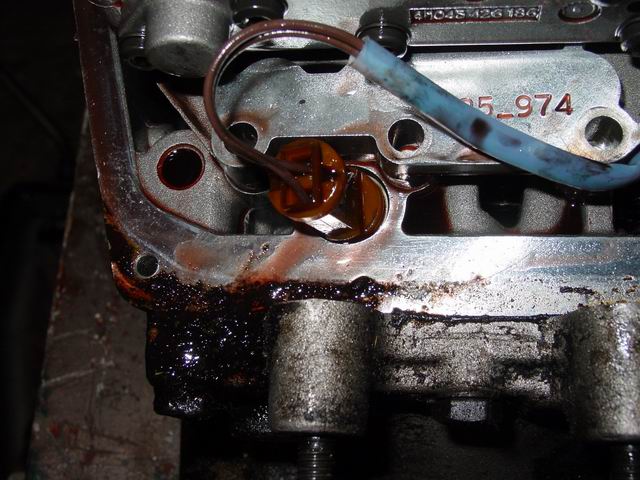
The sensor removed from the gearbox.
The last thing to undo before the valve body can come out is the connector:
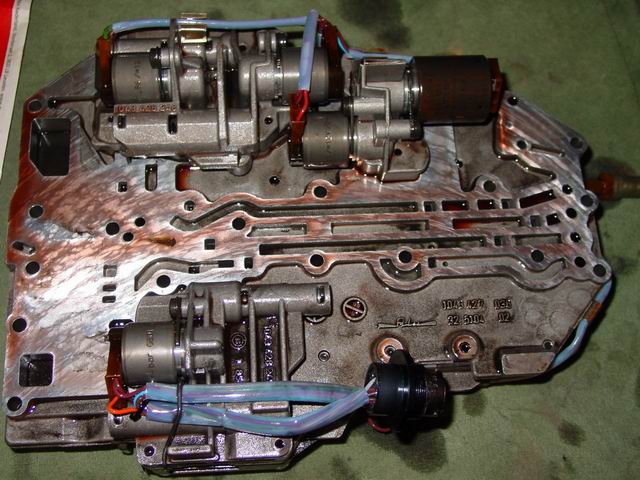
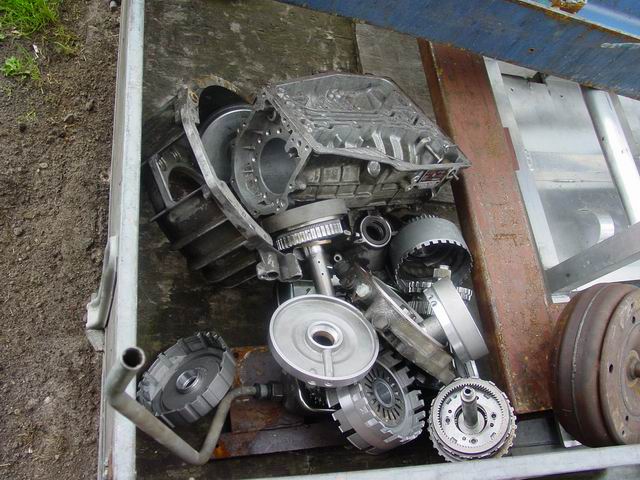
After removing the valve body you will be left with the bare mechanics:
Time to compare valve bodies. You can seen the oil channels are 99% the same but the old 8-pins body seems to have an extra solenoid.
As far as I figured it out this extra solenoid is for blocking the reverse gear.
The 7-pins body without the extra solenoid:
The new filter screen has a cylindrical suction pipe where the old filter (shown a couple of pictures back) just has an opening at the front. This probably has something to do with the deeper oil pan.
Now I have this dream of not having to get under my car in the near future. Yeah..FAT CHANCE! But just in case I decided to replace all the seals.
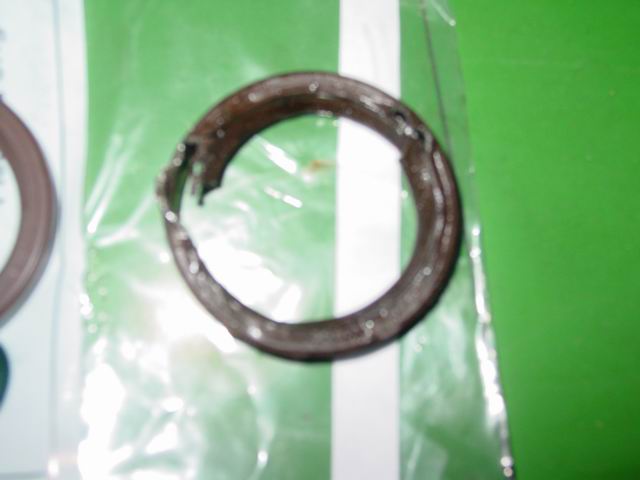
Starting with the front seal:
As I didn’t have a proper seal puller I butchered the seal with a screwdriver. Not something I recommend. But it was all I had at the time and it did work for me.
I used a piece of pipe to tap the new seal into place. Be sure the pipe connects with the sides of the seals where they are reinforced. Otherwise you might break the seal.
Now it’s time for the rear seal. There is already an extensive write-up on the site so I’ll skip that here.
Now all that’s left to do is reinstall the transmission and the other “stuff”.
Total amount of parts and cost:
| BMW Part Number | Description | Price | QTY |
| 24311442671 | Input shaft seal 40x52x7 | 5.50 euro / US dollar | 1 |
| 24111218009 | Output shaft seal 40x58x10 | 7.50 euro / US dollar | 1 |
| 23221201330 | Securing plate | .68 euro / US dollar | 1 |
| 24111217082 | Profile gasket - oil pan | 8.2 euro / US dollar | 1 |
| 24311218571 | Oil strainer (deep oil pan after 2/88) | 17.60 euro / US dollar | 1 |
| 23411218570 | O-ring oil strainer | .75 euro / US dollar | 1 |
As always the prices are just for the parts without taxes or any other stealings from the government.
You will also need about 7 to 7.5 l of Dexron II/III ATF fluid. I got my oil from BMW who recommended Castrol Transmax Z.
This oil is approved by ZF but it does make things more expensive then filling with plain Dexron II/III.
Total amount of time:
It took me about 17 hours to get everything off, swap the electronic units and get everything back on again.
Satisfactory level after the job done: Great! It’s a car again opposed to a 1700kg paper weight. It also uses about 10% less fuel. Maybe due to the catalyst, maybe due to the gearbox or maybe the claims that newer ATF safes fuel are true….who knows. Anyway now I can tell myself this fix will pay for itself 🙂
Skills needed/difficulty level: Experienced DIY
Cause of failure: I just had to know why my gearbox failed . . . so it had to come apart 🙂
Most parts seemed to be fine and where in no way showing the mileage the gearbox has done.
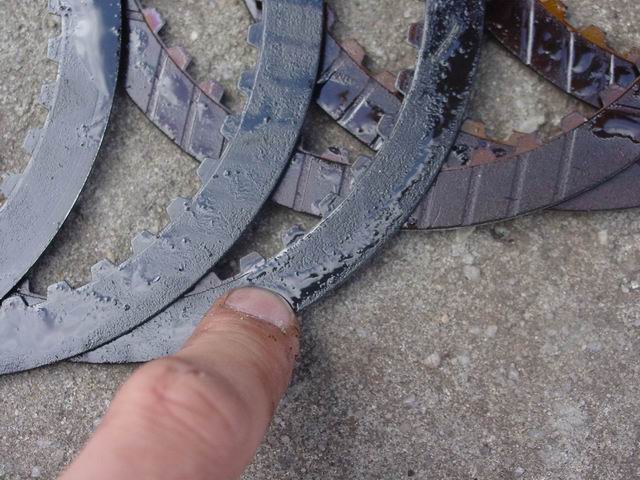
The metal plates that came out of one of the last clutch packs definitely had a part in the gearbox breaking down. The plates had burn marks and a lot of clutch plate residue on them.

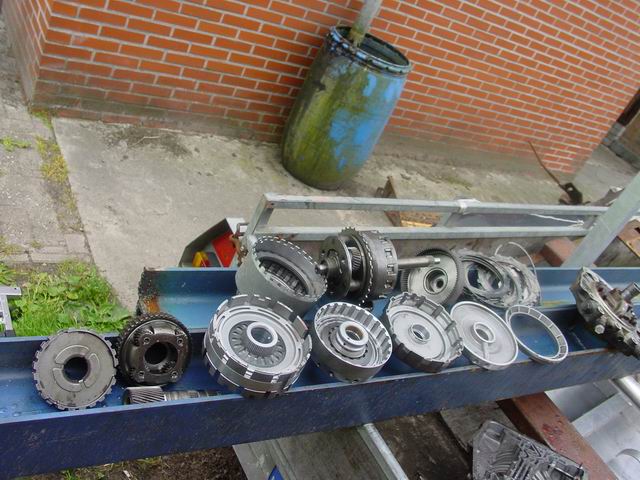
Now let’s have a look at all the clutch plates that are inside the transmission. The clutch discs from the first pack are on top and then the right most clutch was in the front and the left most clutch is in the back of the gearbox. Obviously the clutches are grouped into baskets and are not in the gearbox in one big sequence.
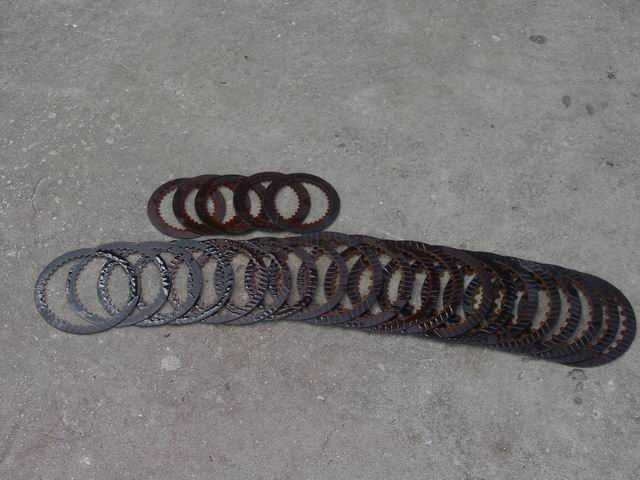
The ones out of the first couple of clutch packs seemed to be in very good condition with a lot of profile.
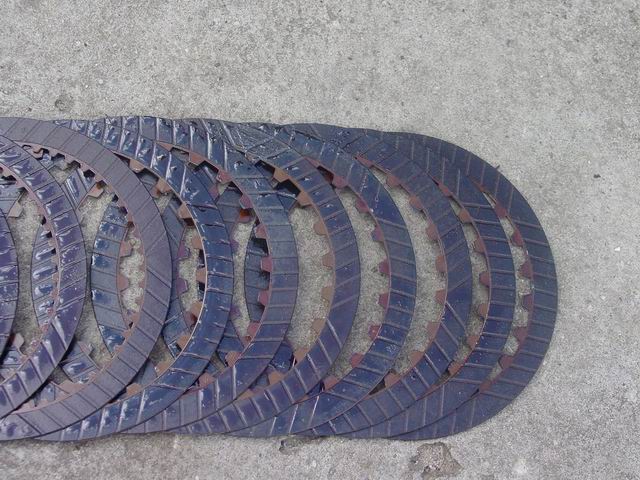
The ones from one of the last clutch packs (drive clutch E or brake clutch F) where definitely burnt and flat.
Now the part that bugs me the most is that the metal discs and the clutches are available separately for the last clutch packs. 6 euro for a clutch disc and 10 for the metal plate. That means that the gearbox might have been revived for 64 euro (4 of each) in parts! Next time I have a problem with an automatic gearbox I’ll first open it up to see if it’s repairable before replacing it. These things are definitely not as complicated as I thought they were.