Article by: Johan
Article applies to: all e32 and e34 models.
Problem:
The heater is on full ALL of the time. It can also happen that you have no heat at all.
If you have no heat and unplugging the plug on top of the heater valve gives you a full blast of hot air in the cabin your problem is probably with the control unit and not the valves.

Models:
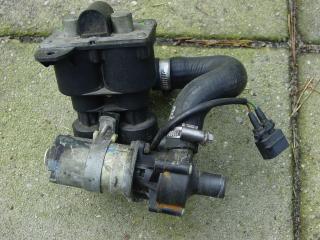
This fix applies to all E32s. The heater valve in this picture is the earlier type (also known as the repairable one).
You may also find that on the V8 and V12 engines you have to unbolt some more parts to get the heater valve assembly out.
Background:
The coolant flow to the heater matrix is controlled by the water valves or heater valves. The unit contains two valves: one for the driver side and one for the passenger side.
The valves are controlled via the plug on top of the unit. If +12v is applied the valve should close. So if it doesn’t get 12v it’s open and will allow the full coolant flow to pass.
So if you unplug the control connector you will get a full flow of coolant.
The unit will fail after time because the rubber seals perish, the plungers are malformed,..etc. Mine was malfunctioning because the seal to the valve was broken allowing coolant to enter the coils of the valve.
This corroded the valve so it got stuck in the open position.
There are two types of heater valves. I have the 1st type. This type is also known as the repairable valve as you can purchase a single valve from the dealer.
The replacement of the valves will also apply to the newer type of valve. Some things like the control connector do have a different location on the newer type.
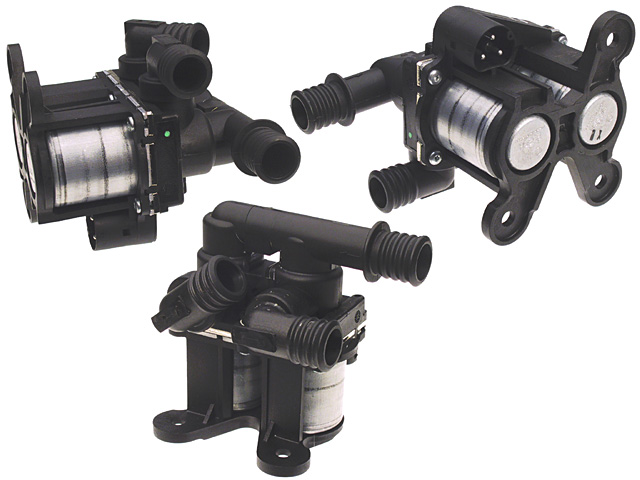
Above: Newer type water valve.
Replacing the heater valves:
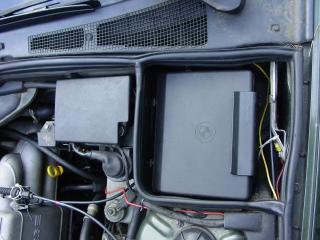
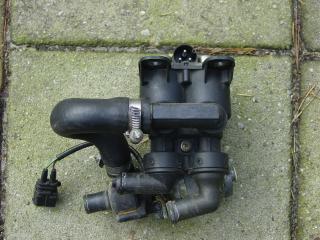
The heater valves are located next to the fuse box under the hood. They are covered by a plastic cap that pulls off upwards.
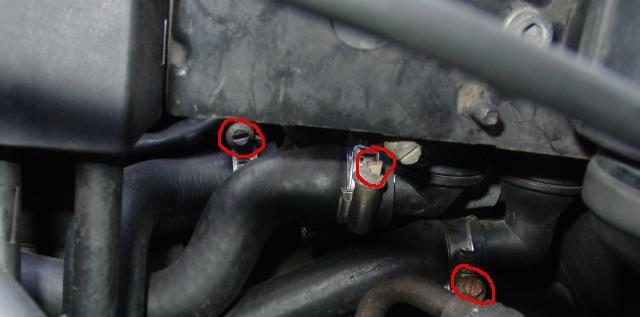
First remove the three hoses that go to the water valve by undoing the hose clamps marked in the image below.
You can leave the 4th, going from the heater valves to the aux water pump on when taking it out.
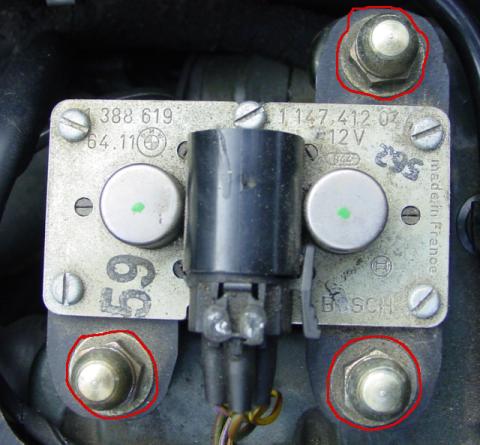
When you have the hoses off remove the 3 nuts on top of the housing.
Now undo the electrical connector on top of the the heater valves – and the connector to the aux water pump which is located to the left of the heater valves.
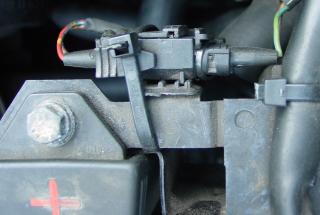
Above: Electrical connector to the aux water pump.
Pull up the assembly clearing the mounting screws and push it out to the left.Now undo the hose going to the aux water pump and undo the phillip’s head screw holding the water pump.
And as always refitting is the reversal of removal : )
Be sure to have some coolant ready when refitting the valves. And of course after topping off the coolant level bleed the air that may have entered the system.