Article by: Bill Rickard
Article applies to: all e24, e32, and e34 models.
If you’re having problems with a seat switch that won’t work in one or more directions then this page may be of some help.
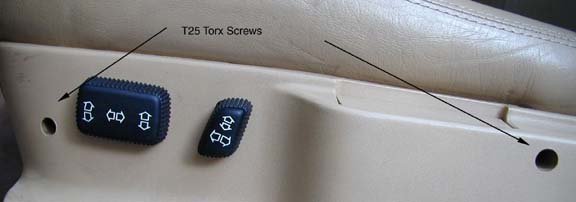
First thing to remove the switch.
Carefully pull the control buttons straight back to remove them, sometimes you can use a flat putty knife or dinner knife to pry them off.
Then you’ll find a Phillips screw that you then remove.
Next you’ll need a Torx T25 driver or socket to remove the 2 screws pictured.
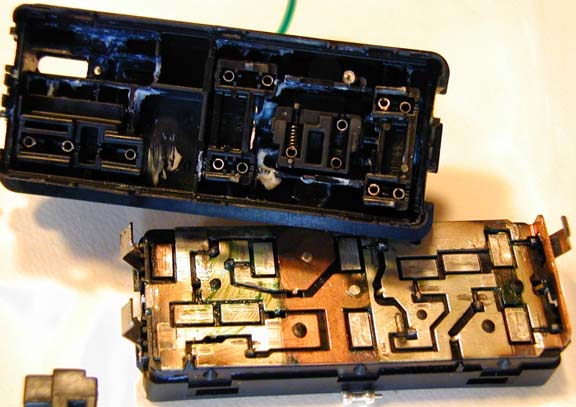
After that you can remove the plastic panel and remove the switch from its socket.
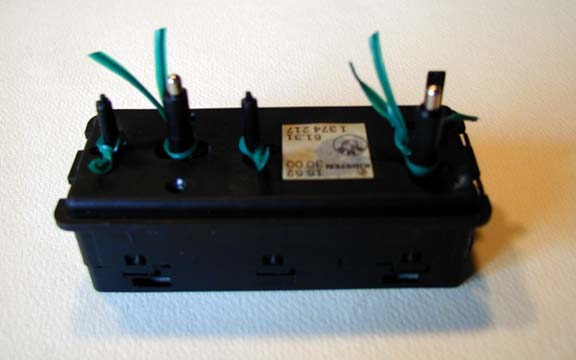
Carefully disconnect the wiring harness from the switch.
Now that you have the switch out take some bread wrapper ties or wire and wrap around the switch knobs as pictured.
Twist it tight and push them down to the base of the switch so they will hold these in when you take the switch apart.
This will keep some of the springs from falling out.
Next to open it up.
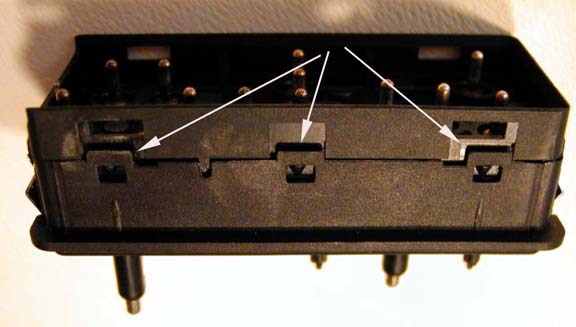
With the switch levers pointing down you carefully pry open at the arrows.
You may want to put the whole thing in a large plastic bag to do this and set it on a table facing down.
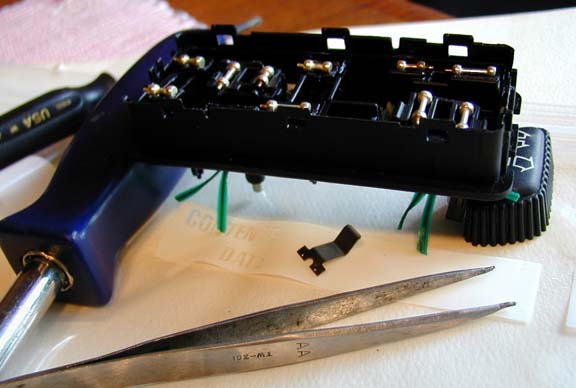
Once you get it apart you’ll see the contacts which look like little silver barbells and small springs underneath them.
The contacts will have some arced or pitted spots on them.
If you roll them around slightly so that a new surface is exposed that will be all you need to do to them.
Both sides of the inner switch revealed:
The arrows indicate pitted spots on the track caused by arcing.
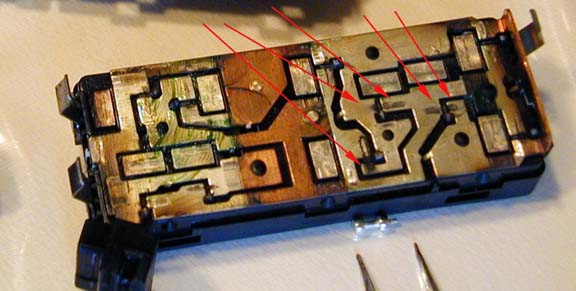
Take some sandpaper or emery cloth and lightly sand the areas that arcing has taken place as indicated by the arrows.
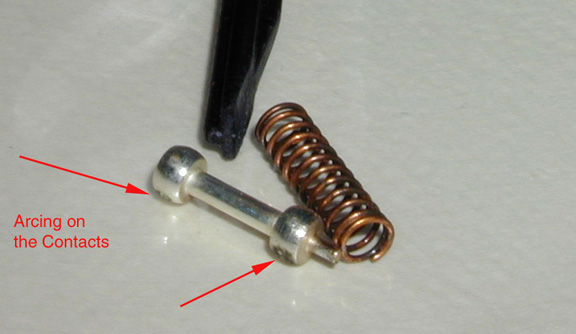
You can see here the spots on the bottom of the contacts where they have been arcing, just roll them around a quarter turn and then reassemble the whole thing.
Reinstall the switch and try it.
Once in a while you’ll have to pull it back out and clean off a little more corrosion in spots.
Also after you sand the flat plate, smear some of the dielectric non-conducting grease that you didn’t disturb back over the areas you sanded (or clean all of the surface and use new grease).
The same thing can be done to the window switches, sunroof switch and transmission mode switch.
They have all have the same spring and contacts design. I checked list price on the seat switch at the local dealer and it was $80.00!
Not bad for a half hour home repair!