Article by: Sean
Edited by: Mike Oswald
Article applies to: all e32 and e34 models.
Problem: A difference in braking using the parking brake or parking brake doesn’t function very well.
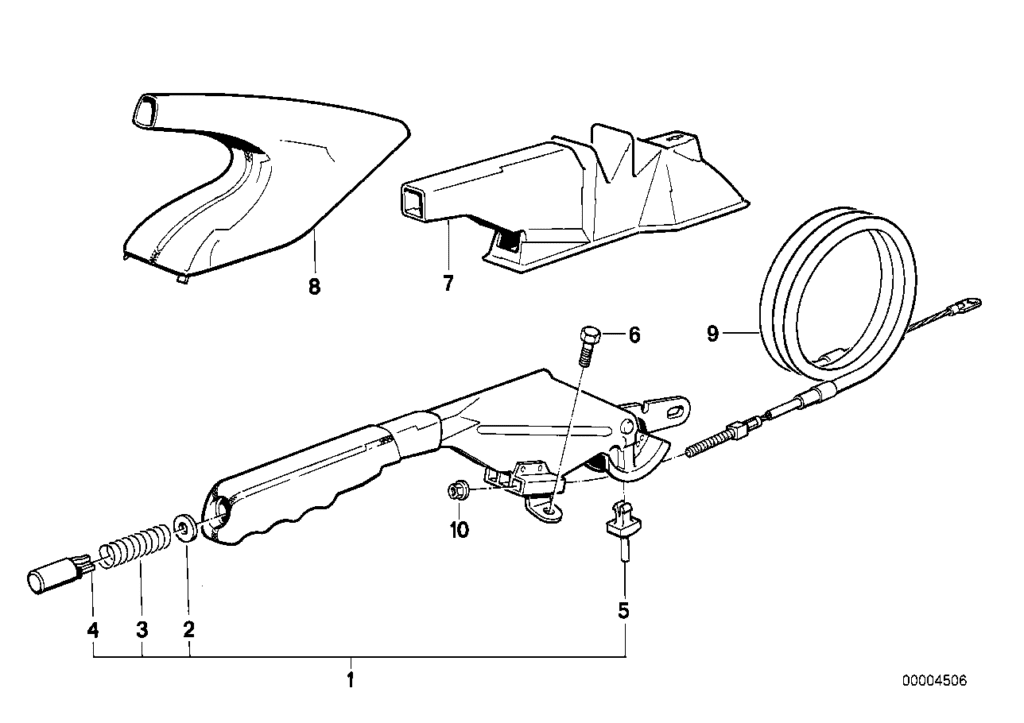
Background : The parking brake has brake shoes integrated into the rear wheel brake rotors. They are operated by 2 parking brake cables mounted at the parking brake lever, and the cables are adjustable in the interior with locking nuts.
To properly adjust the parking brake, you must also adjust the brake shoes with the brake shoe adjusters in the drums, ensuring that the shoes are pushing sufficiently against the inner surfaces of the drum.
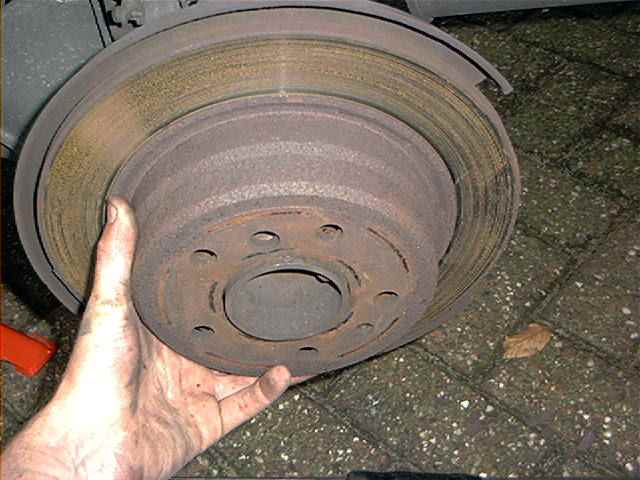
This can be done without unbolting the brake caliper and disc rotor, if the shoe adjuster isn’t seized up. To clear things up and make it more visible, I unbolted at 1 side the caliper and rotor to show the construction.
But again, if the shoe adjuster isn’t seized up, you don’t have to remove those items. A small electrical flashlight may come handy, for instance a Maglight or something similar.
Let’s start wrenching : At first, you need to jack up your car from the rear, so both wheels turn freely. I use the rear cross member for that, but I’ve seen people using the final drive. I don’t recommend that:
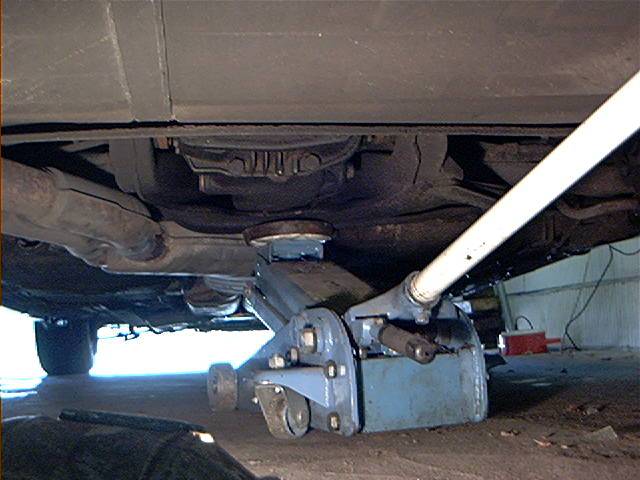
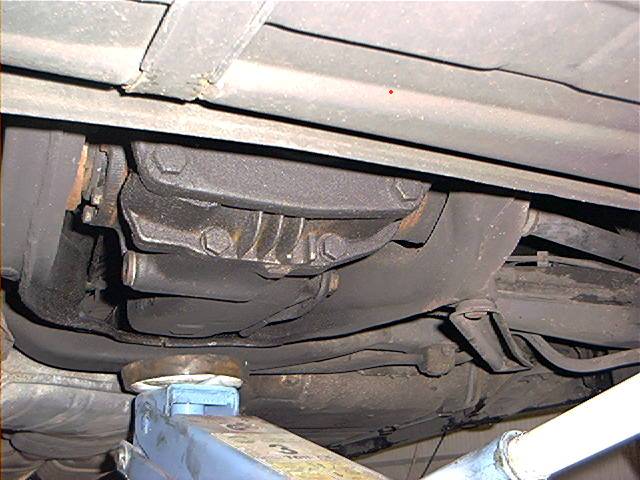
A cleaner shot of the rear cross member:
It’s also a good idea to secure the front wheels with some wood (or the BMW chock) and make sure to set the car on jack stands. You’re probably not going to care much about your emergency brakes if your car is sitting on your chest.
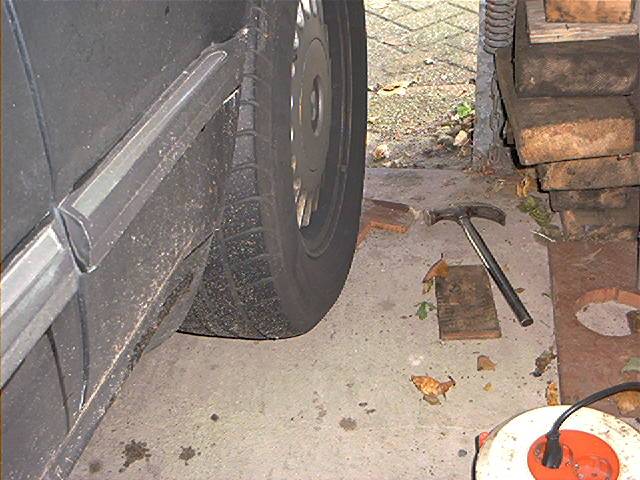
Did I recommend that you use jack stands yet? Don’t rely on the jack only. Remove both rear wheels (obviously you loosened the wheel lug bolts 1 turn before you raised the car).
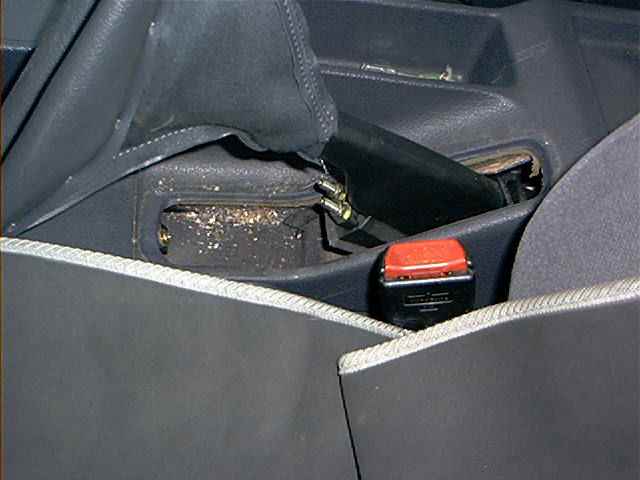
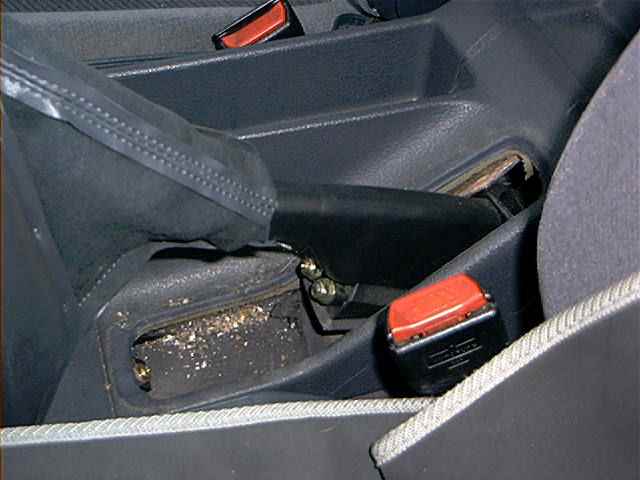
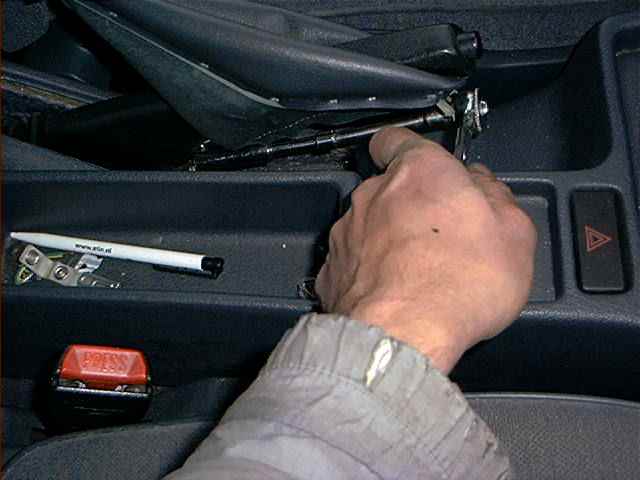
Remove the parking brake upholstery in the interior, showing 2 adjustable brake cable nuts (together with some dirt I didn’t photoshop’d away):
Loosen the nuts entirely, but don’t remove them (I’d used a long socket, but you can also use a 10 mm wrench):
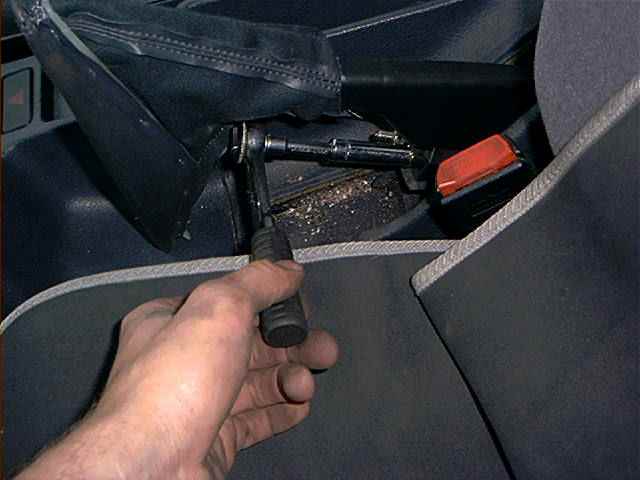
Both nuts loosened:
As said earlier, the procedure can be performed without remove the brake caliper and rotor. But the shoe adjuster can be seized up, and in that case you need to remove them.
The photo’s below are showing this procedure. If your shoe adjusters can turn freely and you don’t want read about removing the brake caliper and rotor and move further with the adjustment procedure, click here.
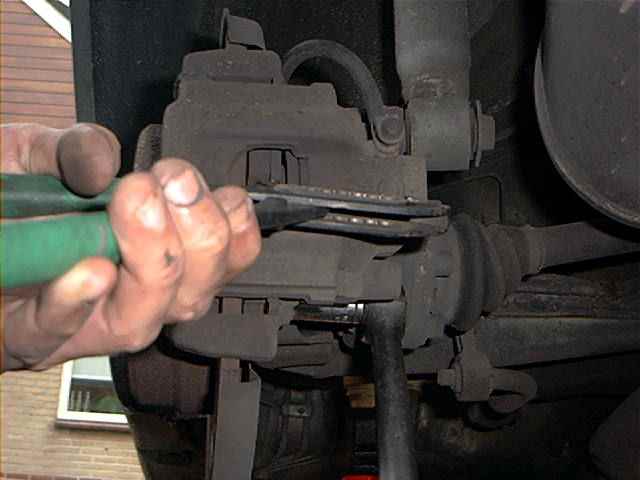
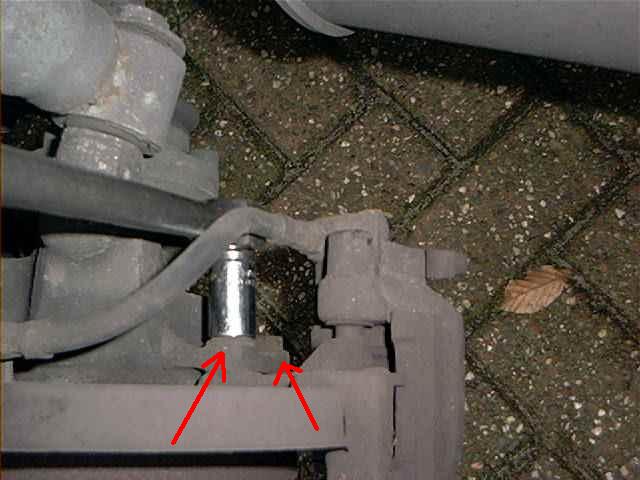
Push the brake caliper piston a bit (few millimeters) back with water pump pliers to make removal of the brake caliper easy. . . Hey wait you didn’t forget to remove the cap of the brake fluid reservoir did you?
Remove the bolts of the brake caliper bracket (the bracket and NOT the bolts of the brake caliper itself!), these are 2 15mm bolts:
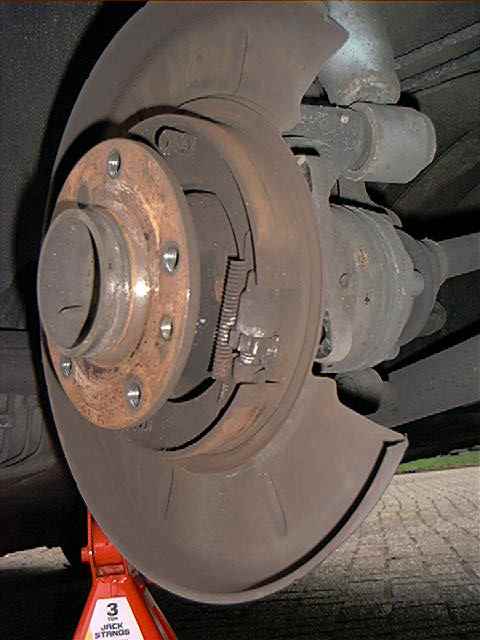
Remove the brake caliper bracket together with the brake caliper and don’t disconnect the hose:
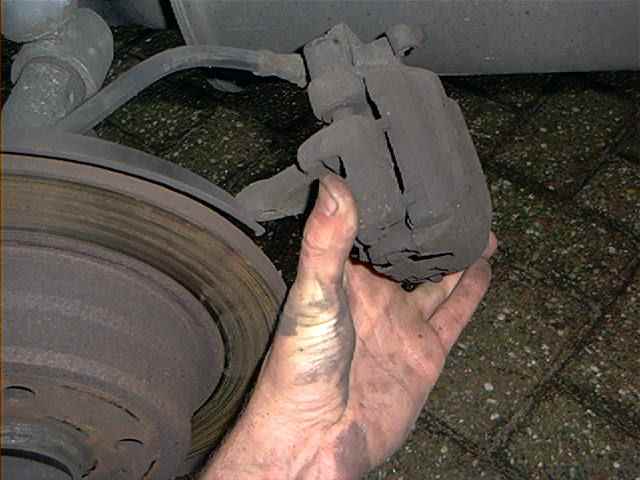
Don’t let the caliper hang, so put it somewhere between the suspension like this:
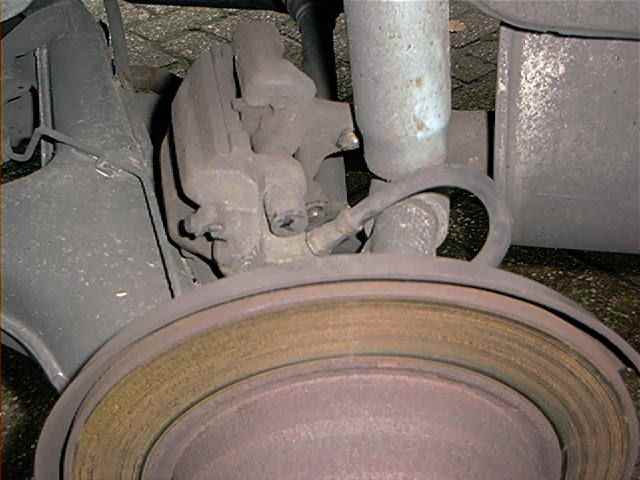
Remove the rotor mounting screw (allen screw), some gently tapping with a hammer may be necessary first. This can be a stubborn screw to remove:
And remove the rotor:
Here you can see the happy parking brake shoes.

And here you see 2 small brake shoes for the parking brake. The shoe adjuster is located at the rear:
Here you’ll see a close up of the shoe adjuster:
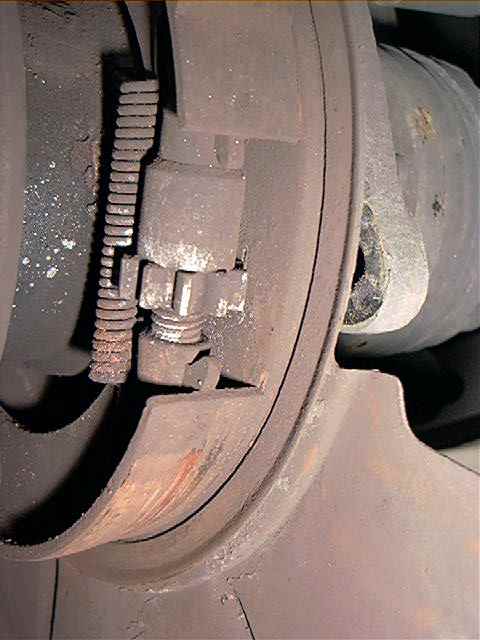
Turning the adjuster clockwise (seen from above) will compress the brake shoes, counterclockwise will expand them. This is the same for both wheels.
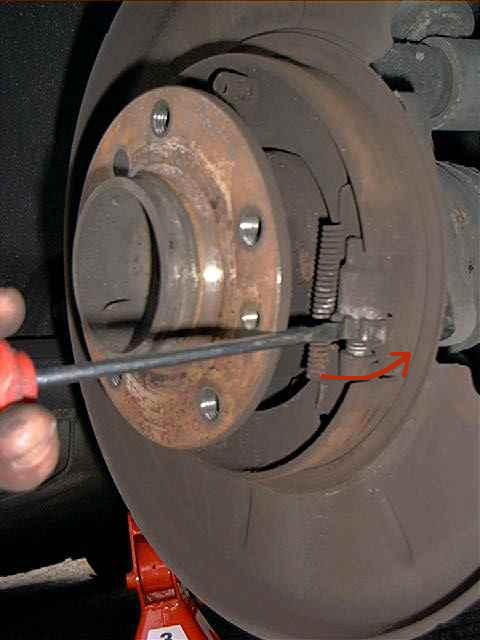
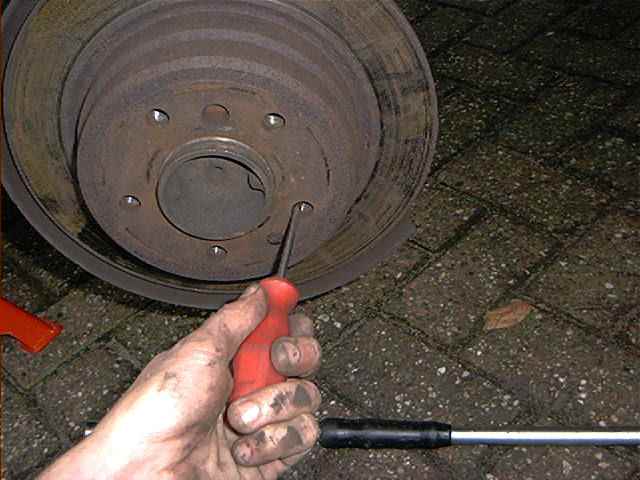
These pictures shows how to adjust, but I forgot to put the screwdriver through the hole of a lug nut (like you are supposed to do while caliper and rotor aren’t removed):
ADJUSTMENT PROCEDURE:
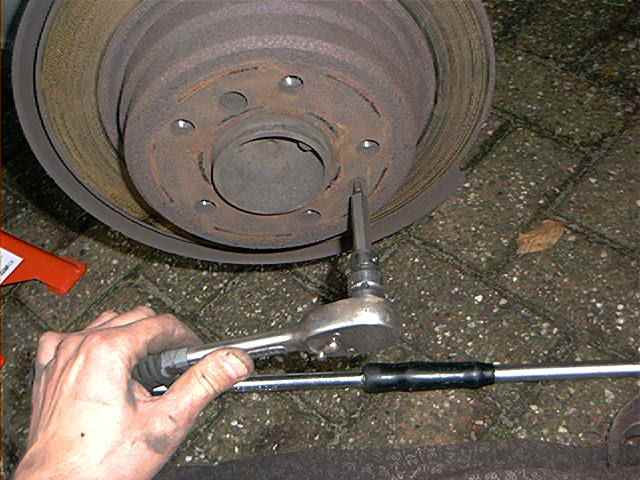
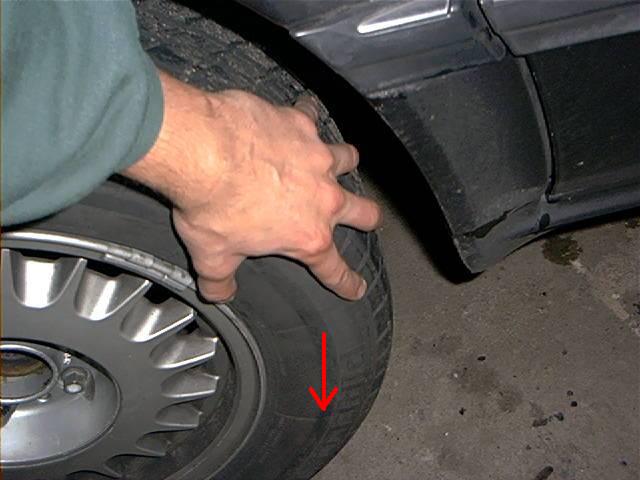
Ok. Now that you’ve seen the shoe adjuster works, now the total adjustment procedure with installed rotors. Use a small electrical torch to search the shoe adjuster teeth through the wheel lug bolt hole:
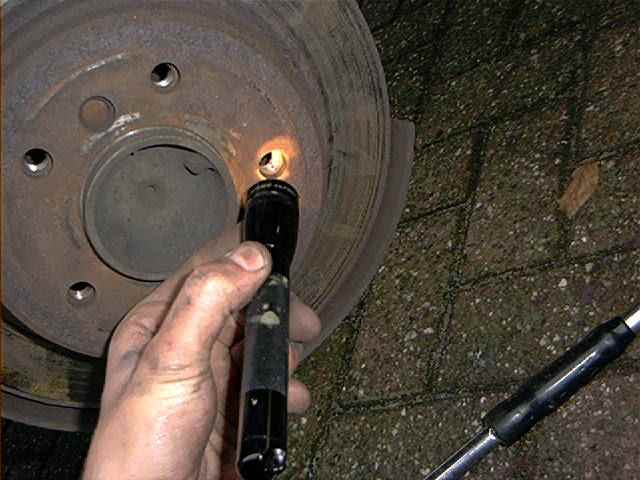
Turn the shoe adjuster counterclockwise with a flat-blade screwdriver to expand the brake shoes until the rotor can’t be turned by hand:
Checking the resistance:

If the rotor can’t turned anymore, turn back adjuster off about 8 notches (clockwise). Repeat procedure on the other wheel, don’t forget that expanding the brake shoes is still counterclockwise, also on the other wheel.
Both adjusters are at the rear of the drum. After both brakes are properly adjusted, install both rear wheels (makes the driving later on a bit easier).
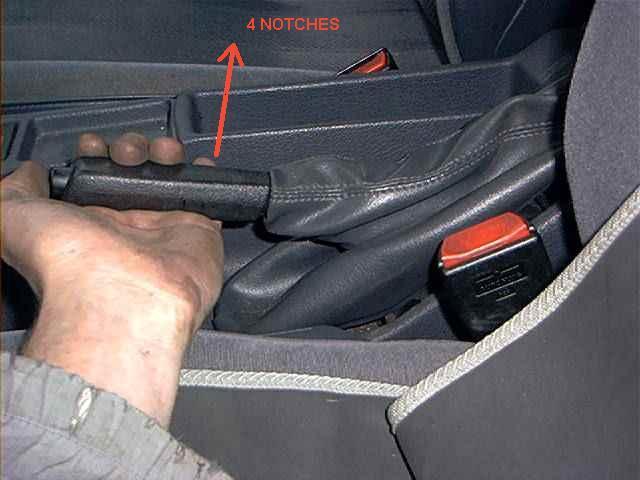
Pull the parking brake lever up 4 notches:
Start at on the right wheel, adjust the cable adjusting nut and checking regularly the resistance of the wheel. At some point, you should feel some firm resistance while turning the wheel:
Repeat procedure on other wheel. Adjust both cables in that way that each wheel has the same resistance. After that, turn both cable nuts about 1/2 turn tighter.
Release lever and check that both wheels run freely. Lower the car and check the parking brake. It must properly work after pulling the lever about 4~5 notches up.
Total amount of time: About 3/4 hour
Skills needed/difficulty level: Both hands and your brain.
Additional input by: Paul Axford
My 730i failed NZ’s Warrant of Fitness test because the left rear parking brake stopped 60% better than the right. FYI, the parking brakes on all rear disk-brake bimmers consists of a tiny cable-operated drum brake inside each rear rotor.
They are too small to be considered an “emergency brake,” only just big enough to hold the car on a hill. The brakes have conventional manual “star” shoe adjusters at each wheel in addition to a cable adjustment at the lever for each side.
Here’s what I did to check and adjust the parking brake system. Sorry, no pics, I was in a hurry.
a) Place the rear of the car on jack stands and pull the rear wheels. Or do one at a time if you wish.
b) With a 15mm socket, remove the caliper and place aside with the hydraulic hose still connected. Unplug the brake sensor on the right side.
c) Be sure the handbrake is off. Remove the single screw holding the disk to the axle hub. Pull the disks off. If it doesn’t come off, check step (c) again 🙂
d) Check the condition of the shoes and drum. Wire brush off rust as required around the hub seating area. If the shoes need to be roughed-up, use a coarse file or sandpaper, not the wire brush! Check the brake adjuster “star” screw and get familiar with (and write down) the direction required to spread the shoes apart.
e) Replace the disk and single screw. Tighten gently.
f) Pull the plastic bezel around the handbrake and check that the cables are slightly loose with the brake off. Adjust as needed.
g) Be sure the shifter is not in park and the handbrake is fully down. With a flat-blade screwdriver, turn the adjuster star (accessible via one of the holes in the brake disk hub) until it’s tight and the disk doesn’t turn. Then back off 3-4 clicks. The disk should spin free.
h) Repeat on the other side and replace the wheels. Leave the back raised.
i) Lift the handbrake normally and check that the torque required to turn each of the 10mm cable adjusting nuts is about equal.
Adjust to suit, tighten or loosen keeping in mind you want 3 or 4 clicks to fully operate the handbrake. Road test and adjust the 10mm nuts further as required.
On the re-test, now the left brake was 15% higher but it passed. Oddly, or perhaps for redundancy, the two sides do not self-balance like many other cars do.
Another BMW curiosity.