Article by: Sean
Article applies to: all 3, 5, 6, & 7 series BMWs from the 1980s and 1990s.
Problem: damaged/cracked ball joint boots of the control arms of the front suspension
Background: this article is about replacing a ball joint boot of the lower control arm. But the procedure about the upper control arm and the tie-rod end boots are the same.
These boots are pretty important, it prevents sand, dirt and mud getting into your ball joints (we are talking real high-tech now). So that is a good reason to replace them when they are cracked. The boots of the upper control arm and tie-rod end are relatively easy to replace, no need to unbolt several parts besides the wheel.
The lower control arm ball joint is a bit trickier. The big 22 mm nut of the ball joint is hidden under the lower part of the strut. So the strut must be removed (3 bolts below to the steering arm and 3 bolts up at the strut tower). But if the strut has to be removed, the brake caliper must be first removed. And you must detach the ABS connector. And the brake light connector. Did I mention that also the stabilizer connection link (aka swing supports) must be removed at least at 1 side?
So for just 2 simple boots you almost need to dismantle the whole front suspension (a bit over the top, I know). I don’t like that because I am lazy. And this particular job had to be done quick, very quick. Now the good news, there is a faster way to do things, described here and to help you out. Hallelujah! 😉
But first something about tapered/conical ball joints. Especially about separating those. Throughout the years, I separated ball joints by using a large steel bar, a couple of hammers and lots of brute force, extreme violence, gallons of sweat and terrible curses. I always succeed, applying more and more force and larger steel bars as ball joints getting bigger. I was getting pretty tired about that (it sometimes damaged parts, what a surprise), so last weekend I decided to bite the bullet and bought me a 12 Euro/US dollar ball-joint (tie-rod) puller and a 11 Euro/US dollar pickle fork. I hate pickle forks, but just in case the separator won’t do the job. Do you ever kiss your tools? Me neither, but last weekend I kissed the puller after working with it, wishing that I purchased this thing 15 years earlier (half a year later, while doing this procedure on my 750, I have a different opinion about these ‘quality tools’, so read on…).
Get the story? Be smart and buy yourself a decent tie-end rod puller if you just don’t want to hammer and bang with steel bars, hammers and pickle forks ruining your suspension parts.
Last remark: you can’t buy these boots at your local BMW dealer. They don’t have part numbers as BMW assumes you replace the whole arm. Try your local auto parts seller, take the old boot with you to show to them because they come in different sizes.
Let’s start unbolting parts:
Jack the car up at the front, remove both wheels and place jack stands.
REMARK: I performed this operation twice on 2 separate bimmers (an E34 and an E32), and the photo’s taken are from both procedure’s.
The procedure is identical:
Now remove the 3 19mm bolts holding the lower strut assembly to the steering arm:
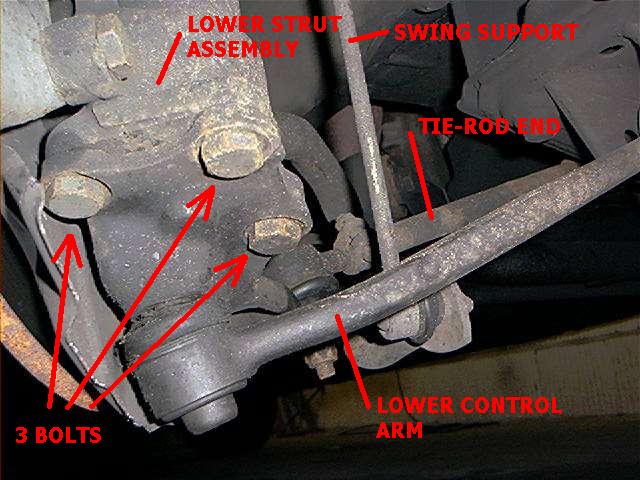
Unbolting the lower end (3 x 19 mm and they are pretty tight):
When the bolts are removed, push the steering arm (with some force) down to release it from the strut.
Move the strut aside. Remember this is the quick method, so things can be in your way sometimes:
This is the E34:
And this the E32:
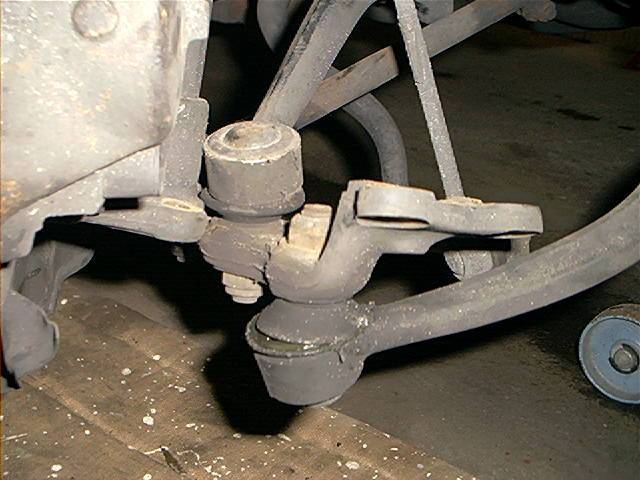
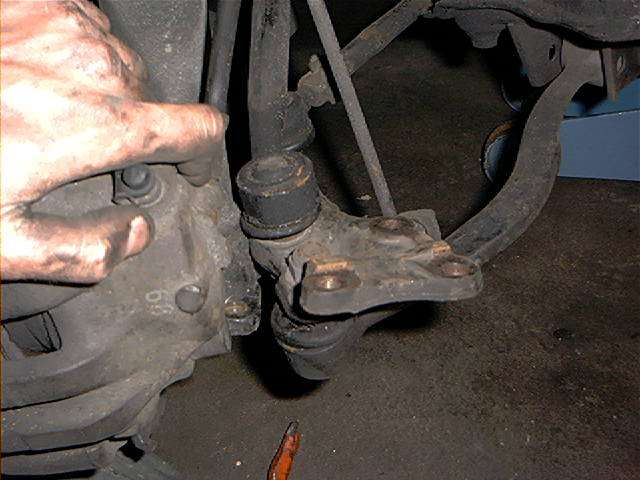
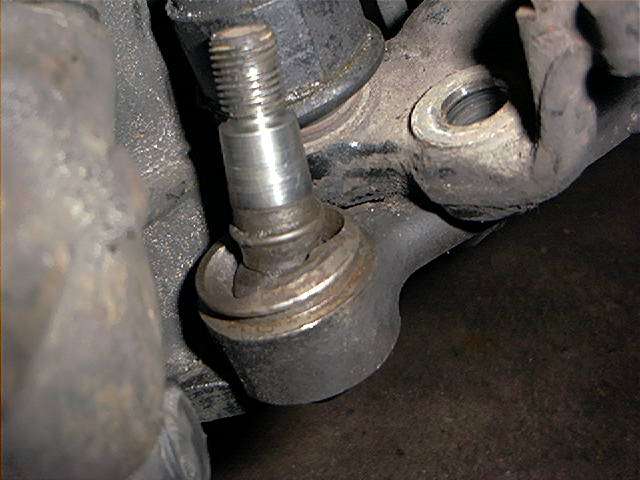
You see that everything is still connected and the steering arm is revealing the big 22 nut holding the lower control arm to the steering arm.
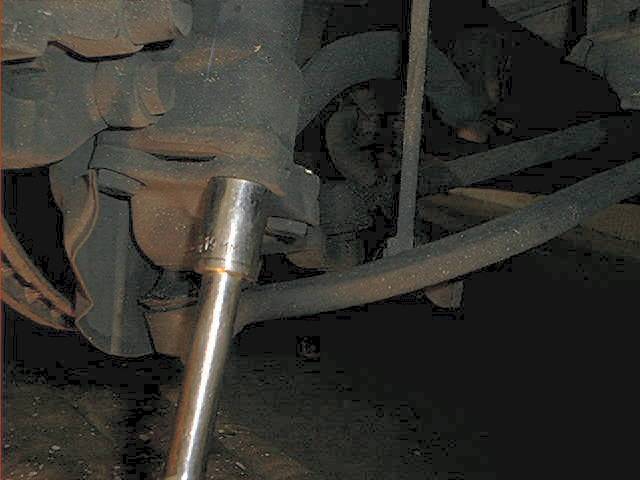
Now remove the big 22 mm nut.
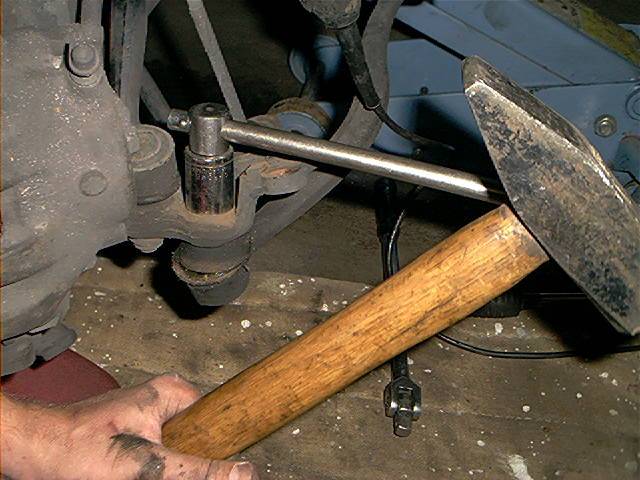
You’ll notice that is hard to unbolt it, because the suspension parts are moving. I succeeded in using a hammer with socket and wack it firmly
Remark: you’ll need 2 hands to do this..one for the hammer and one to hold the socket down…but you get the point:
And yes:
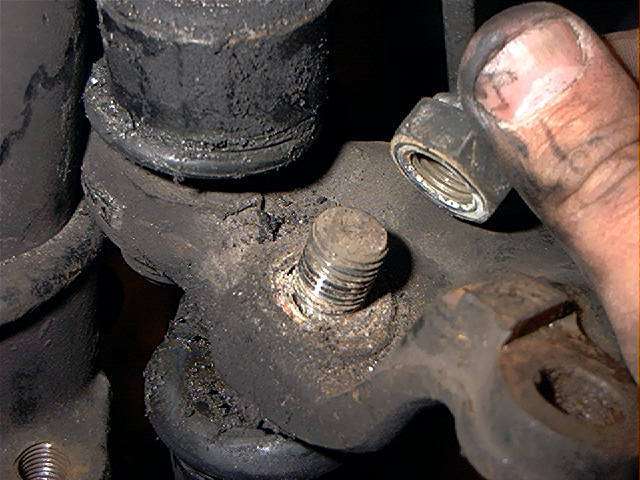
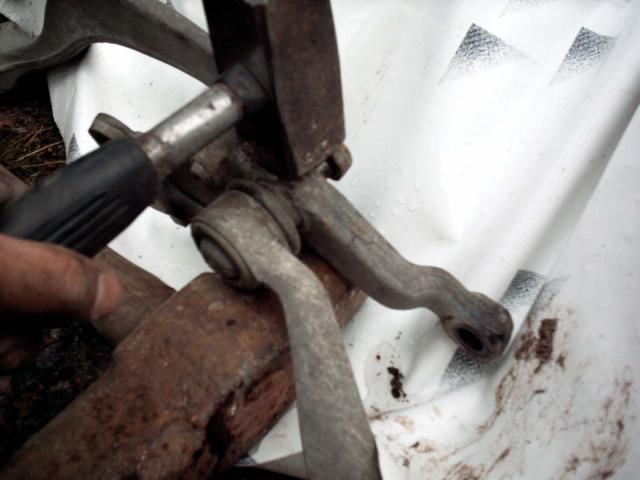
After the nut is loosened, you must separate the ball joint from the steering arm.
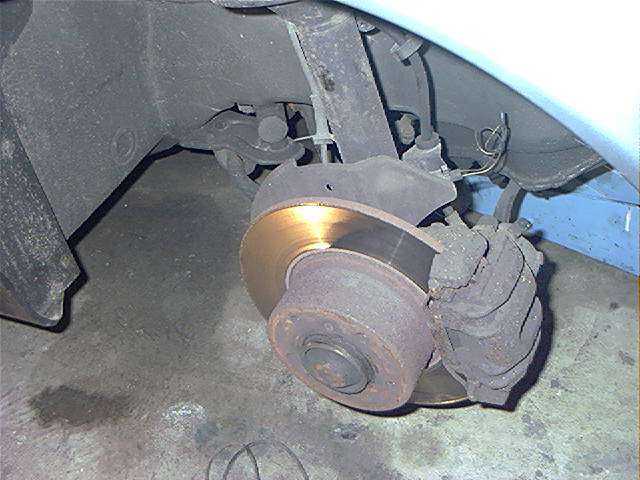
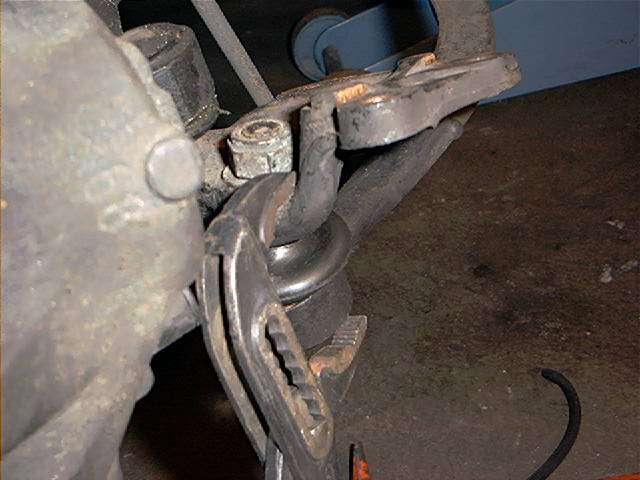
This can be doing by using the pickle fork (shown on other wheel with brake caliper and rotor removed for better understanding):
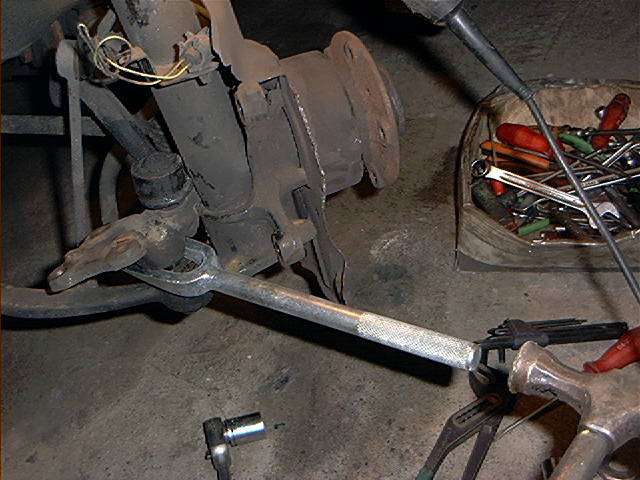
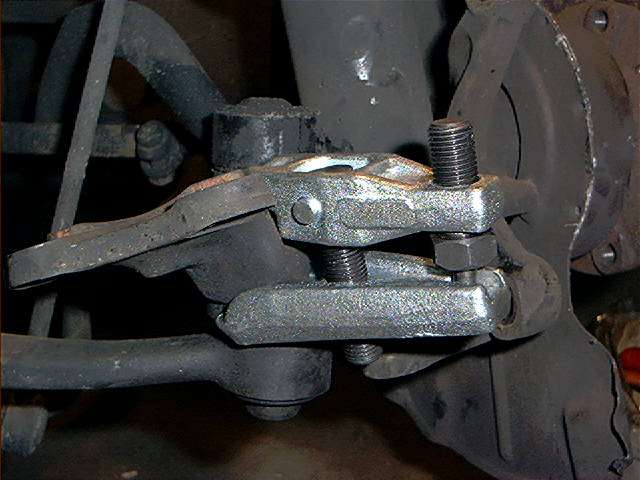
Or the ball joint separator (again, highly recommended).
If you turn the bolt on the separator very tight and it isn’t still separated, try some whacks on the steering arm side:
This did it for the E34, but the tapered end of the ball joint of the E32 was so incredibly tight, that I ended up with a smashed pickle fork and a ruined ball joint separator (and so far the ‘quality’ tools..hah!).
And no separated ball joint. These tools weren’t exactly quality tools, if you ask me.
I finally removed the lower control arm and whacked the lower strut assembly loose from the lower control arm on my workbench with an oversized hammer.
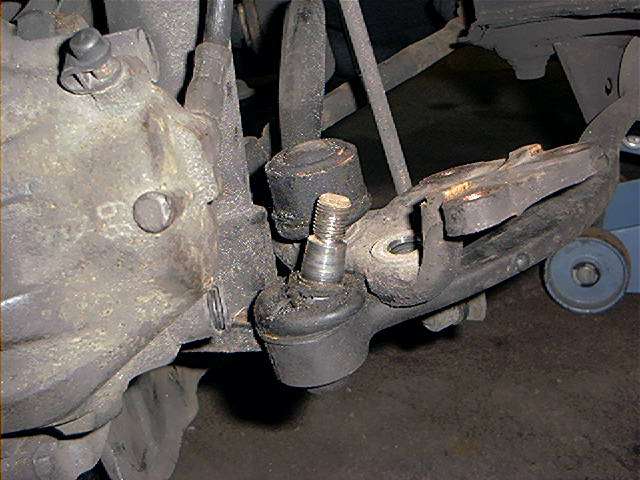
Back to the job. Push the ball joint down (if you succeeded separating it) and move the steering arm away. It’s getting a bit busy down there:
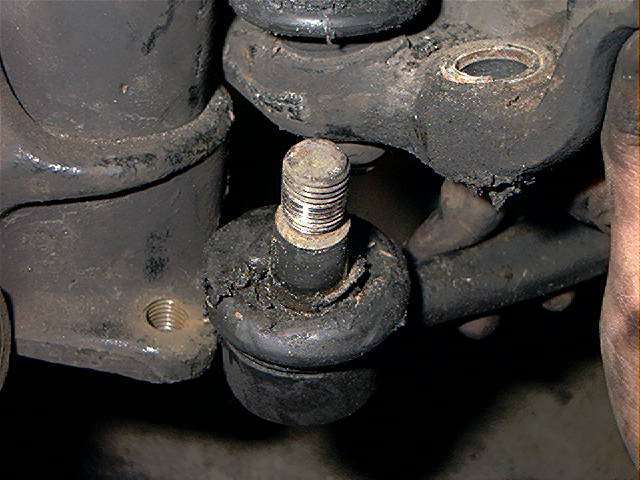
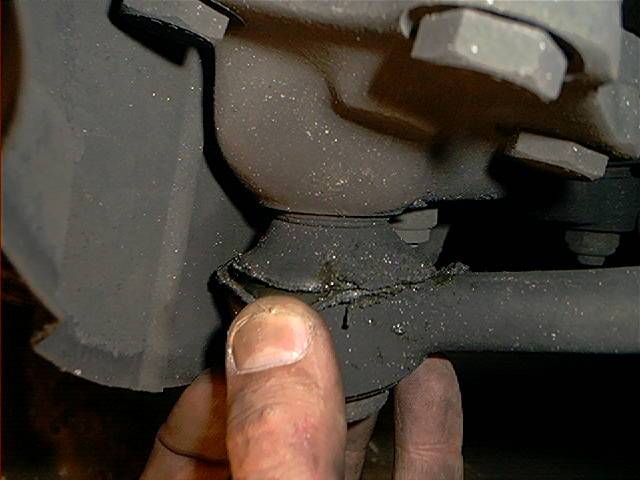
Remove the large circlip holding the boot in place. Try not to damage it, you’ll need for the new boot. Remove the old boot and clean things up.
Remove the crud and dirt (I used a small brush for that purpose):
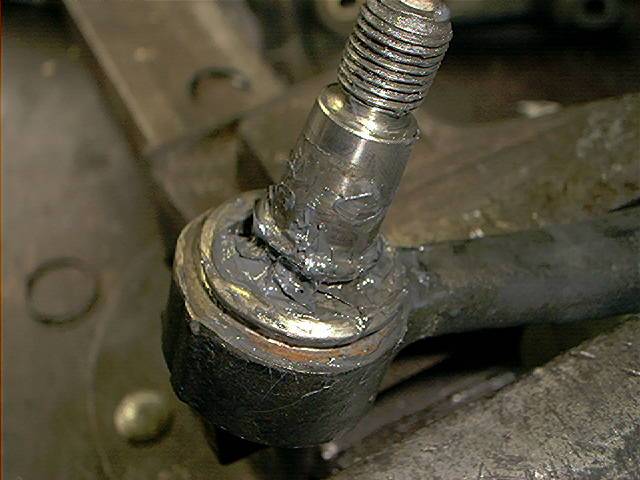
Pack it up with grease (other lower control arm shown):
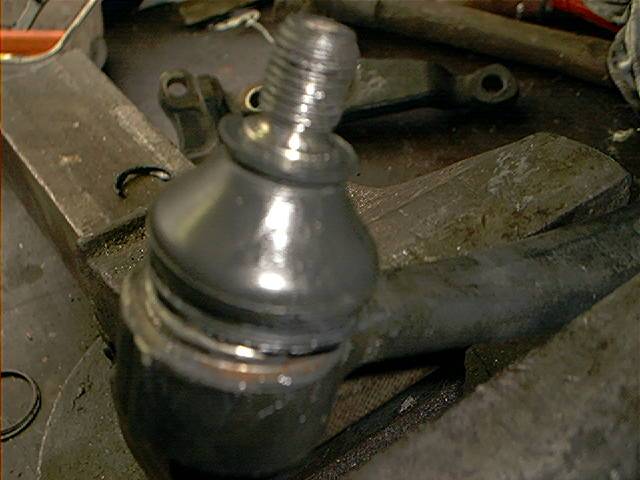
Install the new boot (this was the E32 control arm, at the back you’ll see the separated lower strut assy):
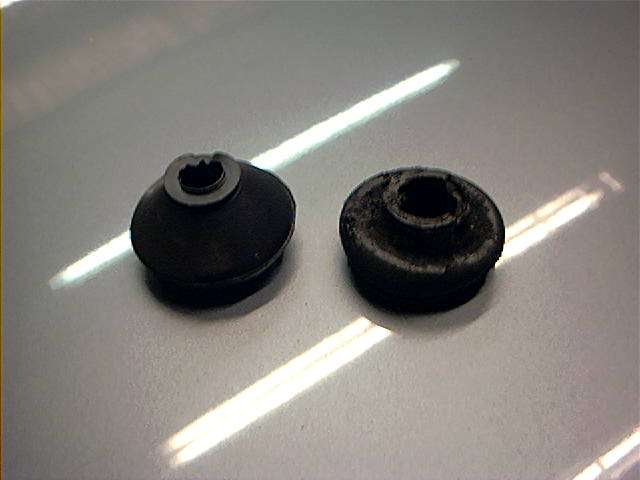
The old boot versus the new boot:
Use some grease on the ball joint, but don’t overdo it. Install the new boot and be careful installing the circlip.
You can easily damage the new boot (I used some pieces of vacuum hose slid onto both ends of the circlip, protecting the boot).
It can be a hassle to install the clip correct, due to the fact that steering arm and strut are blocking the way.
But you wanted a quick method, remember?
When reinstalling the 22mm locking nut the ball joint will as always turn, not making things very easy. Use pliers to hold the bottom of the ball joint to the steering arm.
This will press the tapered joint further into the arm. Keep it pressed until you feel that the nut is secured:
And again, that was about it. It can be difficult to put the strut back on the steering arm, positioning it.
You can also use pliers here, pressing the steering arm against the lower part of the strut.
Tighten bolts, reinstall wheels, get a beer etc.etc.
Again, those ball joints can be a real bear to separate.
If you are really desperate, you can remove the entire lower strut assembly, take it to your workbench and show that damn thing who’s the boss.
Mat Johanson sends us pictures and teach us how to handle reluctant ball joints:
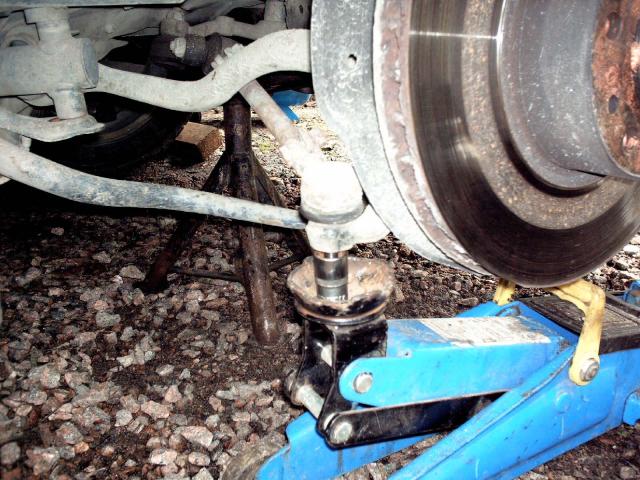
“I just want to give you some good pictures of how to handle conical connections in the front suspension without expensive tools…
A good sledgehammer or two…Just give it some massage and it will walk out by itself. When I remove the steering end I applied some pressure by the jack.
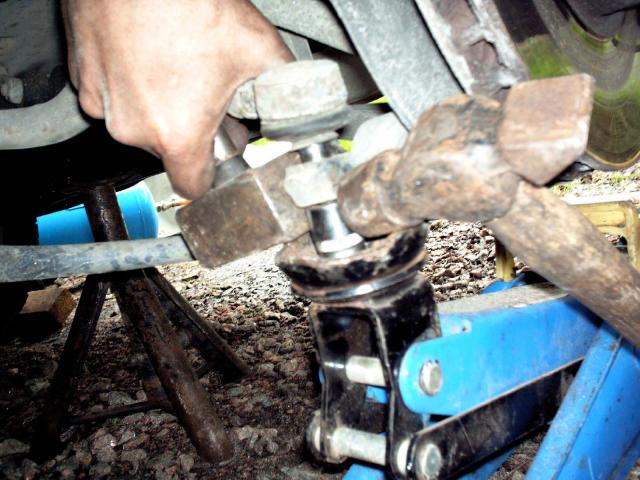
You can see that I use the socket on a almost completely removed nut. This makes it easier to see when it is loosened and speeds up the process.
About 5 good hits with the big hammer and the piece is loose. You have to have a heavy hammer on the back side so things just don’t bounce.
For the suspension upper/lower control arm, I have the complete piece out of the car (it should be possible to do it on the car if you have an extra person to hold the big sledge.)
I found that it was very easy to support it on a large sledgehammer, then I gave it a few good hits and it jumped out by itself.
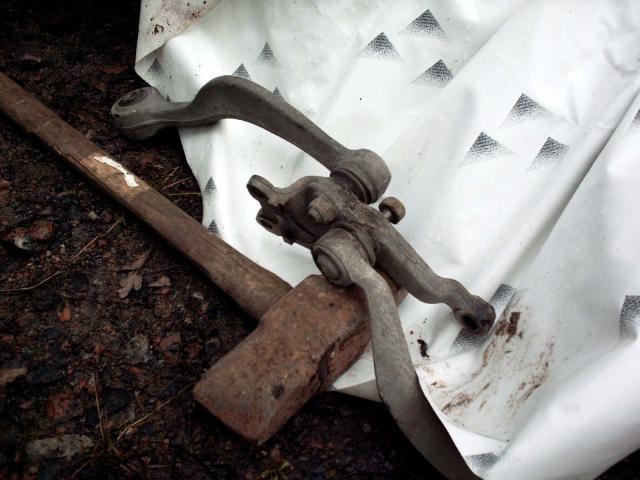
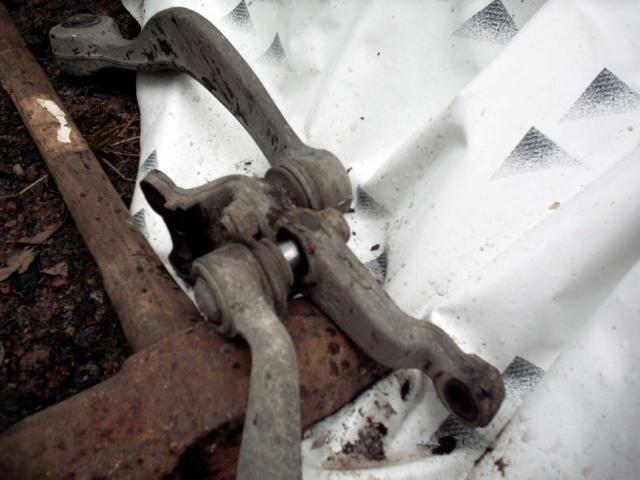
I think for this one I had to hit it 7 times. After this the photo was taken, it had jumped out by itself, I have not moved it by hand or something like that.
This is a method commonly used by car mechanics in Sweden. You do not destroy the pieces (like you can do with big pullers and other stuff).
The hole will still be circular after the massage, you just use the flexing capabilities of the steel to get the pieces apart.”
Mat, thanks for the great pictures & instructions.
Total amount of time: 2 boots in about 4 hours. But again: those ball joints can be a real hassle to separate.
Costs: about 2 euro/US dollar per boot.