Article by: Sean
Article applies to: all e32 and e34 models.
Problem : At one particular fine day in a city far, far away from home (these things always seem to happen when you are miles and miles away from home), I waited for traffic lights. At last, the light turned green and I put my gear selector from N to D (I had put in in N because these lights seem to know only one color). At that moment, I heard an enormous loud “CLUNK” from the rear. And I mean a really loud CLUNK, like someone hit the chassis with a sledgehammer.
‘Blew the diff’, I thought. I immediately pulled the car to the side (to my surprise the car still drove) and inspected the car from underneath. I expected to see large pieces of cast iron swimming in puddles of black differential oil and was seriously considering dumping the 750 at the nearest salvage yard and get back home by public transportation. But that wasn’t necessary. I saw nothing. I parked 2 wheels above the curbs so I could get underneath (ending up ruining my clothes) and started pulling and yanking severely parts to identify the large CLUNK. At that moment, I could lift the differential several centimeters from the front. It was resting at the rear subframe. The differential carrier at the front was broken.
I ensured myself that the driveshaft wasn’t touching the sub-frame and I drove home, very carefully & slowly, preventing accelerating and de-accelerating as much as possible (but couldn’t prevent it fully, resulting in enormous loud CLUNKS hurting my soul badly).
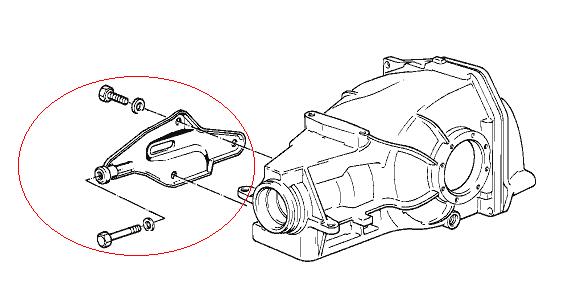
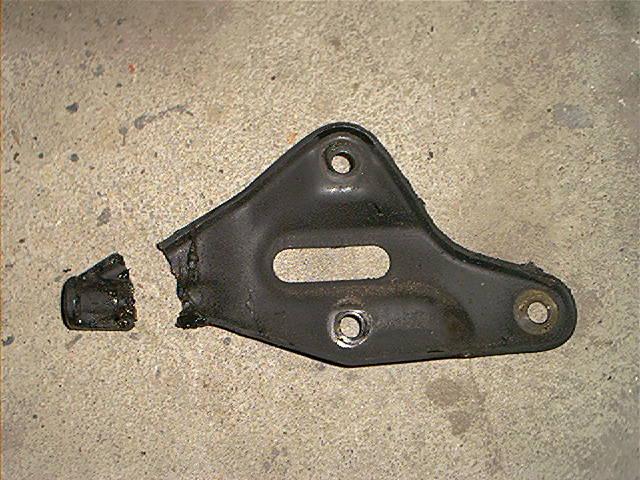
Background : The diff is mounted to the chassis with 2 mounts. One large (and I mean really large) carrier at the back, and one smaller at the front (see picture above). The front carrier is bolted to the diff with 3 bolts (22mm wrench) and mounted to the sub frame with one long bolt (19mm wrench). This long bolt is bolted in a rubber bushing.
When unbolting keep in mind that: especially the 22mm bolts are extremely tight and need some serious extensions (2″ pipe, hammer) to unbolt. So place the safely car on ramps. The upper 22mm bolt is virtually impossible to reach, access can be easier if you drop the diff a bit.
Visually inspection of the carrier is virtually impossible, you have to remove the carrier to inspect it. I couldn’t find anyone on the internet who experienced the same problem so I guess it’s very rare something like this occurred. I even considered not writing a story about it.
Let’s start unbolting parts :
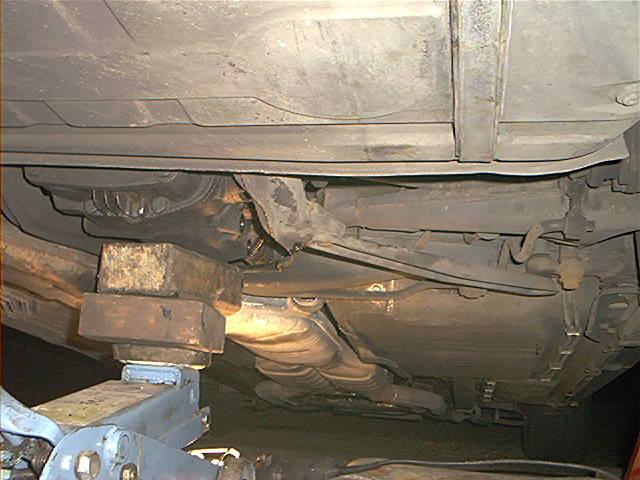
Place the car on ramps or jack stands and support the diff:
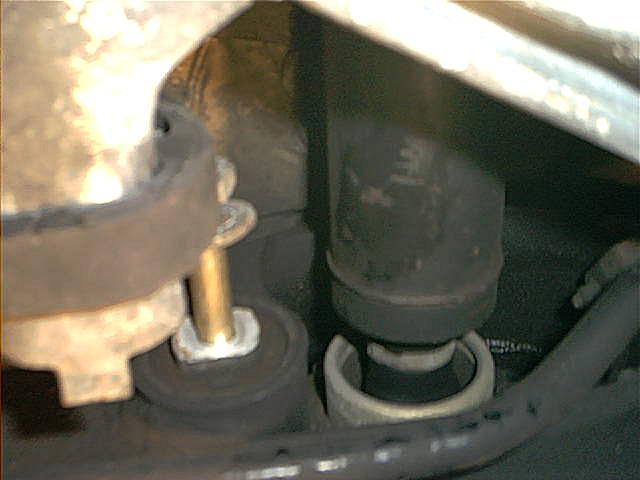
Unbolt the front bolt (on photo already unbolted, seen from front to rear). It’s located near the drive shaft in a bushing.
After unbolting you don’t have to remove the bolt because the exhaust bracket is somewhat blocking the way. At the left visible the exhaust bracket & hanger:
Start unbolting the diff bolts of the carrier. Notice I used an open wrench here, but that was after I used a box end wrench to loosen it:

This picture shows just how those bolts are incredibly tight. I scrapped an 22mm wrench (OK it was old and somewhat rusty, but from a decent brand and I used it for several years with no problem):

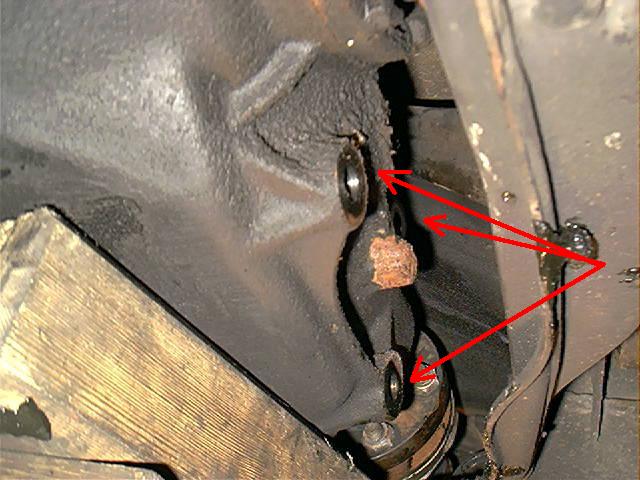
I removed the carrier (what was left of it). This picture shows the 3 bolts to remove. The upper one is a pain to get to, you have to lower the diff a bit:
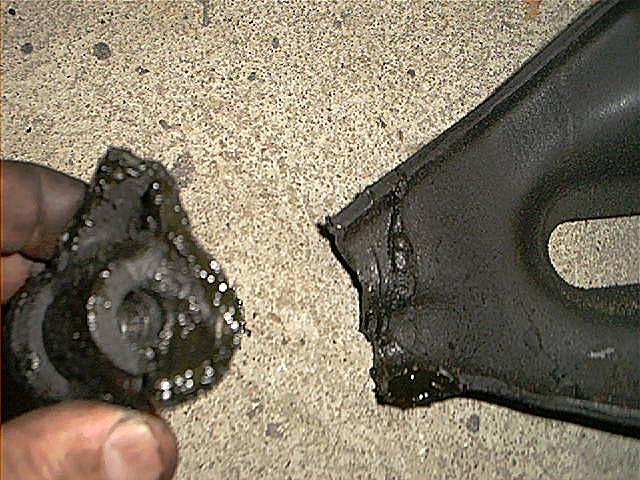
![]() This is the removed carrier with the little piece that was attached to the front bolt. I never seen anything like this before, it had broken straight off:
This is the removed carrier with the little piece that was attached to the front bolt. I never seen anything like this before, it had broken straight off:
Notice the dirt on the edge of the crack. Probably the crack was present for a long time, until it decided to break at last:
A new mount is about 22 euro/USdollar, so I advise you purchase a new one. But I removed the carrier in the evening, it was cold, I was in a bad mood after driving hours with just 80 kmh/50mph and the next day I had to go to my work with this car.
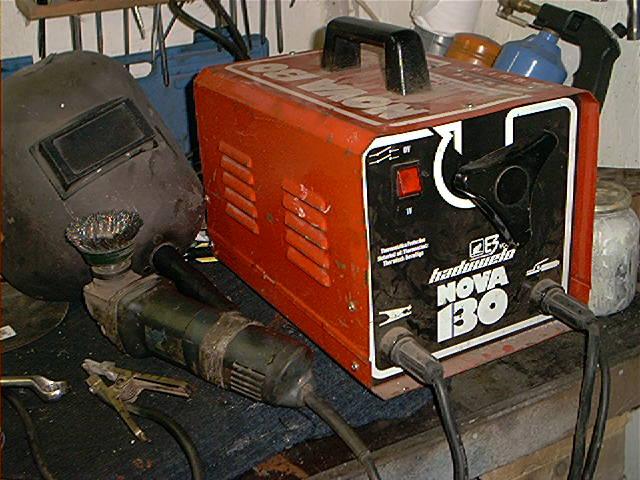
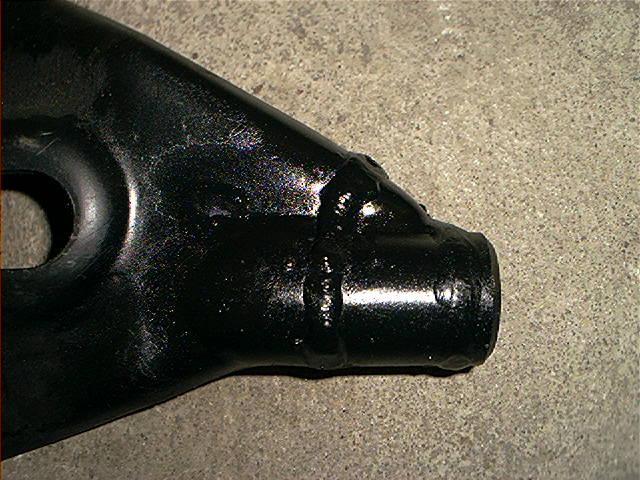
I decided to weld the carrier. Welding (and I mean GOOD welding) is a particular skill so I won’t get into this. For those who are interested: I used ARC welding with 2.5 electrodes:
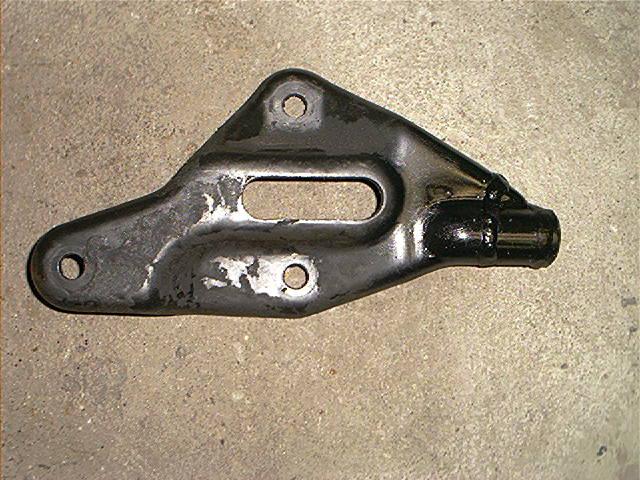
Welded at both sides, metal finished and spray painted:
After this, I reinstalled the carrier. First I tightened the front bolts a few turns, after that the bolts at the diff side.
The diff has to be moved up and down a bit to find the threaded holes. I sure hope the welds will hold.
Total amount of time: About 3 hrs.
Skills needed/difficulty level: Easy task if you don’t weld it but just replace it.
Comments after a few weeks of driving: When it comes to handling and driving the rear of the car feels definitely different. The welds are still holding.