Article by: Sean
Article applies to: all e32 and e34 models.
Problem: Usually, after every fast trip, I smell the odor of my car after I parked it and get out (I get very nervous when I smell something during driving but that is a whole different story).
This is automatic behavior after years and years of driving with relatively old cars.
Do I smell coolant, burned engine oil, burned transmission oil or that typical smell of toasted brakes . . . it always tells me if I will spend next weekend under the hood (bonnet for the British) in a cold garage or spend time with my family in a warm home with cups of coffee and television . . .
This isn’t a 100% guarantee that things are going well. Once in a while, I get on my knees and check for all sort of leaks before they turn into puddles on my driveway.
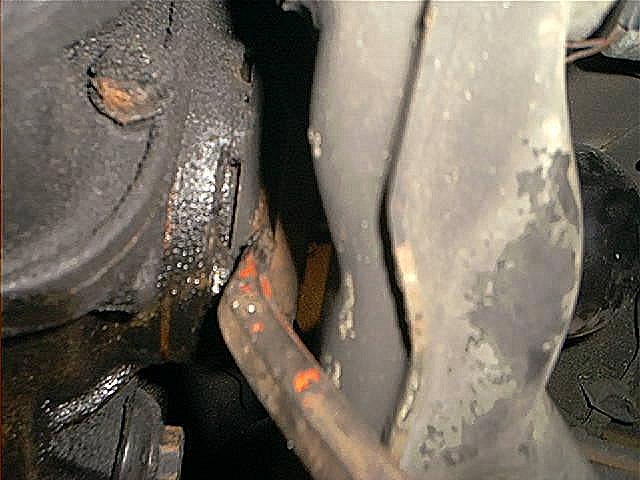
A quick look at the front . . . d*mn, that water pump leaks every day a bit more (it’s on my TO-DO list) . . . a look at the lower oil pan and cross member . . .
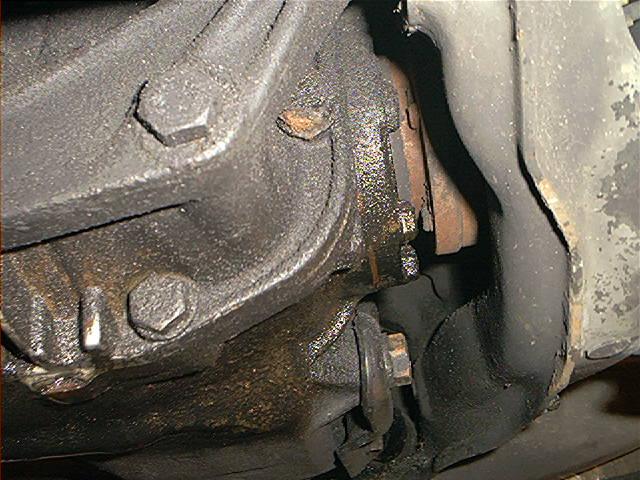
That rear engine seal always seems to weep a bit . . . a quick look at the hydraulic pump and steering box . . . should have replaced that P/S return hose a long time ago but still haven’t found time do it . . . the transmission . . . always a bit wet at the rear . . . the differential . . . huh?
Drops of oil? What’s this then?

That is not good. The diff should be perfectly dry (see pictures of a former story, the ‘diff carrier repair’). First I came up with idiot ideas like a leaking gasket or something like that, but as in most cases, this turned out to be a worn seal.
Additional information: The bulletproof diff has 3 seals, 1 input seal (driveshaft) and 2 output seals (axles). Usually the output seals are worn. And that is good, because they are pretty simple to replace.
The input seal is a whole other story…so make sure you identify the correct seal. . .
Now this is a typical, old-fashioned, straight out of the box, original, 100% output seal leak:
The nice thing about this seal replacement is that you don’t have to drain the diff oil! I am not that clever finding those things out, I got this tip from a BMW mechanic.
When you remove the drive flange, no oil (or just a single drop) will come out. Honestly.
Let’s get wrenching!
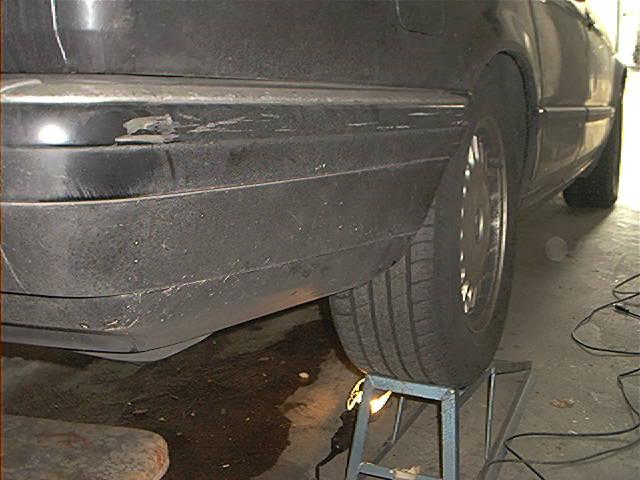
I put the car on ramps to make access to the diff easier and safer. Make sure you block the front wheels. I forgot to do that.
That damaged my bodywork, my garage door, one axle and my ego severely.
I won’t get into this. Don’t email me with questions about what happened.
Please ensure you work safely:
First you have to remove one side of the drive axle. The drive axle is mounted to the diff flange with six 8mm Allen bolts.
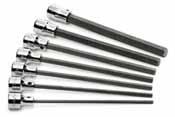
For this stubborn bolts I don’t use regular Allen keys (no room for them) but long Allen sockets (long hex bits).
These are *highly* recommended:
It’s advisable you clean the inner of the Allen bolts with a small flat blade screwdriver. If the socket isn’t fully inserted due to debris, there is a pretty good chance you strip the hex.
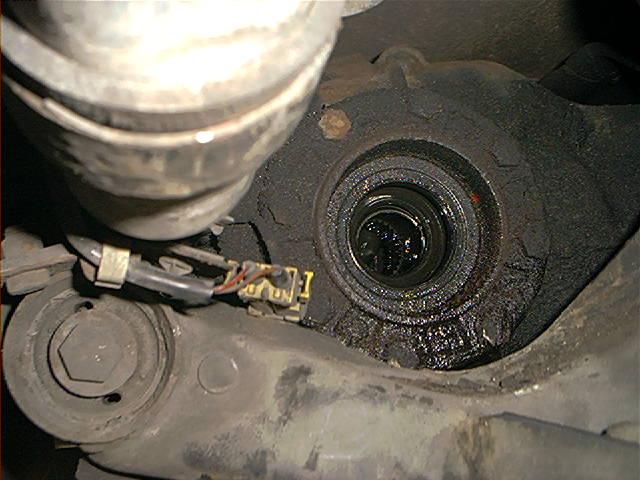
The yellow connector is from the speedometer sensor, above are the fuel filters:
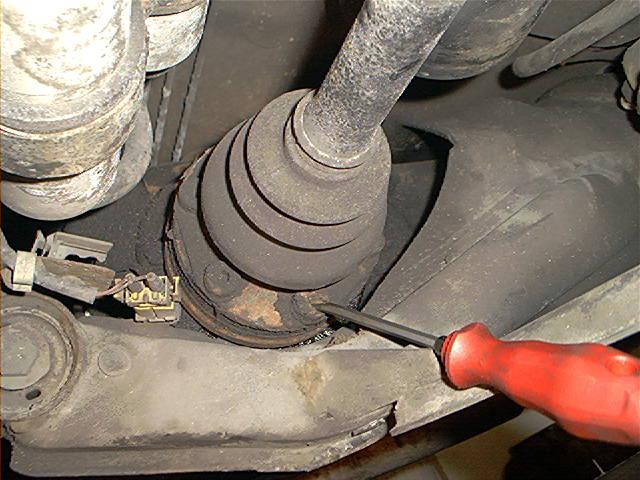
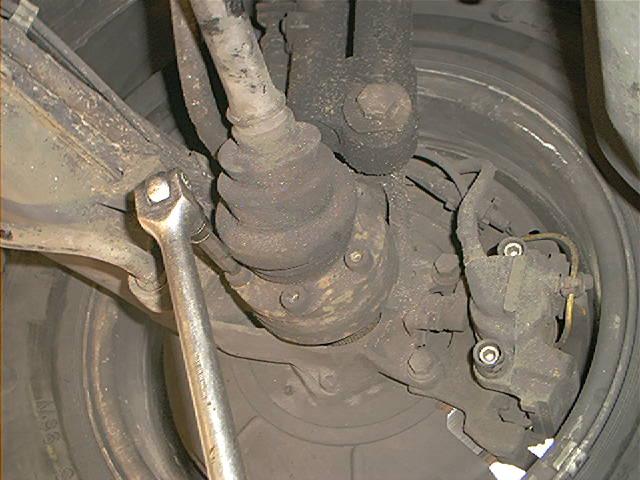
A few grunts were necessary to loosen the bolts. At the picture you’ll see a 3/8″ ratchet, but I had to use a 1/2″ breaker bar for the few first turns:
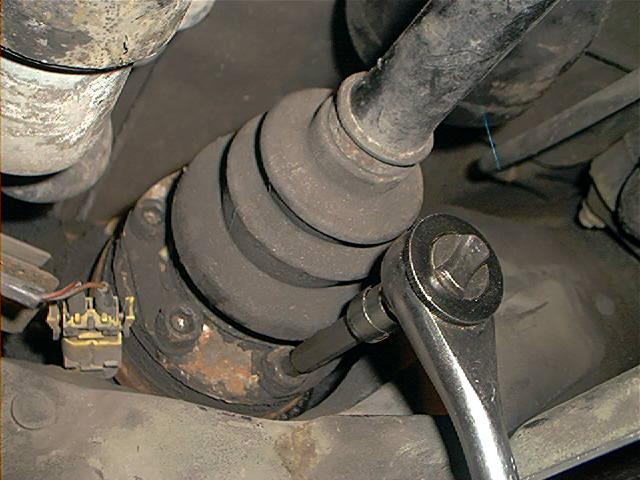
I was lazy, I didn’t turn the rear wheel to gain better access to the upper bolts so I used a swivel with an extension:
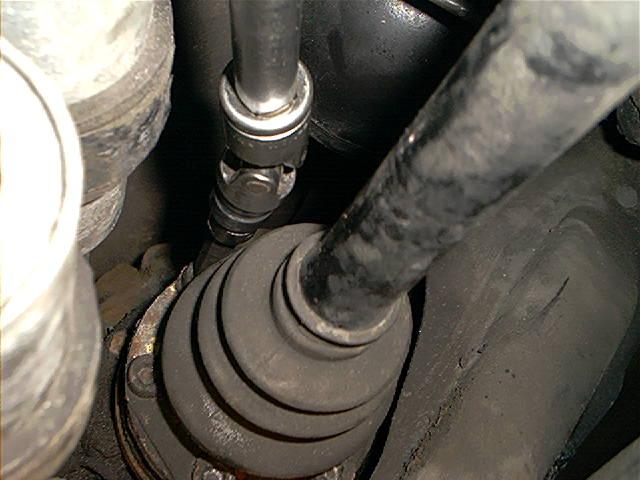
At first, I thought I was lucky and that disconnecting one half of the drive axle would be enough to remove the diff flange. Unfortunately, that wasn’t the case.
The fuel filters, sub frame and LAD accumulator are blocking the way so I had to remove the entire axle.
If your car doesn’t have LAD, there is a good chance you don’t have to remove the axle entirely and simply can move half axle out of the way…but I could not:
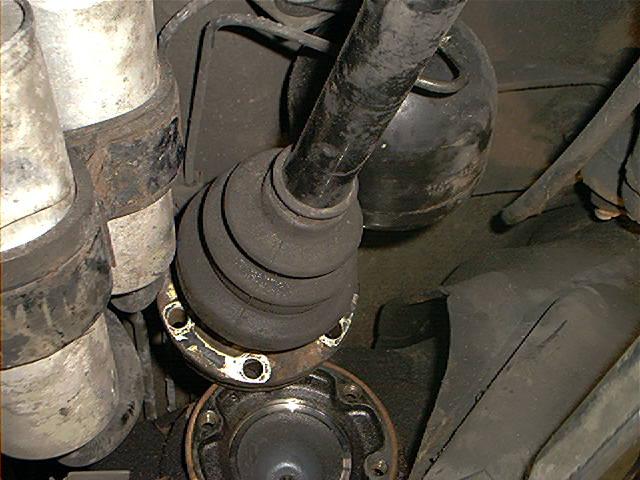
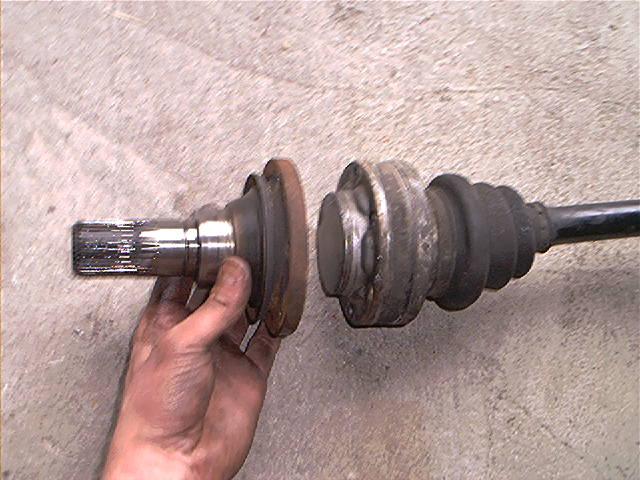
So unbolting the other side (wheel bearing):
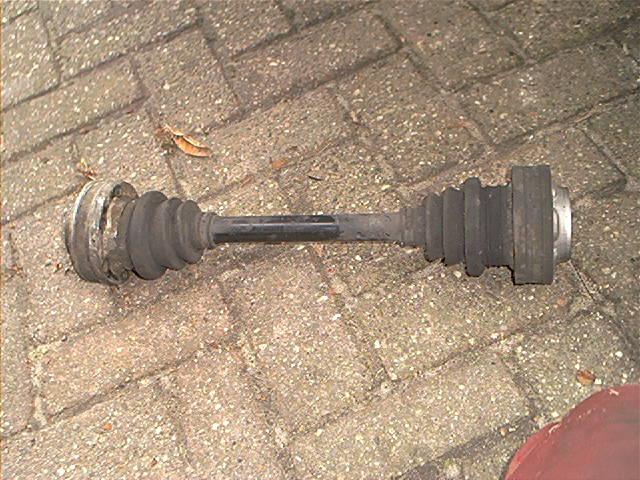
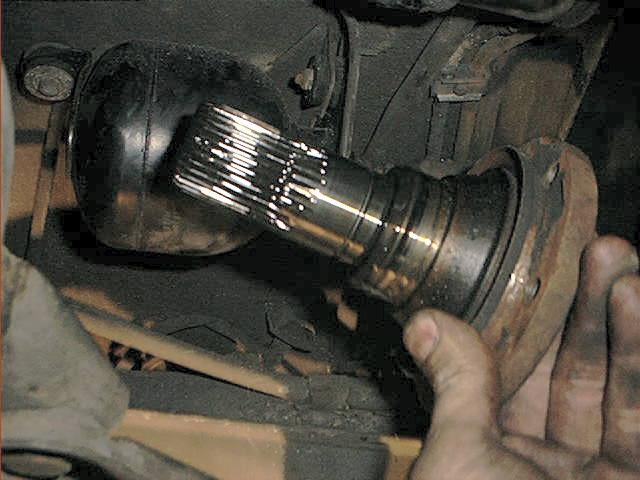
Now you can simply pull the axle away. The CV joints are closed units so grease won’t be spilled and re-greasing is not necessary:
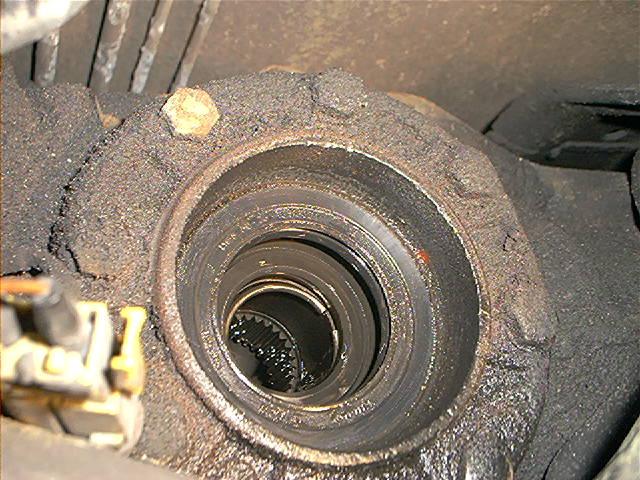
Exposed wheel drive flange. Looks brand new from the inside:
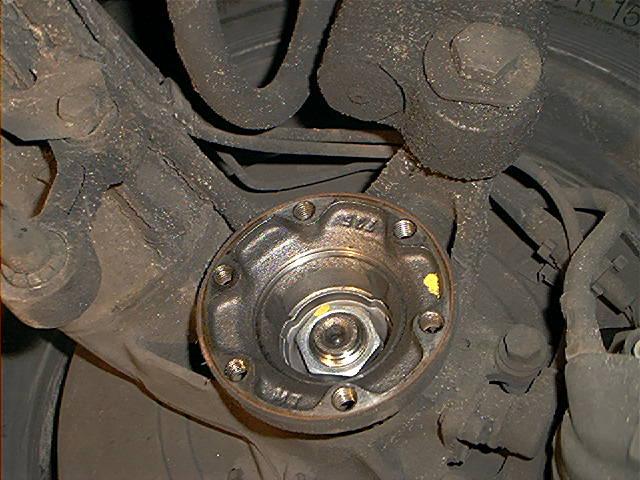
Exposed drive flange. Notice the absence of a central locking nut:
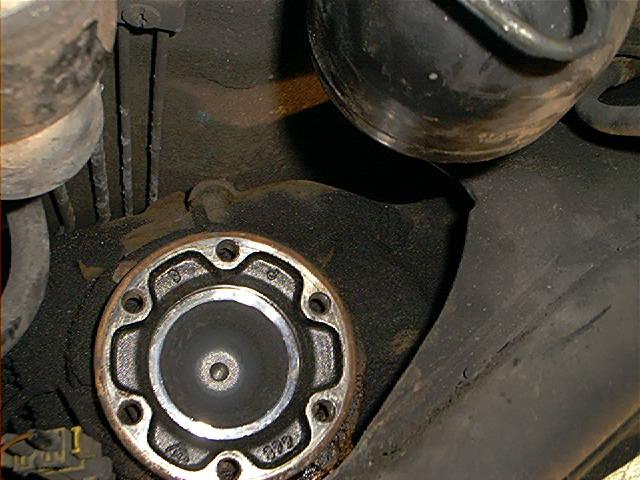
You can simply pry the drive flange out with a pry bar, it’s internally locked in place by a snap ring:
Carefully remove the drive flange. See, this is easy, right!?
And indeed, no diff oil was lost. This picture shows typical traces of a leaking seal. Maybe a good idea to clean things while your at it:
I forgot why I took this one. . . : )
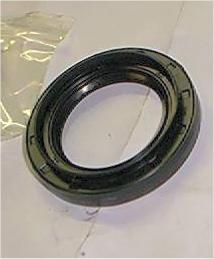
A close-up of the old seal. Notice the snap ring inside, this locks the diff flange. A seal can be a real bear to remove and this wasn’t an exception.
The problem is that you have very little space between the diff and the large sub frame. A large screwdriver simply doesn’t fit:
No matter what I tried, I couldn’t get it out. I know there are special seal pullers, but probably just as you I don’t have one.
After an hour or so and several fruitless attempts, I was getting a bit desperate.
After lots of coffee and thinking I decided to use 2 tools. One large pry bar and one arm of a small puller are combined to a ‘special tool’:
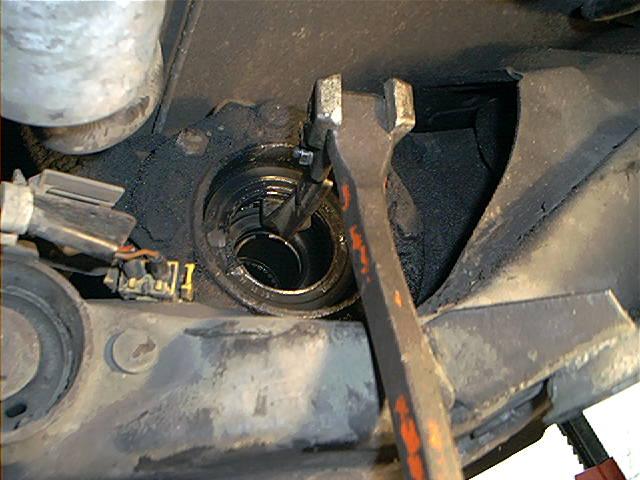
That did the trick:
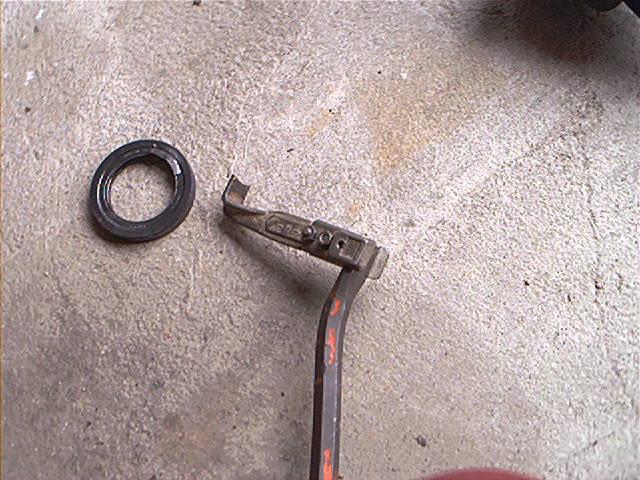
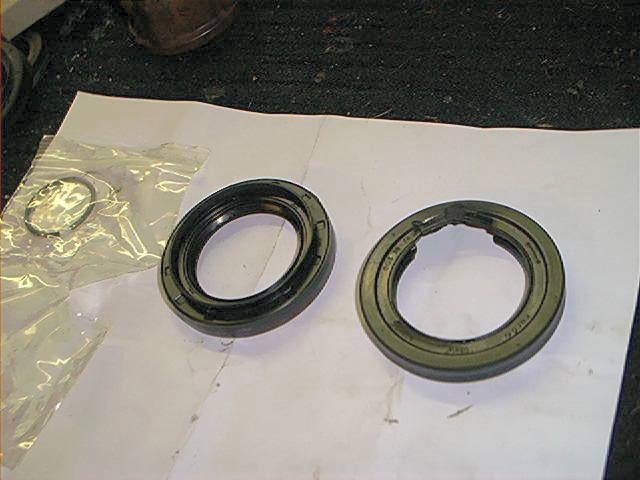
New versus old seal. Notice the differences in design. The new one has some sort of extra dust ridge. The snap ring comes with the new seal, replace it now while you can:
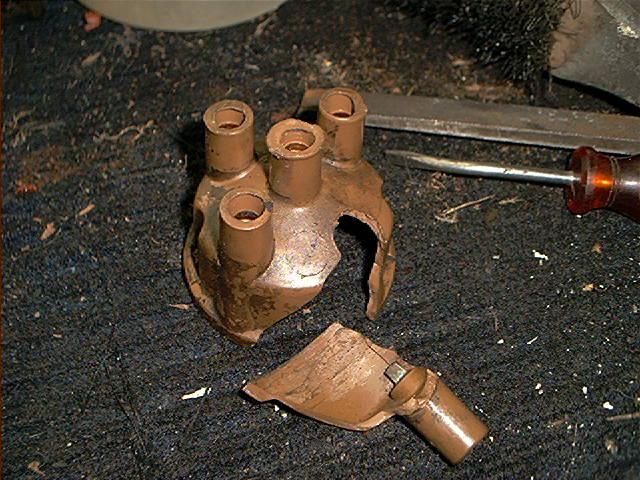
Besides a special tool to pull the seal, you also need a tool to drive the new seal in place. I thought I was very clever by using an old distributor cap with a hammer for this purpose.
Now that wasn’t smart, I destroyed it after the first few whacks. Luckily no pieces fell into the diff:
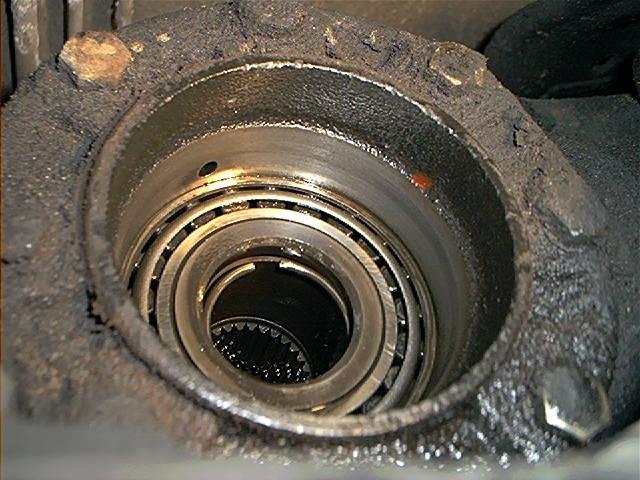
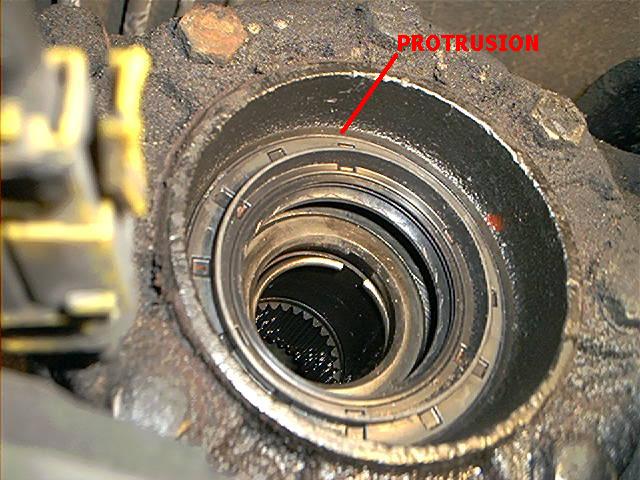
Installing the new seal requires to apply force WITHOUT damaging the new seal. Not easy. Eventually I used a large socket, and that did the job.
Be very careful what you do, take your time and check often the amount of protrusion of the seal into the diff.
I installed it just like the old seal, about 2 mm into the bore. This depends on the removed drive flange shaft.
If some wear is present where the old seal contacted the shaft, try to install the seal a bit deeper so that the new seal does not contact the wear groove:
Lubricate the surface of the seal with diff oil and install the drive flange with you hand (not a hammer!). It should pop in place as the snap ring engages.
If it doesn’t (like in my case), turn first the drive flange and if that doesn’t help, turn the other rear wheel slightly.
Now I didn’t know how much oil leaked out the diff, but I did want to risk anything.
The filler plug is an 10mm Allen bolt, located at the rear of the diff and impossible to reach with a ratchet.
So I used a little trick with a hex bit and a box end wrench:
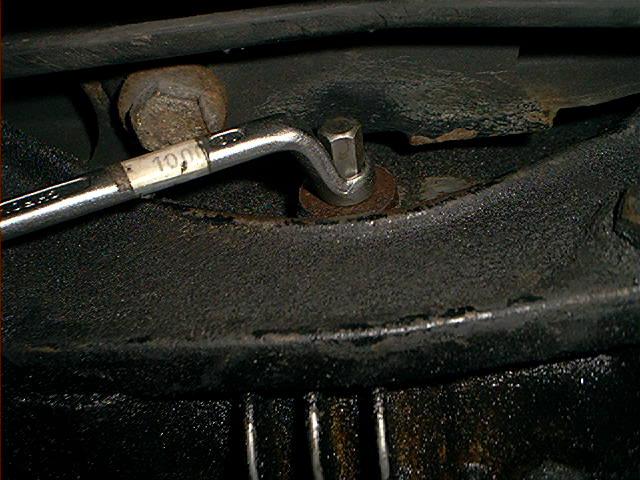
It was a beast to loosen. Don’t forget to replace the washer. The diff uses 75W-90 gear oil, but I’ll guess any GL-5 gear oil will do.
Total amount of costs :
Prices in euro’s / no taxes:
| BMW Part Number | Description | Price | Qty |
| 07119963355 | Diff fill plug washer | $0.06 | 1 |
| 33101214071 | Diff output seal | $23.04 | 1 |
Total amount of time : this took me about 5 hours, because of the fiddling with the tools. It can be performed a lot quicker.
Skills needed/difficulty level : for the skilled DIY’er.
Satisfactory level after the job done : Great! No more leaking after a week of driving. Perhaps this story raises a question: why didn’t he replaced the other output seal also?
Well, I know that the previous owner had replaced the seals some time ago so I guess it was just bad luck one of them prematurely failed.
And regular visitors of this site know I have tons of bad luck, so we are not surprised at all.