Article by: Sean
Article applies to: all e32, e34, and e36 models.
Problem: My 750i developed an huge vibration over 60-80 km/h (40~50 mph), and a loud ‘clicking’ noise when moving off or accelerating.
The complete driveshaft exists out of various components, while each component can be more or less can responsible for vibrations.
Another problem is that the driveshaft is shielded by the exhaust, and between the exhaust and the driveshaft, a large heat shield.
Mmmm . . . I think you should borrow you wife’s car for the next couple of days . . .
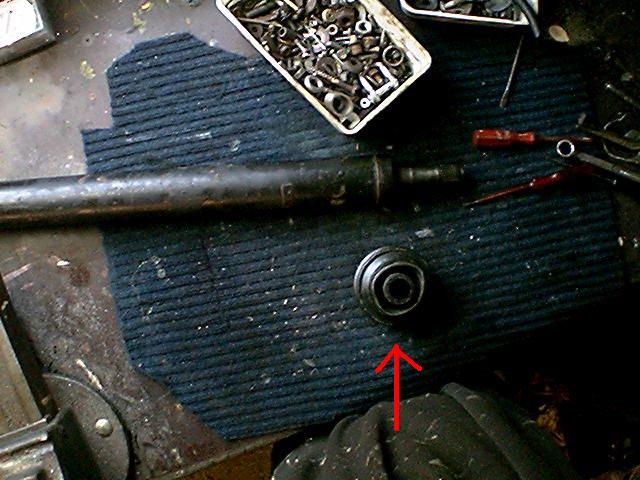
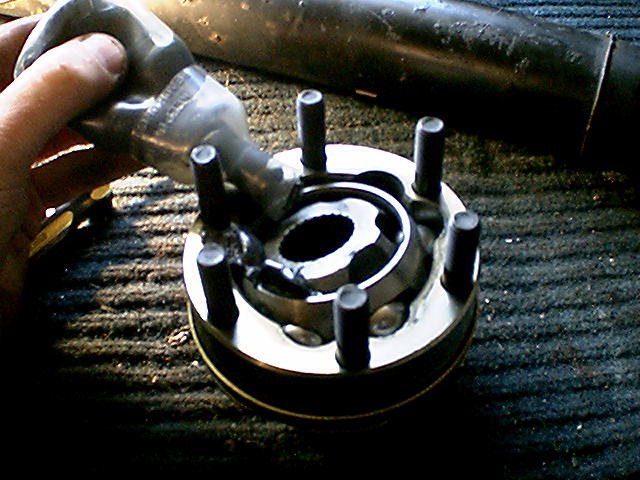
The only (visible and reachable) part of the driveshaft is the rear CV joint. According to my experiences, this joint shouldn’t have any radial play whatsoever.
This means, get underneath and get a grip on the shaft. Pull that shaft up and down (not forward and back) with some serious force:
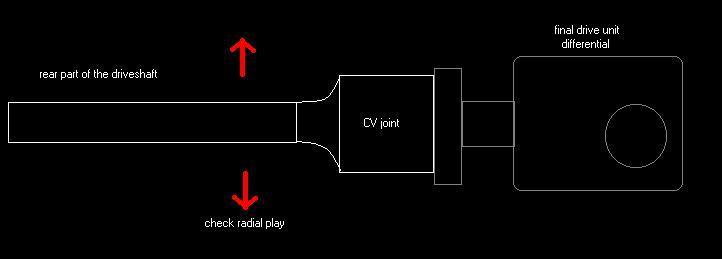
In my case, it had radial play. Not much, but enough to convince me that this was the source of the vibration. I was hopeful that the other parts of the driveshaft were in good shape.
Models: As far as I know, for all models applicable with auto tranny. The rare 5 speed gearbox of the 735i can have an additional guibo, and the 740i/730i-v8 auto tranny.
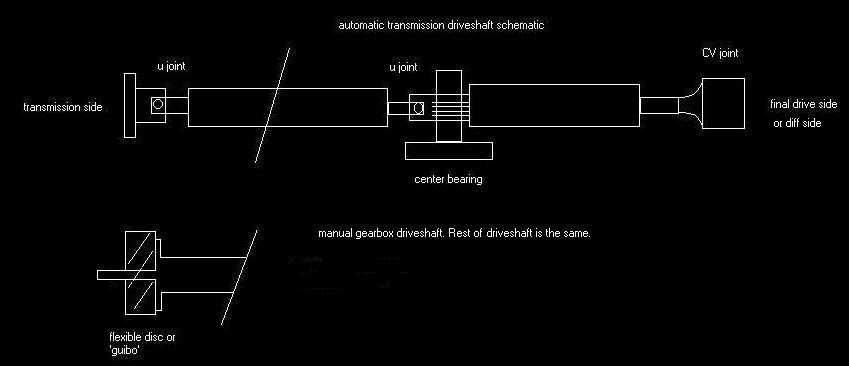
Background: The driveshaft of a 7 is a 2 piece driveshaft, joined in the center by a coupling and center bearing.
The front of the driveshaft (transmission side) is connected by a non-replaceable universal joint (automatic transmission only) or a flexible disc (manual gearbox only) also known as ‘guibo’.
The 2 pieces are connected with another non-replaceable universal joint, followed by a center bearing, mounted in rubber to prevent vibrations.
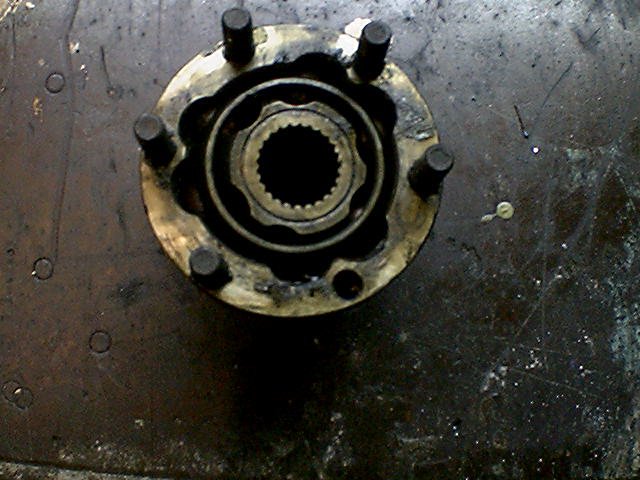
At the rear (final drive side) the driveshaft is connected to the final drive with a regular CV joint, the same used in drive axles although it seems that the one used on the driveshaft is a re-enforced one.
Note: 750i(L) came always with an automatic transmission. A guibo isn’t used with these driveshafts. For manual gearbox models or the 730i-v8/740i: a worn guibo should always be replaced.
Check your transmission seal. Leaking rear transmission seals seems to accelerate the deteriorating process of the rubber. Check for cracks, missing pieces etc.
Lets start unbolting parts: a while back I was working on another BMW, an E34 5 series. I had to replace the clutch.
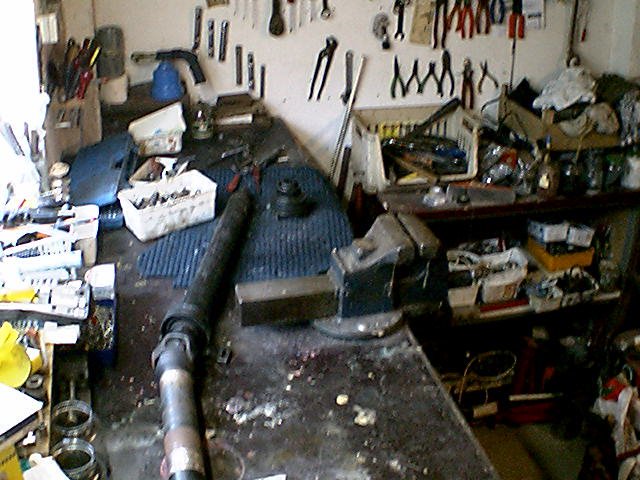
Like most readers of this site, I don’t have a decent floor lift. Just my garage box, some basic tools, my hands and a small brain.
It cost me a lot of work to get the car raised at a certain height, giving me enough clearance to remove the tranny underneath the car.
Although the tranny doesn’t have to be removed (bummer, maybe next time…) some serious workspace is necessary. The exhaust can be removed as a whole unit, but you definitely need space.
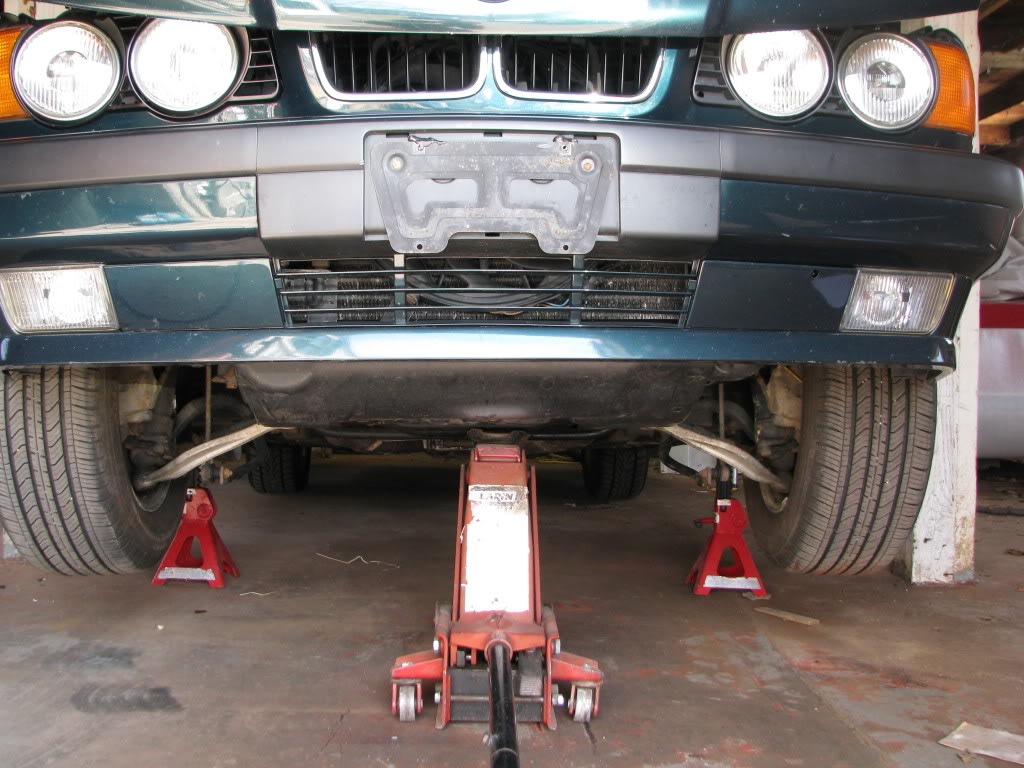
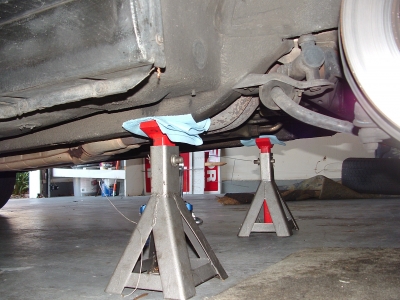
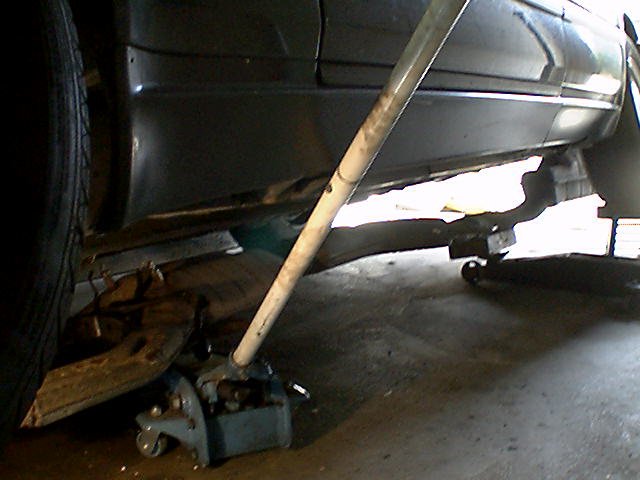
Time to jack up the car. Make sure you have the car secured on jack stands or a lift. It’s not cool to have a car fall on you. . . .
The exhaust system on a 750 isn’t a nice system to play around with…laying underneath the car with the exhaust system on top of you.
Simply because it’s just very, very heavy. Way too heavy to handle with just one person, if you’re are planning to remove it as a whole unit. So bring in a second person, or use 2 jacks to support this beast.
Mark the lamba (O2) sensors connections (preventing you from connecting a bank to the wrong lambda sensor…you just don’t want to do that) and then disconnect the lamba sensors.
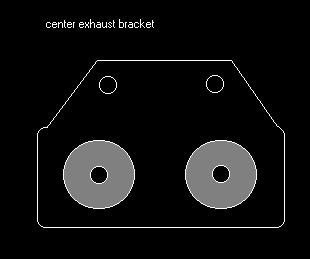
Remove big rubber center bracket (also known as midsection) that connects the transmission to the exhaust.
Tip: remove 2 bracket bolts on tranny, and 2 bracket bolts from the exhaust. You can remove the complete bracket as a separate unit before you remove the exhaust system.
Remove other left and right exhaust brackets. I unbolted both halves from the exhaust at both sides. Of course, they broke.
Good news: they are not expensive! Order these parts at your local BMW dealer together with the rest of the parts (no affiliation). Remove the complete bracket assembly.
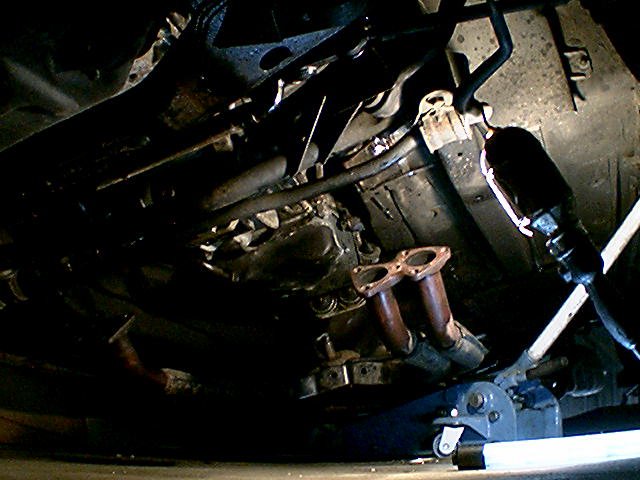
Now comes the hard part . . . where the pro’s are separated from the amateurs….unbolting the front exhaust pipes from the exhaust down pipes.
6 bolts on each side. Breaking the studs will definitely ruin your weekend. Be gentle, soak them in WD-40, a bit hammering . . . a sharp whack.
But it can be done without snapping them. Of course, when reinstalling, you will use plenty of anti-seize compound like copper paste. Lots of them.
Assuming the complete exhaust system is still supported by 2 jacks, remove the rubber hangers and unbolt the 2 exhaust support brackets from the rear muffler.
Those bolts can be rusty. Of course yesterday you soaked them already with lots of WD-40.
The lowering can begin.
Carefully lower the jacks:
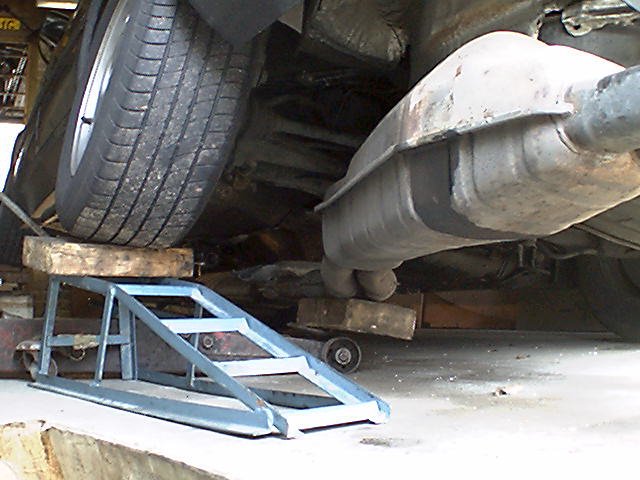
Excellent. Notice the lamda sensors in the photo above. Maybe its a good time to replace them.
There is no way that you can access them while the exhaust is mounted. I didn’t replace them. They call me a cheapskate.
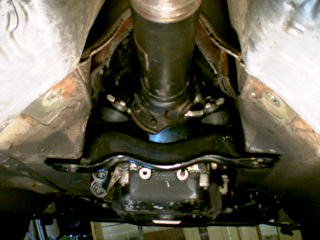
After removing the exhaust system, remove the heat shield. Pretty straightforward.
Check the heat shield for damage from the driveshaft. Some reported loud noises from the drive train when accelerating, indicating a serious center bearing problem.
Most likely, the driveshaft was hitting the heat shield (or worse, transmission tunnel).
Remove bolts from transmission flange. They are better accessible if you remove the transmission support cross member, see photo. Good idea to support the tranny while doing this.
And keep the tranny supported. Don’t let that big 12 banger lean against the firewall. In most cases, this will damage the coolant hoses (or connections from the heater pipes) at the rear bulkhead in the engine compartment.
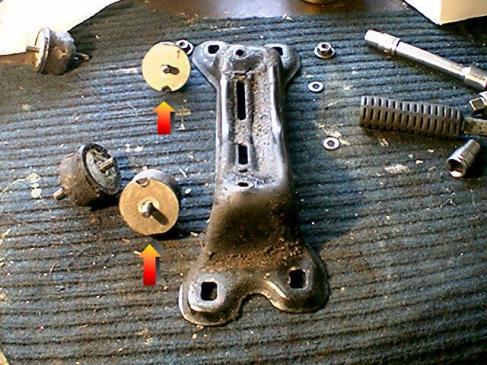
At that moment, you won’t be nice to any close relatives in your family for the next couple of days. Removing the cross member is also a good idea because in most cases the tranny mounts are worn and need replacing. Like mine:
No matter what you do or how you do it: support the driveshaft. Don’t let front or rear section hanging loose. Unbolt CV joint from final drive.
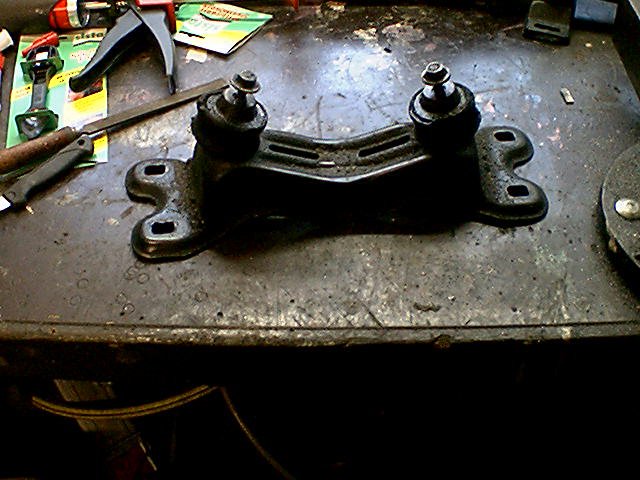
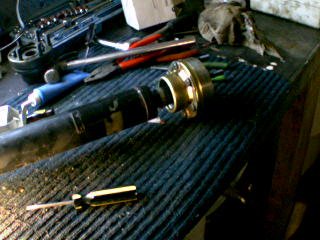
Tip: don’t re-use the bolts. They are self locking, intended to be used only once. Pull away driveshaft at center bearing. Place driveshaft on workbench. You did a good job:
Check out the driveshaft. Inspect U-joins. There should be no play whatsoever. Pull and twist the joins. Check center bearing for noises and cracked rubber mounting.
Remark: the center bearing can be replaced (see a couple of lines underneath) but the U joints cannot be replaced.
The U-joints are non-serviceable, non-replaceable. If you encounter some play in the U joints, replace that part of the driveshaft or consider buying a complete rebuild driveshaft.
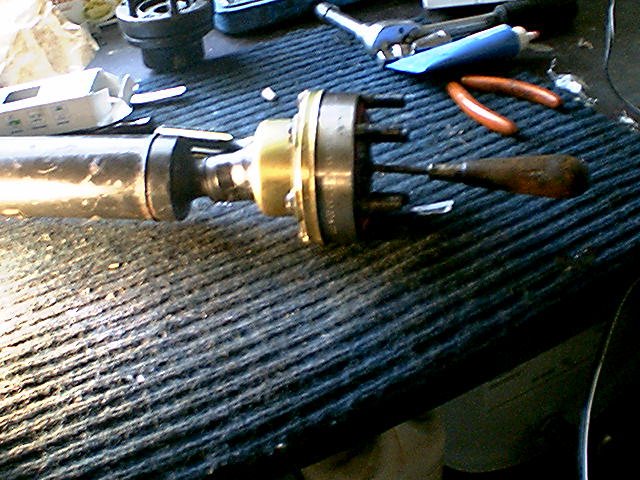
Removing the old CV joint can require a puller. First remove the rubber boot clamp and remove the circlip which holds the joint to the shaft. In my case, I could easily whack the CV joint of the shaft with a soft hammer.
No adhesive like locktite or something was used on the splines (fortunately):
Above, the removed CV joint. Note the signs of earlier abuse. Apparently, some gorilla in the past unbolted only the front section of the driveshaft, allowing the driveshaft hang unsupported.
Sometimes I hate the thought that such idiot people had worked on this car.
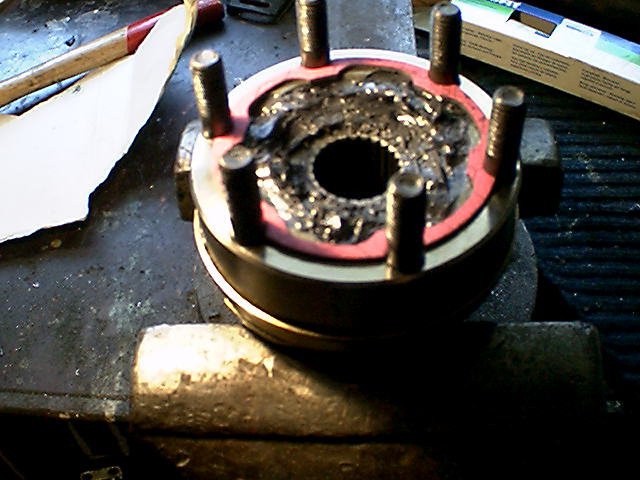
Close up of the old CV. I noticed immediately the lack of grease in the joint and the huge amount of play:
Remark: I didn’t replace the center bearing. At this point, some people might do that. Good decision.
The following information is quoted from a post from Rainman (http://bimmer.roadfly.org/bmw/forums/e32/) for the procedure of removing the center bearing:
“As far as separating the driveshafts to change only the center bearing its quite simple. There are only 2 styles used on BMW. One uses a large nut which clamps down on the splined shaft behind the center bearing and the other type uses a bolt in the end of one driveshaft behind the ujoint. The large nut type you just loosen the nut and slide the shafts apart to get at the center bearing assembly. The other type you loosen the bolt behind the u-joint a few turns then slide the shafts apart some , then loosen a few more turns, slide apart some more. Repeat until the bolt is all the way out and you can take the shafts apart. Before you start on any of this , take a paint marker and mark the 2 halves so they always go back together correctly.”
A couple of days later the parts arrived. See the end of this section for prices. I ordered the following parts at the local BMW dealer:
- 2 exhaust brackets
- 2 tranny mounts
- 1 CV joint
- 4 exhaust gaskets
- a gasket for the CV joint (very important!!!!)
A comparison between the old and new CV joint:
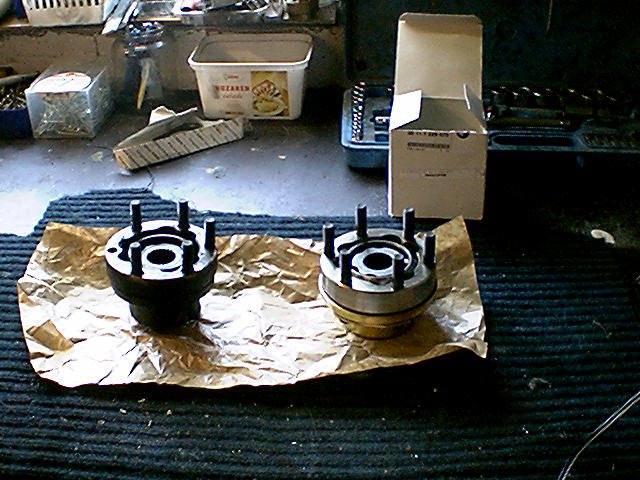
The new one has a different part. no., looks heavier and more robust. Notice the worn inner race of the old (at the left) CV joint.
The only thing that was common between them, was the total lack of grease…the new joint comes with no grease at all.
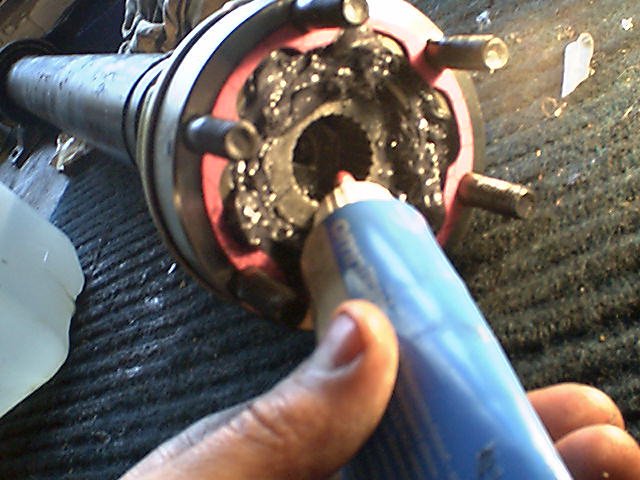
Of course, I discovered this at home. Back to the shop. You’ll need app. 80 grams of grease. Don’t use more grease:
Work the grease down the cage. Swivel the inner race a bit. Make sure all grease is used. Now comes the most important part, which in most cases is overlooked or forgotten.
There MUST be a gasket between the CV joint and the rear diff flange. This gasket prevents the grease spreading all over your rear sub-frame…and there are other ways to prevent rust.
This is why my CV joint failed, because the gasket was missing.
Later I found out that the ‘Previous Owner’ ordered a shop (not a BMW dealer) to replace the driveshaft.
They used a driveshaft from a salvaged BMW and forgot (or simply didn’t know, lacking an impressive amount of brains) to mount a new gasket.
Without gasket and later on without grease, these couplings don’t last very long.
These experiences contribute towards my growing feeling that the only reliable mechanic you can trust to work on your car is yourself. Nobody else is interested in doing a good job.
Clean the surface thoroughly and mount the gasket (it works like putting a sticker on) on to the CV:
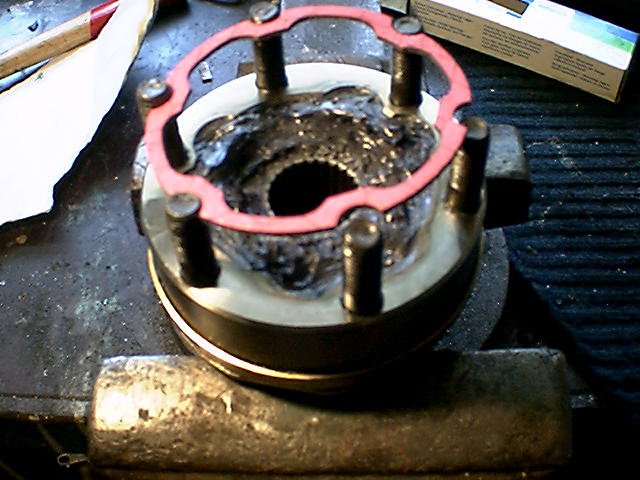
Did I mentioned already how important this gasket is? Now, clean the splines on the driveshaft where the CV joint is suppose to be and install the joint on to the driveshaft.
Don’t install it completely yet, first try to get the dust cover a couple of inches on to the driveshaft. I used a screwdriver with some tape wrapped at the end, preventing damaging the rubber boot:
When done, use some thread sealer on the splines. I used anaerobic single component adhesive from Omnifit (no aff).
Good stuff, but you can use any other sealant. 2K sealant isn’t necessary:
Make sure none of this sealer gets into the joint.
Install joint onto the driveshaft. Use some (light) hammering with a soft hammer, if necessary.
Install circlip and boot clamp. If everything worked out OK, it should look something like this:
Well, that’s about it. Installation is the reverse of removal. Don’t you just hate that when we say that?
There is more to it. First I installed the new tranny mounts.
Pretty straightforward, but keep it mind that they must be mounted only 1 way:
A bit of cleaning (I never saw a brand new, clean tranny rear cross member underneath a 14 year old car, do you?) and it should look like this:
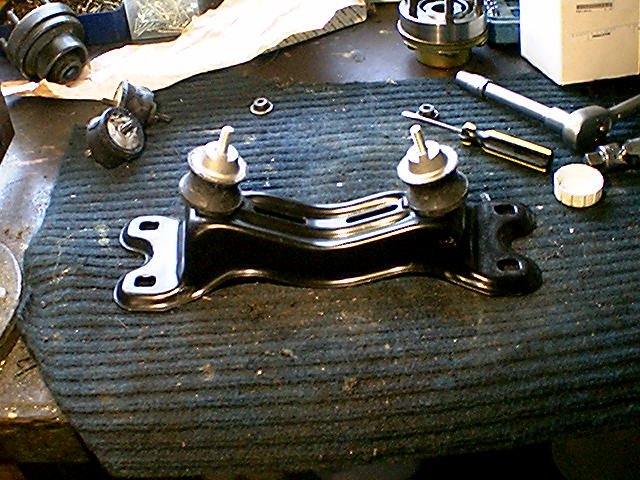
Beautiful! Too bad nobody can see it from underneath when installed. I needed the jack supporting the tranny, so I mounted the cross member first, and after that the driveshaft:
In addition: I used new gaskets between the exhaust manifolds and the front exhaust pipes. You’ll need 4 of them. Maybe next time I’ll reuse them, to try if that will work.
Pay attention to the center bearing. It must be properly aligned in the center of the car, and must be mounted with some preload. Preload center bearing approximately 4 mm towards front of car when tightening those bolts.
Connect the lambda sensors to the corresponding connectors. Remember, you just don’t want the left bank signal hooked up on the DME computer of the right bank…..of course you marked them.
Use anti-seize compound on every thread, bolt and stud, especially on all exhaust bolts. Use an old toothbrush to get it into the threads.
After a couple of months, when replacing a tranny seal or part of the exhaust or…..you’ll be thankful for this advice. These are old cars, there isn’t a reason why this car will run without any major problems until the next buyer buys it.
Total amount of parts and cost (prices in USD): Some prices or partners may differ from country, model or year.
Check out your dealer for the right partners for your car.
| BMW Part Number | Description | Price | QTY |
| 11761716708 | Exhaust bracket | $8.13 | 2 |
| 11761711717 | Exhaust Manifold Gasket | $17.86 | 4 |
| 26111229075 | Drive Shaft CV Joint 96mm / 10mm studs | $388.61 | 1 |
| 26111229503 | Drive Shaft CV Joint Gasket (103mm) | $7.66 | 1 |
| 24711131663 | Automatic Transmission Mount | $6.93 | 2 |
Total amount of time: about a day
Skills needed/difficulty level: not for the faint of heart, but it can be done. No special tools required, just the basic 2 right hands, wrenches, sockets and ratchet. Perhaps a puller.
Satisfactory level after the job done: very good. Car runs smooth, and no vibration whatsoever. Time to get a beer.
Some things I should have done but I overlooked, forgotten, just being too lazy or didn’t replace because I am cheap and now I am regretting that while everything is reinstalled already and I drove it for a few thousand kilometers/miles?
Yeah. I should have replaced the transmission rear seal while I was at it. At that moment, it looked OK…..and the tranny had been rebuild 40 dkm ago.
So I thought . . . well ok . . . it was already a bit wet around that area . . . but gee . . . I needed the car next Monday and it was already Saturday and the local dealer was closed and my wife told me that I put enough time into that car for this weekend . . .