Article by: Sean
Article applies to: all BMW models.
Problem: Lots of them. What else did you think? It started with vibrations from 0-60 km/h (0-40 mph) under mild or hard acceleration, highway speeds no problem. Later it became a knocking, thumping and clunking sound from underneath the car (located somewhere between the front seats, beneath the parking brake) when taking off. This got progressively worse until the banging and smashing sounds had gotten so loud I thought the drive shaft would take a peek inside the interior. At a certain moment, I couldn’t ignore it anymore.
Yep, I threw the center bearing. A common problem. I waited (too) long with the repair because it’s a time consuming job to replace and I just recently finished the water pump replacement. You probably won’t believe it, but I do try to live a normal life between a couple of repair story’s…(hah! I’d wish!)
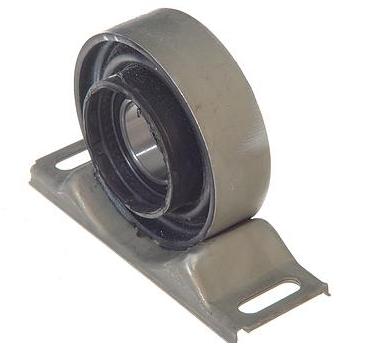
Background: Also known as the drive shaft center support bearing or center mounting.
The E32 drive shaft (for automatic transmissions) is a 2 piece unit with universal joints (U-joints) in the front section, a center bearing and CV-joint in the rear section. On some models (every model with manual gearbox and all 730i-v8/740i models) the front U-joint is missing and a rubber ‘guibo’ is installed where the drive shaft connects the transmission output flange. Basically, all the drive shaft components can wear. In addition, the rubber guibo can rot and deteriorate.
The U-joints can’t be greased (no fitting) and are considered not to be serviceable nor replaceable because they are staked in, which in my opinion is not a good thing…but read on. The CV-joint (see out story drive shaft CV joint) and center bearing can be replaced.
The center bearing alone can be shot, that often happens, but mostly there is a cause. Several experiences learn that the center bearing usually go bad due to bad universal joints. So inspect them carefully. It is theorized that the front U-joint freezes thus leading to the middle section of drive shaft swinging around the center bearing and torn the rubber (or worse). I will go into detail about this later on. Further more, inspect also the tranny mounts while you’re at it. They usually wear quickly out due to a wobbling drive shaft.
And as a last remark: if you have the Bentley book to assist you, ditch it regarding the drive shaft center bearing replacement. I never seen an E32 drive shaft like described there. Your drive shaft doesn’t have a snap ring nor a sliding coupling so forget that story and read this. Not convinced yet? A couple of remarks from others replacing their center bearing:
Tom: ‘Bentley’s was not even close to my drive shaft‘
Hallen: ‘So, I am reading the Bentley, and it says to unscrew the retaining ring, pull back the boot and remove the snap ring. My drive shaft does not seem to have a retaining ring and I can’t see a snap ring.’
Pat: ‘I have a 750 drive shaft and the Bentley did little for me.’
Let’s get wrenching:
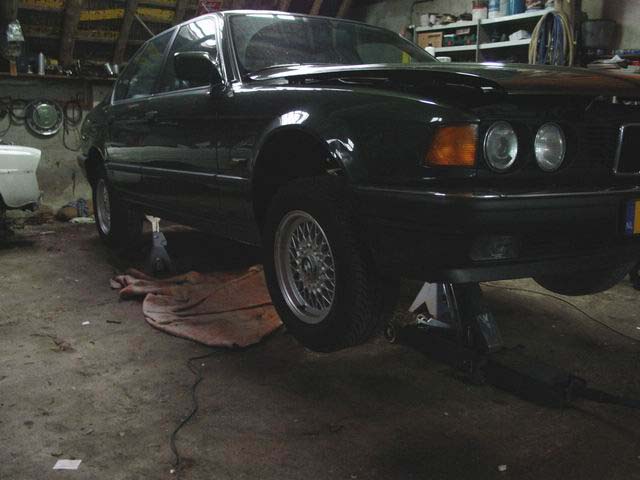
The first step is to raise the car sufficiently. The exhaust must be lowered so you’ll need enough clearance. For these kind of jobs, I spare no amount of time setting things up safely. I don’t feel like being part of a car sandwich.
Johan in Australia about safety: “Forged jack stands and a rock solid concrete surface. You’re under there wrestling the drive shaft bolts on and off . . . dying under a 7 is not my idea of going out in style!”
Time to crawl underneath, you’ll be spending quite some time here so get comfortable.
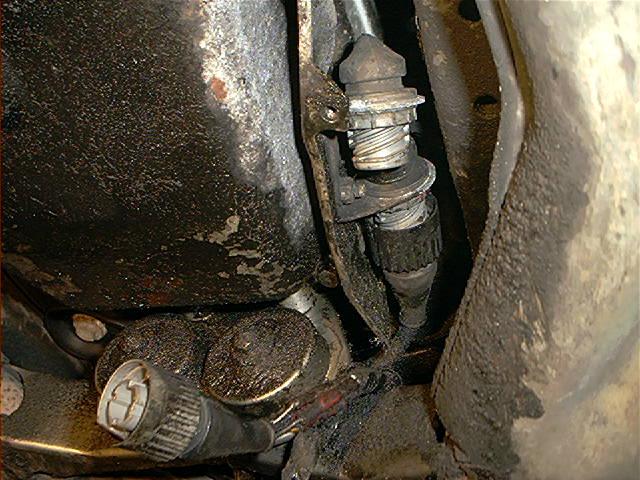
Next to the tranny, you’ll have the 2 connectors for both lambda sensors (750 only, the 735i only has one).
Disconnect them. In my case, the grey connector is the lower one and the black connector is the upper one. Please don’t switch them while reconnecting:
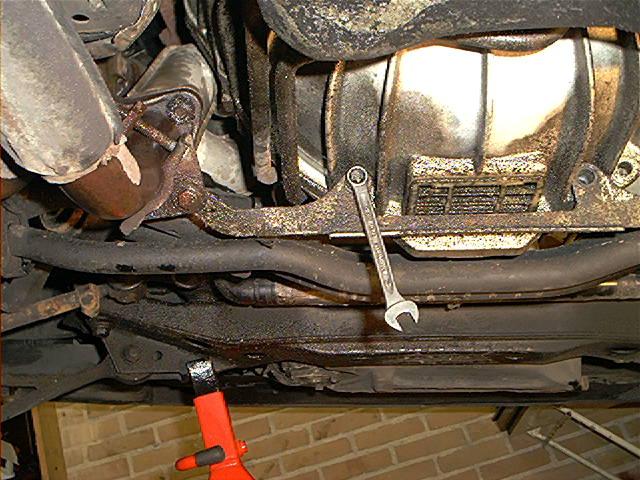
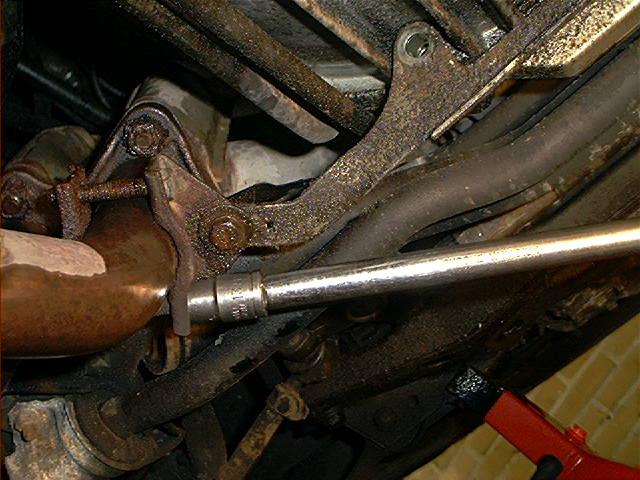
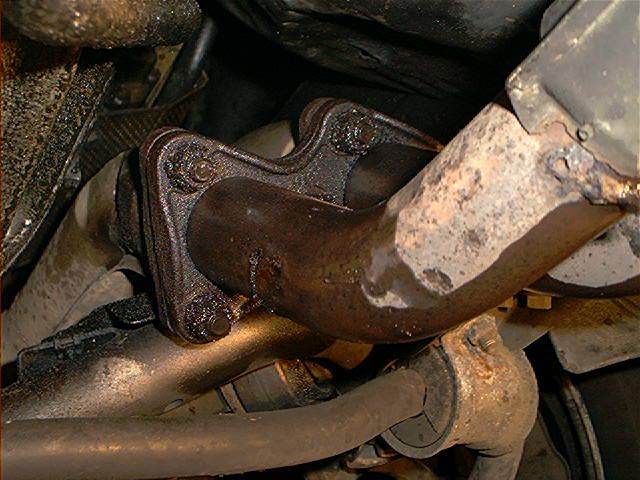
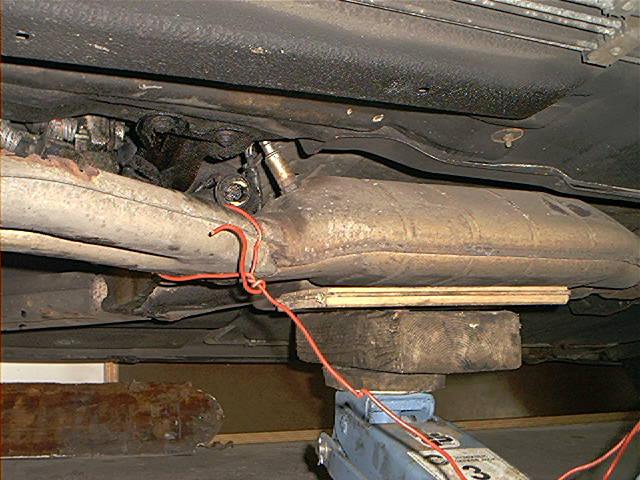
Unbolt exhaust center bracket from transmission.
If you don’t succeed in using a 10mm wrench, you should use a Torx E12 socket.
Notice I already soaked every exhaust bolts and flange nuts liberally with penetrating oil:
Usually, the bracket bolts are very rusty. To prevent snapping them off, I removed one bolt only and the other just a few turns:
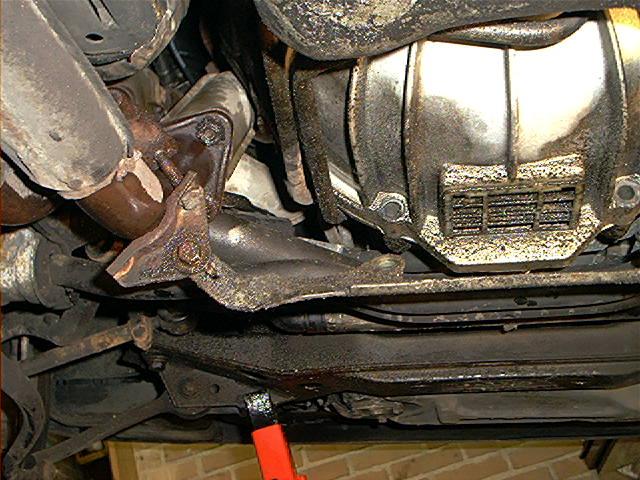
The bracket is finally starting to come loose. What a pain.
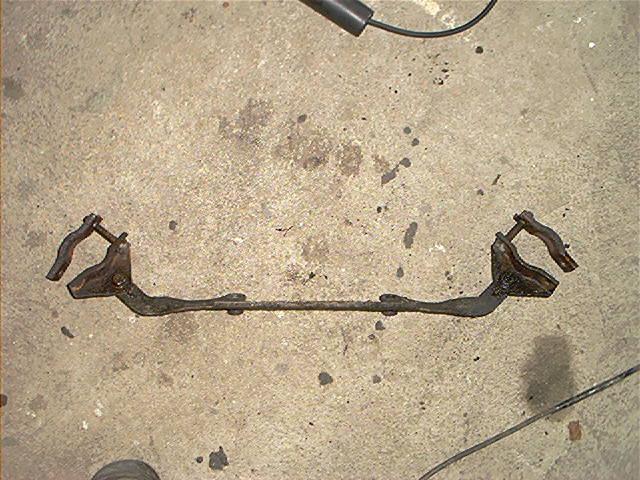
The removed bracket:
Next, undo both flange nuts from the second exhaust bracket that is located at the rear of the tranny. Just remove those 2 rear nuts, leave center bracket attached:
Ah, those exhaust nuts. I cannot emphasize enough how important it is that you soaked them before with penetration oil and take your time to loosen them.
I have heard many stories of broken studs which are a royal pain in the ass to fix because of the difficult location of the down pipes:
My bolts were badly rusted and a pain to remove:
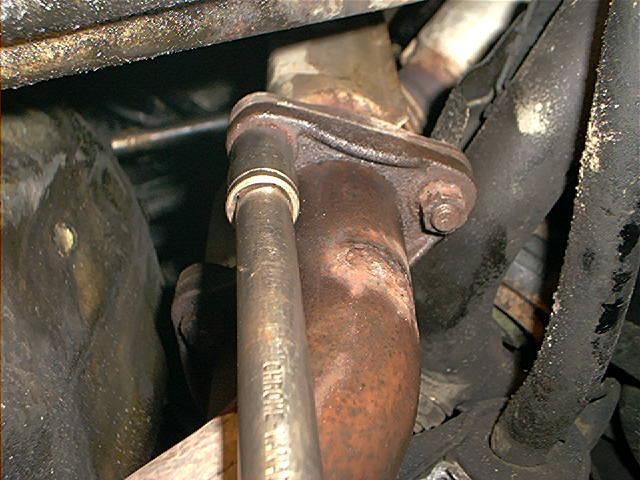
Normally, you use a 15mm socket for this purpose. Some nuts were extremely stubborn and got damaged, so I sometimes whacked a 14mm socket onto the bolt.
Ending up searching for some new exhaust bolts, so that was the second trip to the hardware store that day:
None of the studs broke – thankfully. At this time you should start to support the exhaust. I used two hydraulic jacks for that, because it’s a heavy beast.
The exhaust is supported by 2 rubber mounting rings, which are also a pain to remove. I usually bend the lip of the bracket in order to slip the ring out.
Tip from Sean: raise the exhaust with the hydraulic jacks as much as you can to release tension and make removal of the ring easier.
Replace rings if they are teared or cracked (like this one):
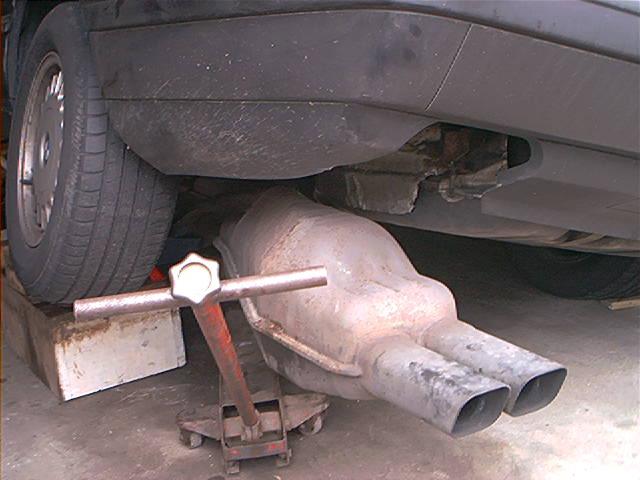
Unbolt 2 brackets of the rear muffler (photo stolen from Johan because I forgot to take a picture of that):
The next couple of photos shows the lowering of the exhaust.
You should first lower the exhaust a little bit, then pull it slightly to the rear (allowing it to release from the studs of the down pipes and center exhaust bracket) before lowering it finally:
Notice the disconnected lambda sensors:
Exhaust removed and started to remove the heat shield. It’s bolted to the chassis with 6 M10 bolts (which are quite large for such a thin shield):
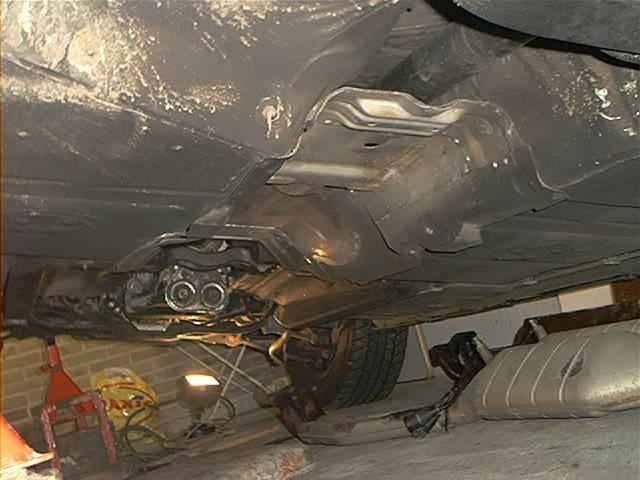
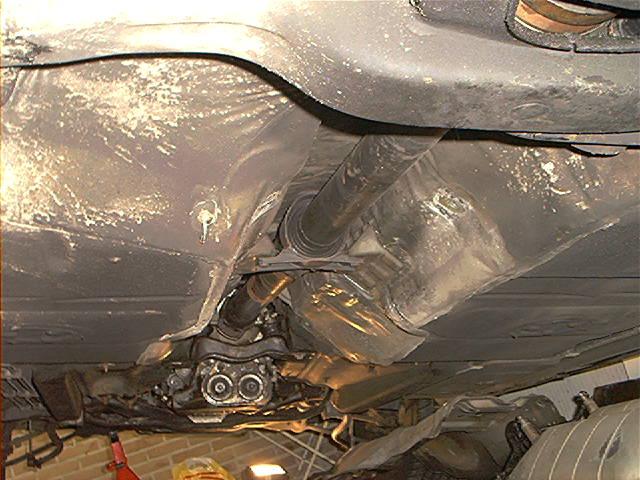
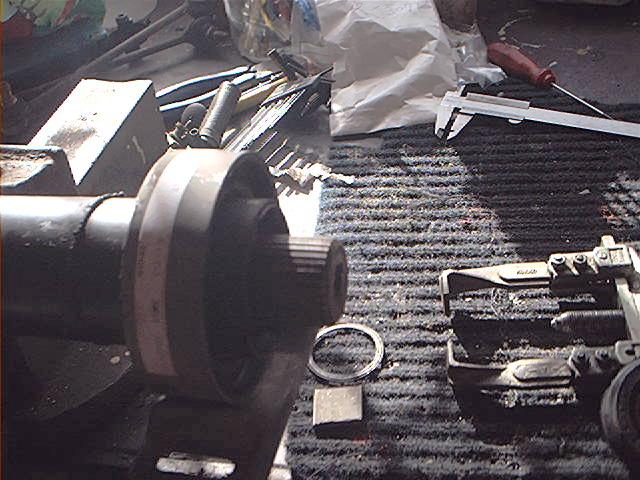
Heat shield removed, about to remove the drive shaft.
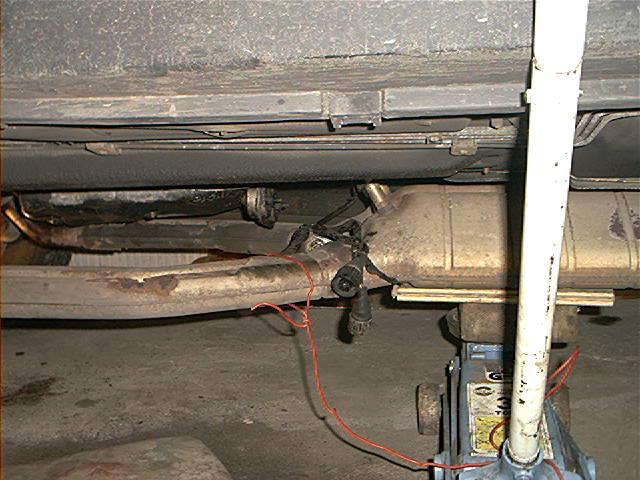
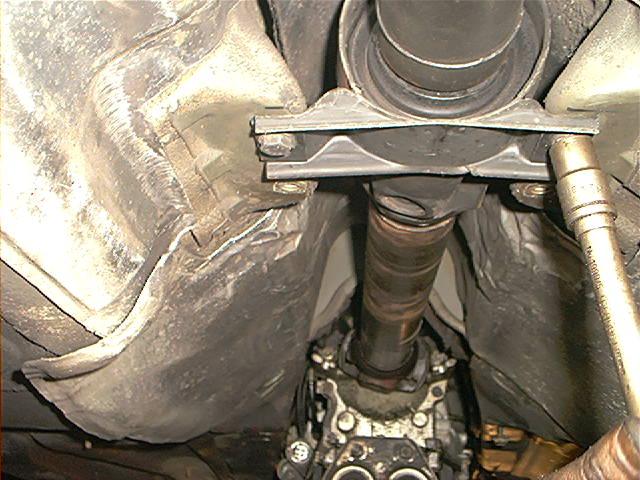
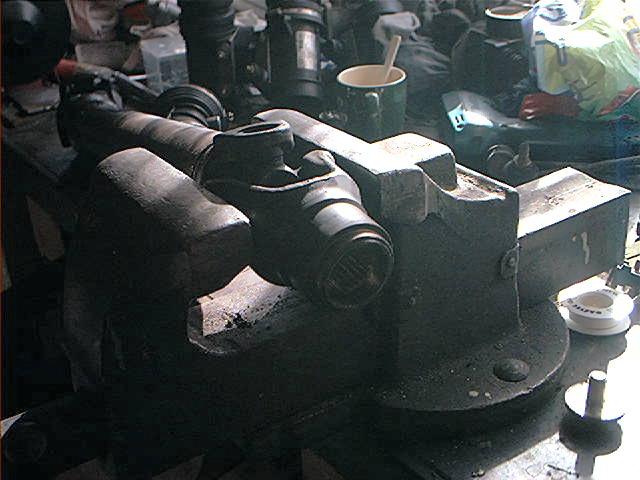
The drive shaft is held in place by 4 large bolts at the transmission flange (remember no guibo here – that’s for a standard transmission only), 2 bolts supporting the center bearing and 6 nuts of the rear CV joint:
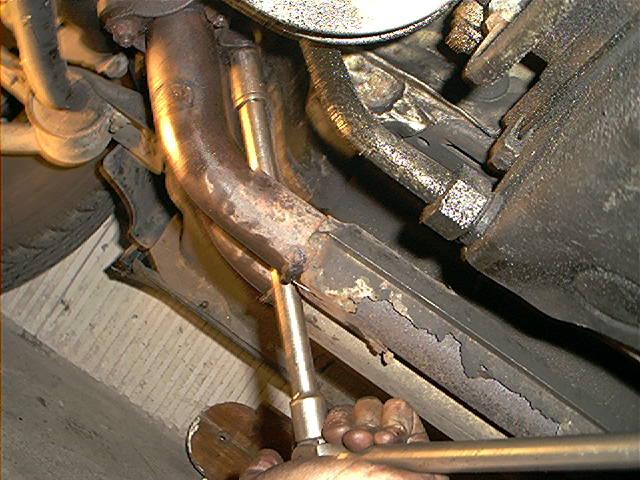
The 4 bolts holding the drive shaft to the transmission output flange are hard to reach. So I removed also the transmission cross member to gain access, don’t forget to support the transmission:
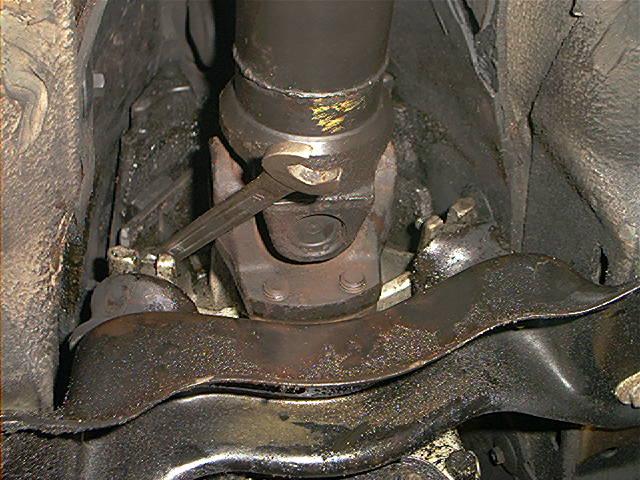
I used a 19mm wrench with a piece of pipe to unbolt the bolts. I kept the car in Park because the bolts were put in tight. I left one bolt a couple of turns in place so I could unbolt the other parts of the drive shaft first:
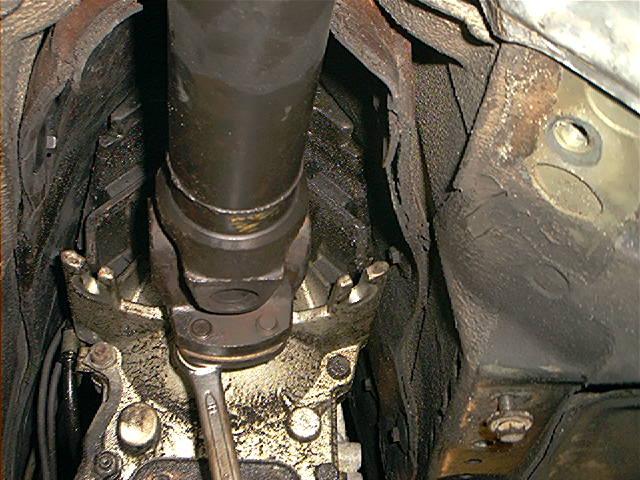
Loosen the 6x13mm nuts of the rear CV joint, this goes easier if one rear wheel can turn freely because you have access to just 2 or 3 bolts at the same time:
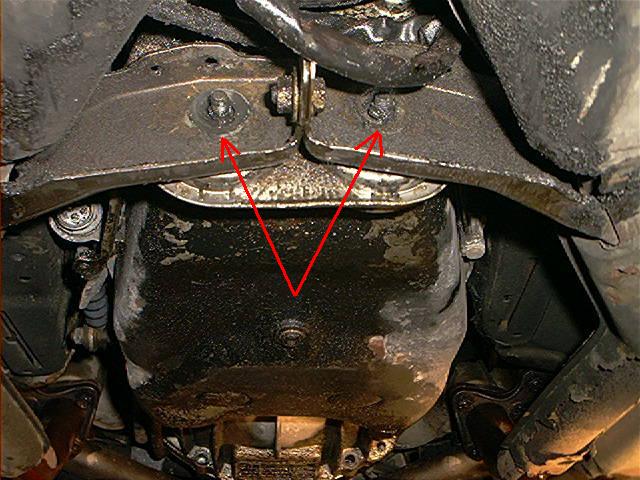
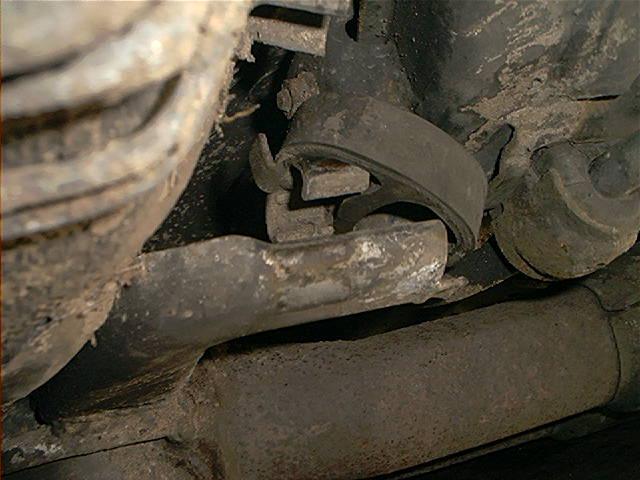
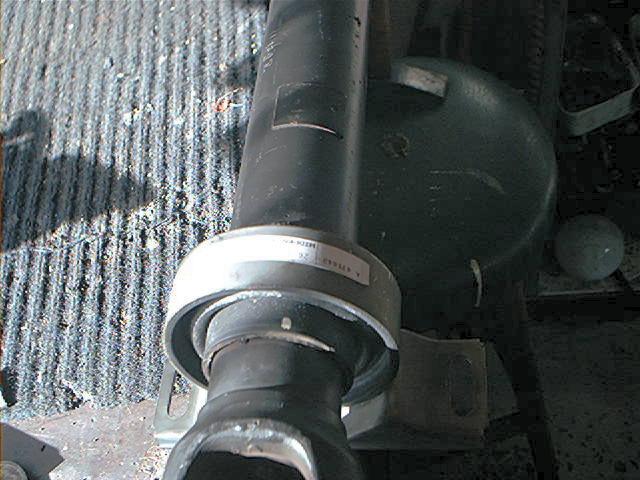
Unbolting the center support bearing (2x13mm bolts). Some prefer to mark the position of the center bearing so the new one is installed in the same position:
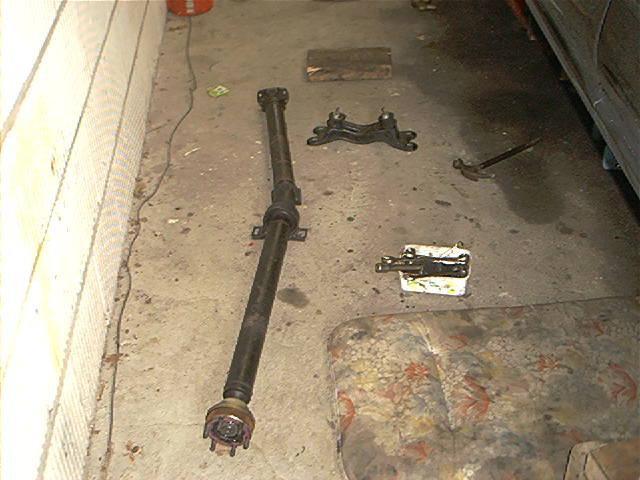
Congrats, a removed drive shaft. Next to it the removed transmission cross member and a bucket to collect the bolts:
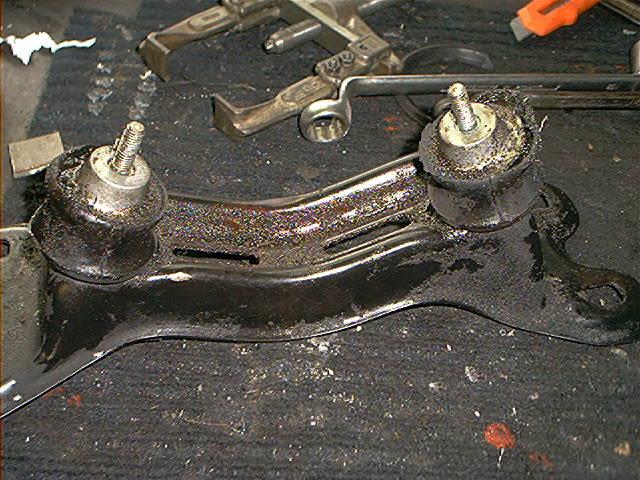
About 2.5 years ago (see section ‘drive shaft rear CV joint‘) I replaced those mounts and now they are worn again.
A proof that drive shaft problems causes the transmission mounts to wear out quickly:
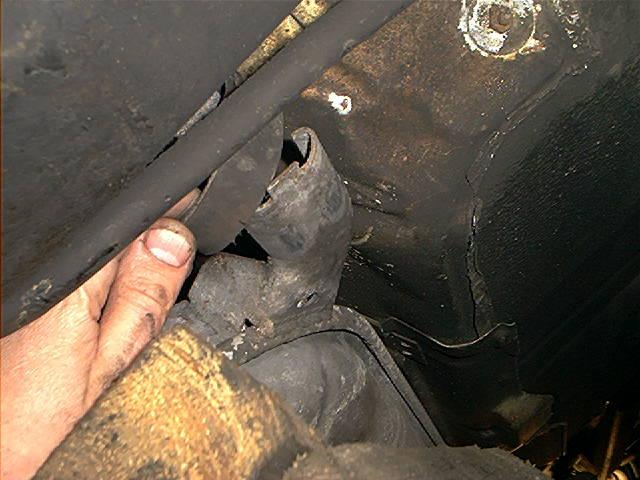
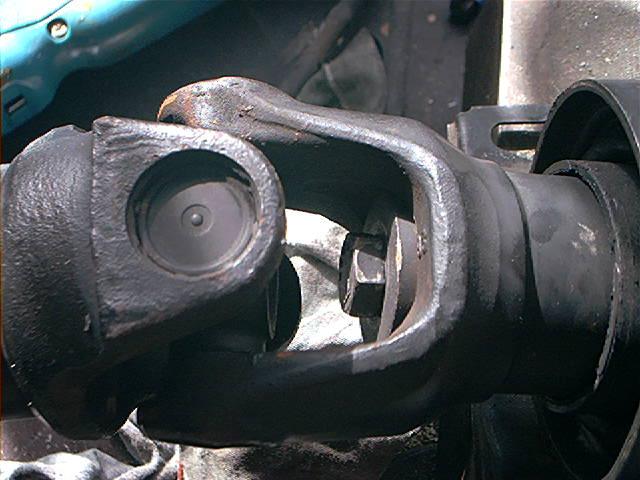
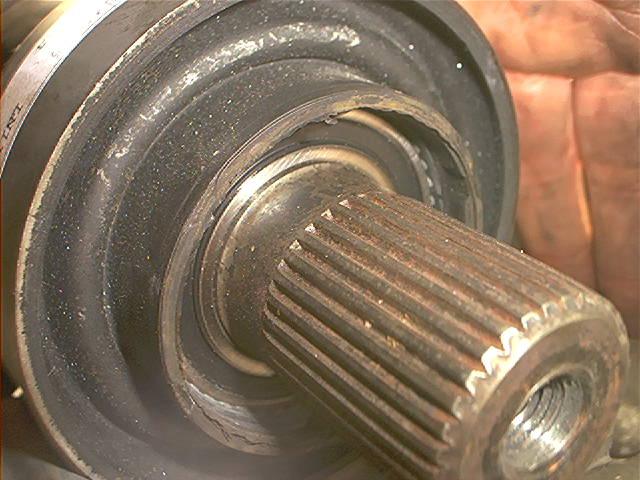
Ok, at this point the fun ended and some real problems started. As you can see, my center bearing was severely shot.
The center bearing is a sleeve bearing, surrounded by a rubber sleeve which in turn is attached to the center bearing hanger. As you can see, the rubber sleeve is torn:
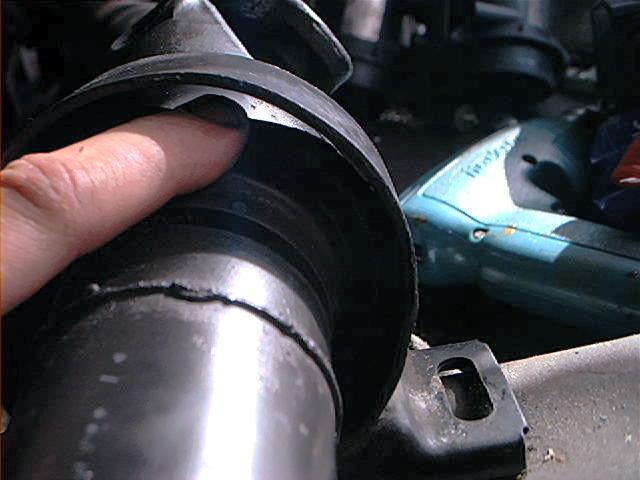
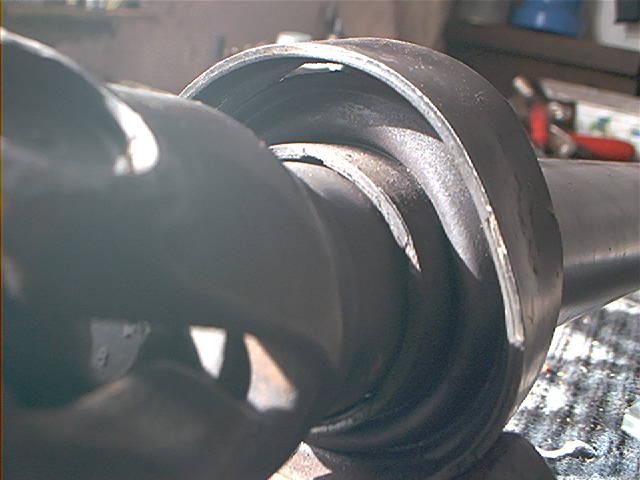
Again, this can happen but this can also be caused by a seized front U-joint. A bad center bearing can be a symptom of that. Freezing of the U-joint further causes the driveshaft to precess and oscillate around the rubber sleeve, deteriorating the sleeve more rapidly.
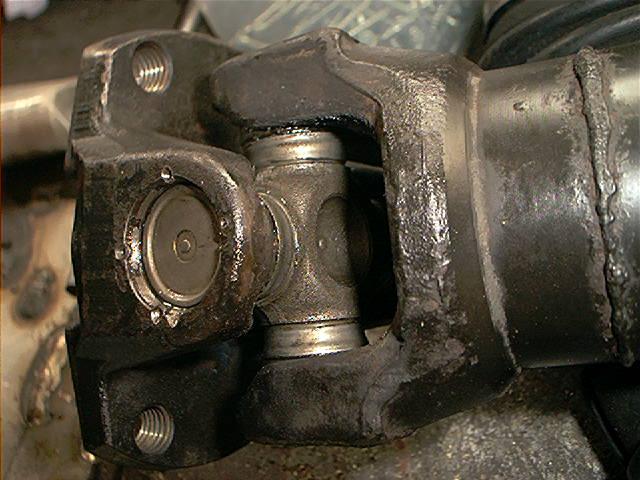
So I inspected my U-joints carefully, moving them back and forth. They should move without any noticeable ‘stiff’ feeling. Unfortunately I discovered that the front U-joint was seized, causing the center bearing to wear out. This is a problem, because the U-joints are considered not replaceable. The difficulty is that the non-greaseable u-joints are staked in at the factory, there are no grooves present for snap rings.
Most people decide to buy a complete rebuild drive shaft when this happens, and certainly in this situation (with a shot center bearing and a seized U-joint) that is the best option. But in our country rebuild drive shafts are not common, especially not for rare cars like the 750.
Anyway, this car had to be back on the road the next day so I had to figure something out. After some calling around I brought my drive shaft to a shop, which told me they could replace the U-joint. The U-joints seem to have a fairly standard size (24mmx74.5mm) which was in stock. They machined the old U-joint out, sanded the staking until the bores where smooth and pressed the new one in. Unfortunately they didn’t machined grooves for snap rings. They staked the new u-joint with a punch and loc-tite:
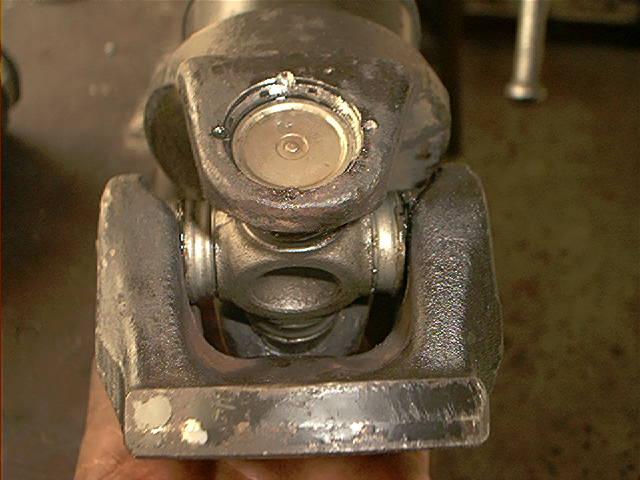
Personally, I didn’t think they did a very good job. There are other ways of doing this yourself, perhaps better. Gale about this: ‘The u-joint cups are held in place with a star washer that is staked with a punch. You’d need to grind the old stakes off with a Dremmel tool & stake the new one similarly with a punch.’
Another way of securing the u-joint (author unknown): ‘The “staking” is pressed out then sanded until smooth. The u-joints are then re-installed and staked with a tack welded washer.’
Snap rings are the way to go according to Frank: ‘The u-joints can be replaced but few places have the right tooling for the job. The difficulty is that the u-joints are staked in at the factory. During replacement, grooves need to be machined for snap rings to hold each of the u-joint bearing caps in. This is why special tooling is needed.’
Not everybody has good experiences when replacing U-joints: ‘I have paid $400 each drive shaft to have them done locally (Drive shaft King in Dallas) but I don’t think I will use them anymore since my last drive shaft developed a severe vibration within a few months of being rebuilt. I found that the snap ring groves were 1mm too far out. I pressed the caps back in and installed shims between the clip and u-joint to fix it. Anyway, find a reputable shop for the job.’
When you replace it yourself: make sure the new U-joint is perfectly, 100% aligned in the center of the drive shaft or else you will have more vibrations after the replacement then before. Not an easy task without snap rings and grooves.
Notice that my new U-joint also didn’t have a grease fitting. There are several opinions about non-grease-able joints and grease-able ones. I leave it up to you, but ask yourself how you are gonna grease the u-joint when the drive shaft is hidden behind the heat shield and exhaust (although some reported they drilled holes in the heat shield to access the grease fittings).
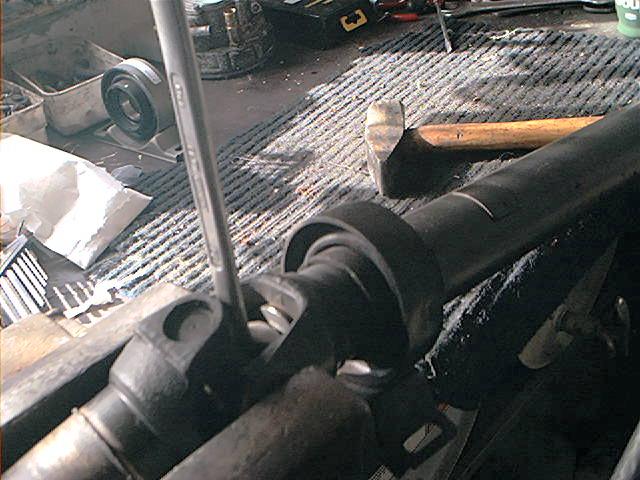
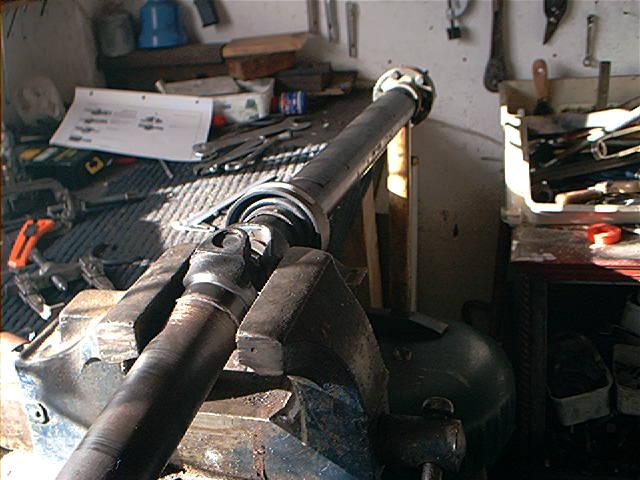
So much for the front u-joint. It was about 18:00 hours, I was tired, the car was still on ramps and there was so much work left to do. Well, I continued to replace the center bearing. The following photos are taken in the last light of evening…sorry for the back light.
It is important you mark both halves of the drive shaft before you separate them.
The drive shaft is balanced in one piece so the halves must be reassembled in the same position.
Lots of people take a paint marker for this but you can also identify the factory marks for this, 2 tiny little punches as shown here:
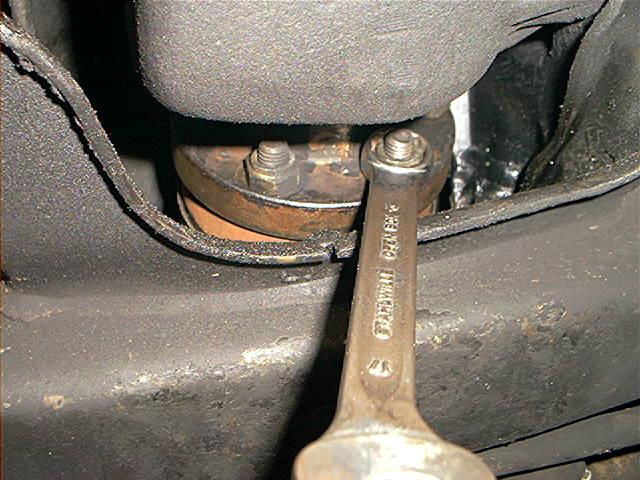
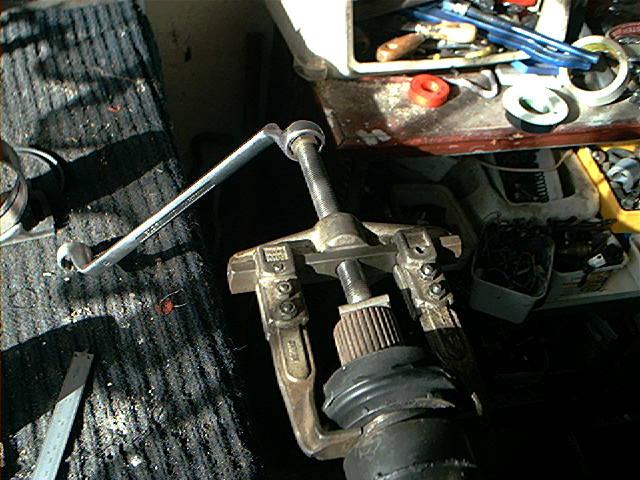
Locate the big 19mm nut behind the U-joint near the center bearing, unbolt it:
Loosen the bolt behind the u-joint a few turns then slide the shafts apart some, then loosen a few more turns, slide apart some more.
Repeat until the bolt is all the way out and you can take the shafts apart:
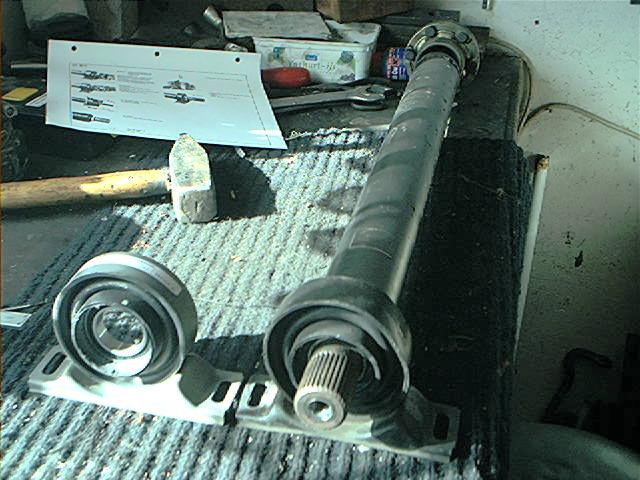
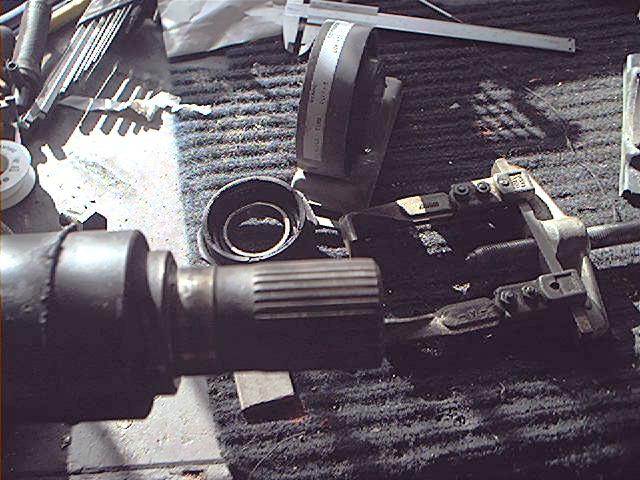
Shaft apart but old center bearing still installed. New center bearing awaiting to be installed:
The other part of the shaft in my bench vice. I dunno why, but I find this the most beautiful picture I ever took. The cup of coffee in the back was necessary to stay awake:
You need a puller to get the center bearing off as it was happy staying where it was. It just slides off but needs mechanical help.
As my puller was a little bit too small, I cut the rubber sleeve so I could remove the metal hanger. Notice the crack:
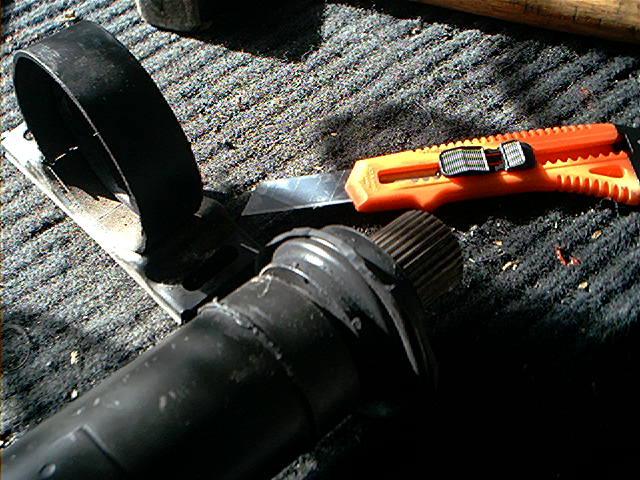
Pulling the old bearing:

Remember to note which way the bearing comes off so you put the new one back the right way:
Not everybody has a puller. Aussie Andy about this: ‘Now, I didn’t have access to a puller nor press so I v/carefully cut the old bearing off with a 4″ grinder & tapped the old bearing off.’
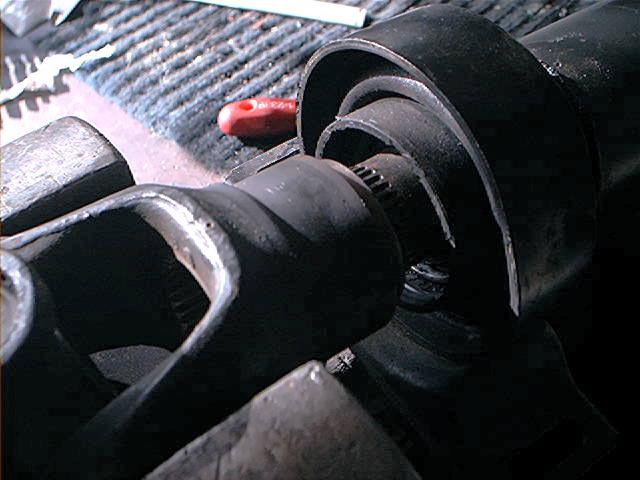
Installing the new center bearing onto the splined shaft. Notice the installation direction, the rubber sleeve must point towards the U-joint:
I replaced the new bearing by tapping it on with a similar sized interior diameter piece of pipe (2″ if I remember correctly). Stop tapping if the ridge of the shaft is barely visible like this:
Reinstall front shaft section and pay attention to the markings. I cannot emphasize how important that is.
The complete shaft was factory balanced in assembled state, so that the shaft sections must not be turned when assembled:
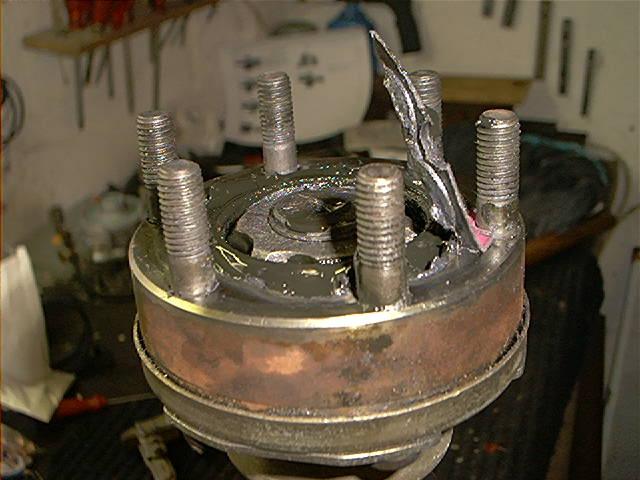
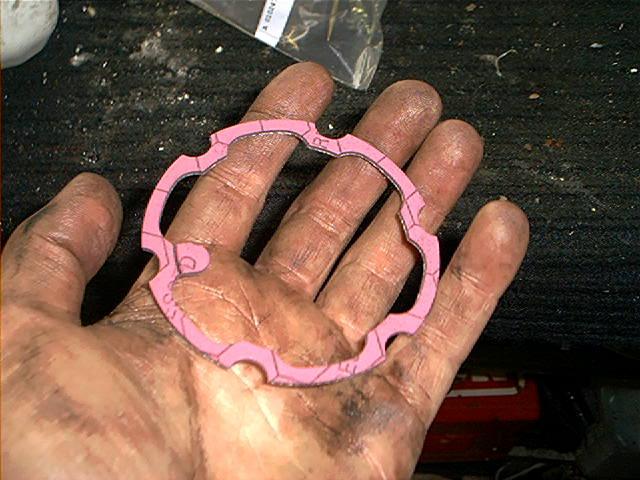
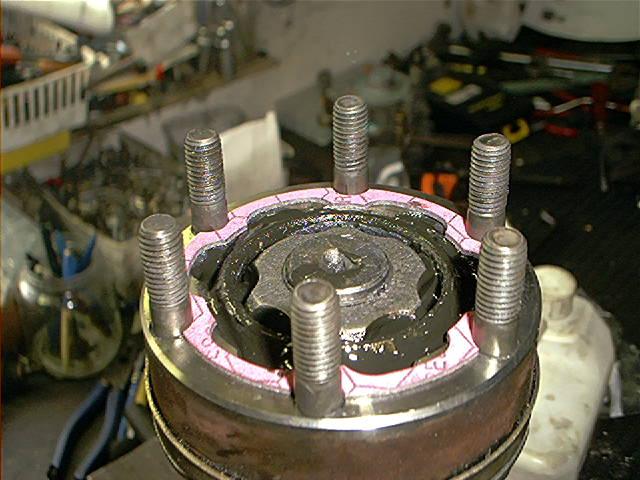
Replacing the rear CV joint gasket. It is a cheap gasket, so reusing is IMHO unnecessary. Some people decide not to replace it, I leave it up to you:
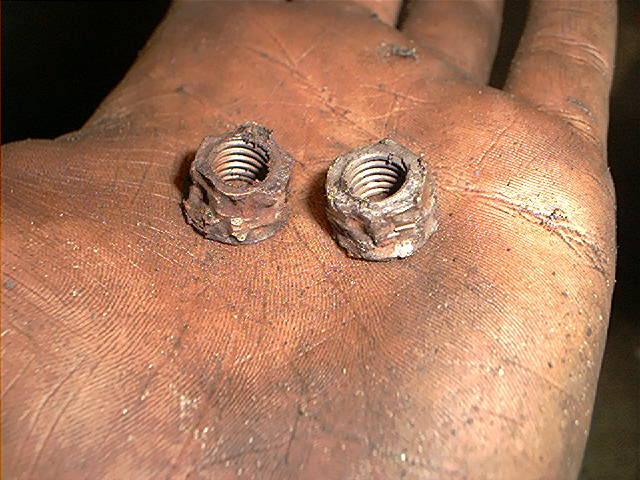
To prevent the exhaust stud bolts from rusting again, I bought myself some copper nuts. These are especially made for the exhaust, and can be bought by a local hardware store (not BMW dealer):
I also replaced my transmission rear seal while I was at it. Johan already created a story about that, so I will add some pictures of this replacement to his story in the near future.
Critical Step: While reinstalling, make sure you pre-load the center bearing 4~6mm towards the front of the car. You can also consider centering the drive shaft/transmission. I just used a tape measure to align the front of the d/s in the tunnel mid way side to side and slightly adjusted the center bearing and transmission bracket until it was in the middle of the tunnel.
Money spent: Prices in USD / no taxes . . .
| BMW Part Number | Description | Price | QTY |
| 26121226657 | Center bearing | $31.87 | 1 |
| 24111218009 | BMW Shaft Seal (40X5-8X10) | $7.32 | 1 |
| 26111229503 | BMW Drive Shaft CV Joint Gasket (103mm) | $7.66 | 1 |
Total amount of time: all day, evening and a part of the night because of the U-joint replacement. Missed supper time.
Skills needed/difficulty level: experienced DIY’er
Satisfactory level after the job done: Not very good. It took me a lot of work, time and money and I have still some vibrations because they didn’t properly centered the new U-joint. For the total amount of costs I could have bought myself an used drive shaft in good shape from eBay. Well, this is life and it doesn’t get any better than this.
Also, the badly staking of the new front U-joint scares the hell out of me and I am glad that if the U-joint falls apart with 180 km/h (112 mph), the drive shaft will rest on top of the heat shield/exhaust and doesn’t dig into the highway causing my car to crash (my worst nightmare).