Article by: Sean
Article applies to: all E31, E32 and E34 models.
Problem: whining or howling noises from the front that become louder as you increase speed, grind noises when turning the wheel of your car by hand (jacked up). Of course in my case I had a slightly different phenomenon: rattling noises from the front (like a loose shock absorber) while driving, that disappeared making a left turn, and become louder making a right turn. And no, the wheel bearing was not the first thing I thought of. A slight grinding noise when I turned the wheel by hand pointed at last at the bearing, after I checked the entire suspension and numerous other components 🙁
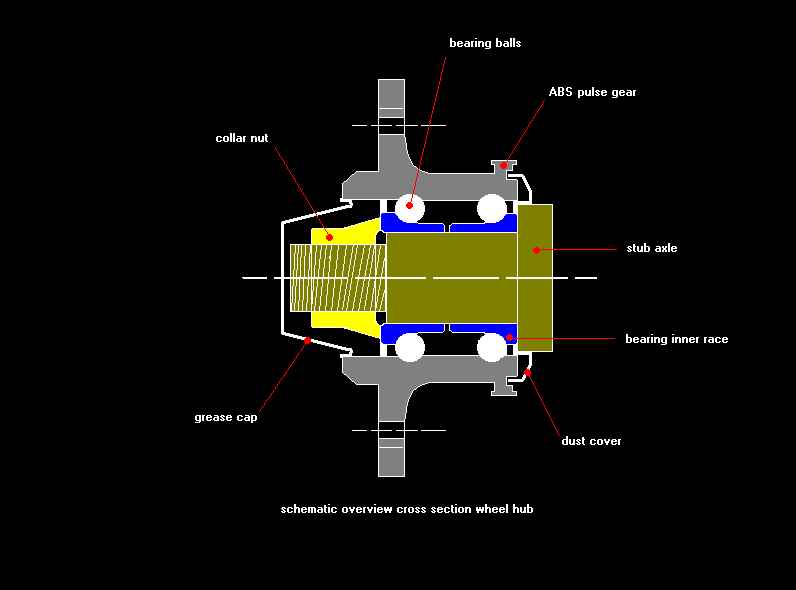
Used technique: You can’t change the bearing only. You must change the whole wheel hub, making it a pretty expensive bearing.
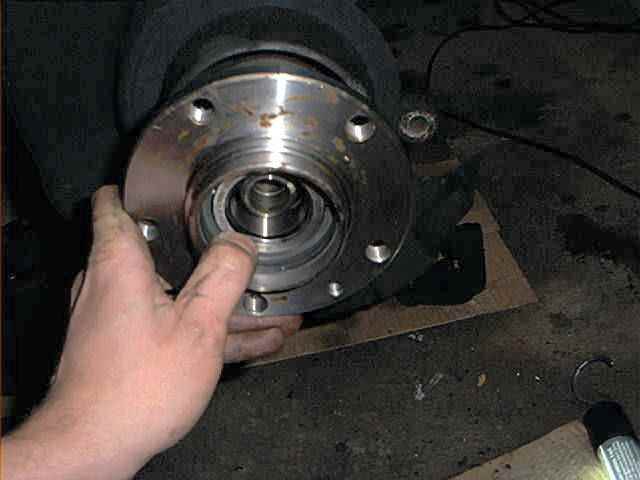
The bearing is running in the inner of the hub.
Look at the drawing below:
When purchasing a front wheel bearing, you can choose either your BMW dealer or the local auto store. The BMW bearing is not that expensive, considering the prices from other suppliers. Some informing around gave these prices:
- BMW dealer: 140 Euro/Dollar (incl. taxes) (part number: 31 21 1 129 386)
- Other suppliers: between 120-160 Euro/Dollar
I was cheap and bought the cheapest bearing I could get, from a local parts seller. The brand of the bearing stated ‘SKF’, which is fortunately a very good brand.
SKF is the world’s largest supplier of bearings, and my experiences are very good with them.
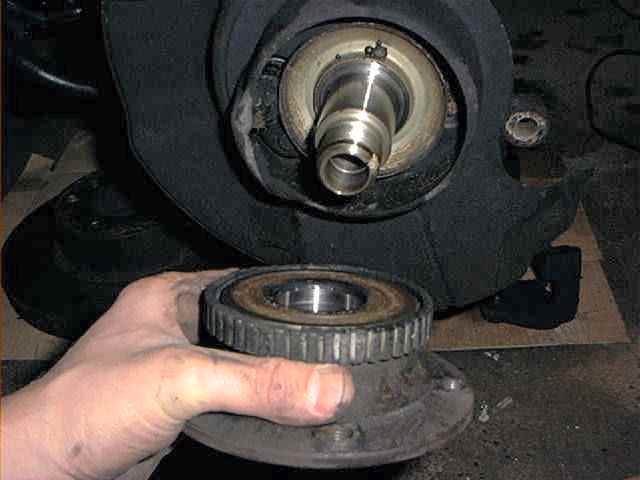
Keep also in mind that there are 2 types of bearings:
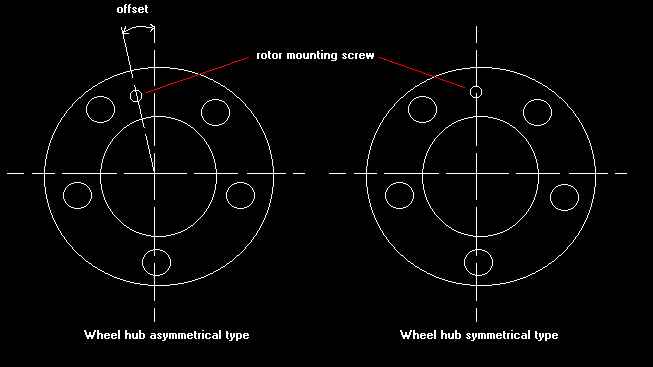
So you must first remove your wheel and check the current wheel hub for the position of the rotor mounting screw. The other type will fit, but there is a chance that your brake rotor won’t fit anymore (not every rotor has 2 holes for both types of mounting screws). In that case you won’t be a happy person.
Lets start unbolting things:
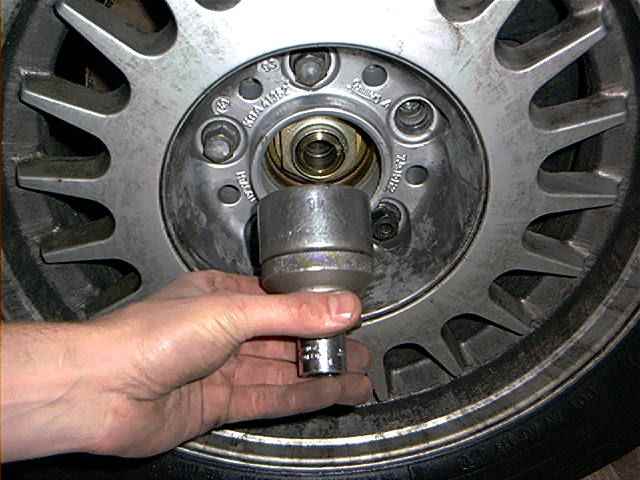
First of all, you need a special kind of socket. The wheel hub is bolted to the axle stub with a large 46 mm nut, with a stunning force of about 300 Nm. And yes, you need a socket and not a box-end wrench. Probably, your sockets won’t go any further than 32 mm. I went to my local garage and asked if I could borrow this particular socket. Fortunately, that wasn’t a problem so I ended up with a promise that next time I’ll treat them on pie 😉
First ~always handy~ remove the wheel:
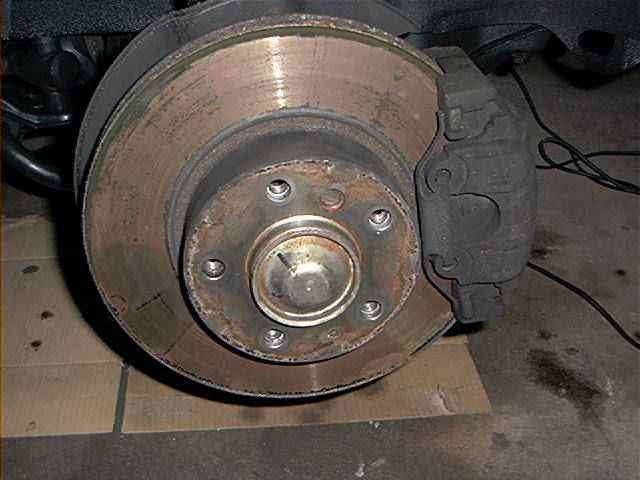
Pry off the grease cap, using a flat-blade screwdriver and a hammer. Work your way around the grease cap:
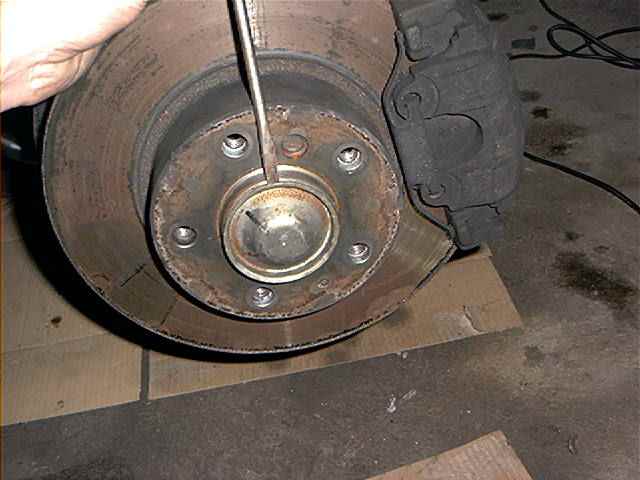
Bend stacked part of wheel hub nut back with a screwdriver:
Re-attach the wheel. You won’t be driving it, so 3 wheel studs will be fine:
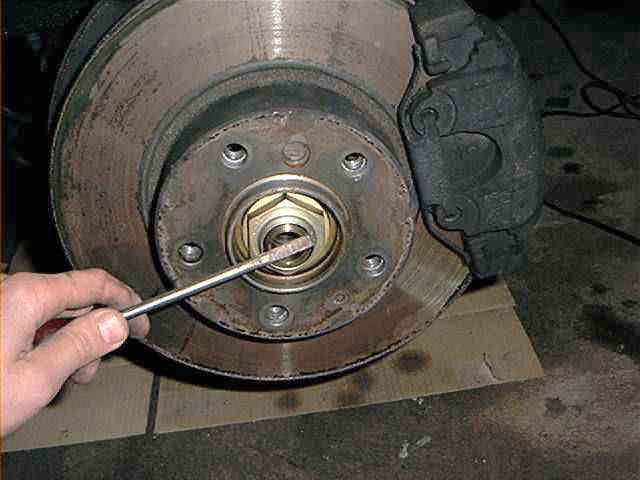
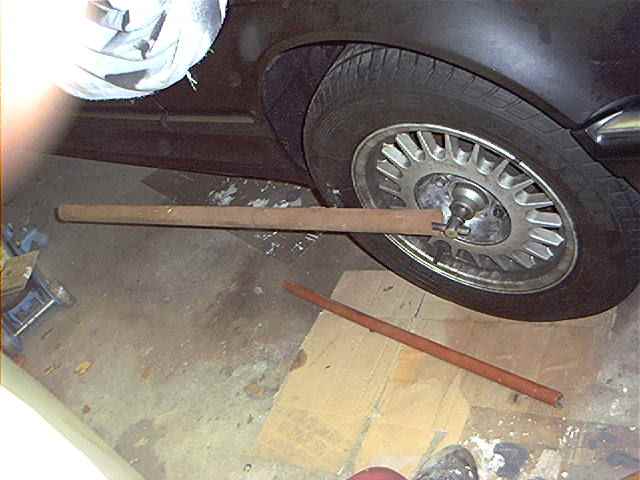
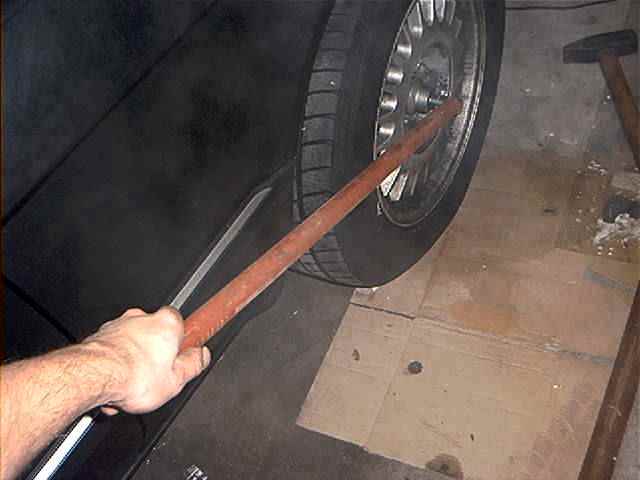
Lower the car, pull the handbrake firmly and put the car in gear or in P. Put the socket onto the nut through the rim:
Now use a long handled socket wrench.
I used a socket with a 1/2 connection because I didn’t have any other. It’s better to use 3/4 or 1″.
After some pulling I realized the used pipe was to short. So I used a 1.5 meter long steel pipe for extra leverage.
That did the job! Just loosen the nut a couple of turns (about 2), do not remove the entire nut yet!
Jack the car up for the second time (you didn’t thought this was easy huh?) and remove wheel again.
Now its time to remove the entire brake caliper assembly, but leave the brake hose connected.
If a ridge exist on the rotor edge, push the brake piston a bit (about 3mm) back into the caliper with water pump pliers, this makes it easy to remove the caliper from the rotor:

The caliper & carrier are mounted with 2 bolts. Remove the upper and lower bolt (19mm):
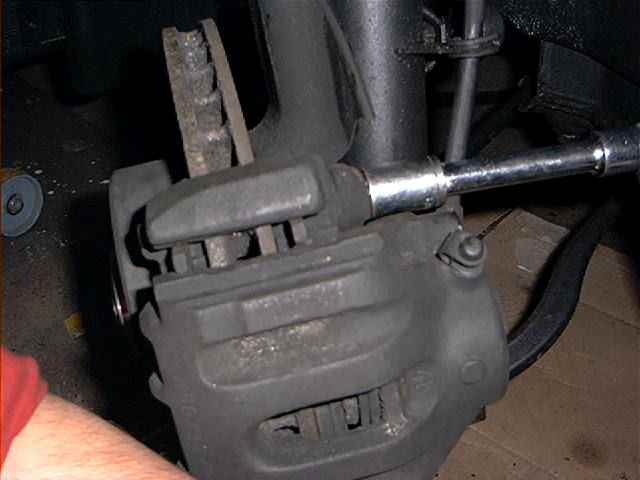
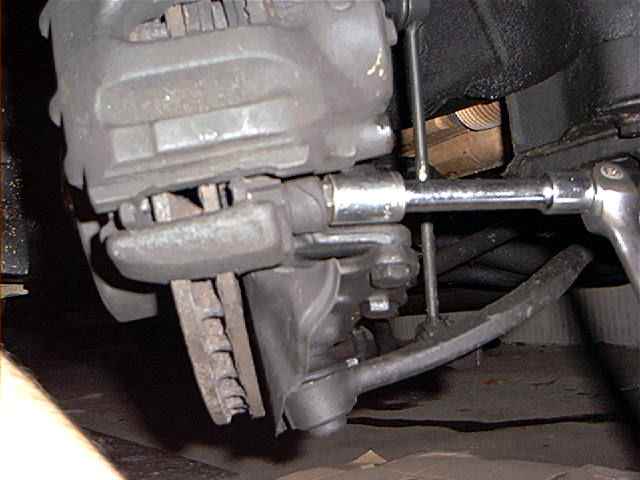
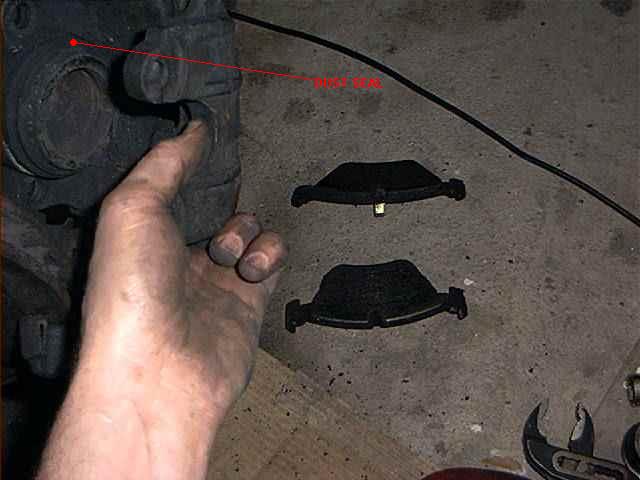
Remove brake caliper & carrier (don’t let it hang loose). Maybe it’s a good time to check the condition of the brake pads and dust seal while your at it.
If the dust seal is cracked or teared, replace it otherwise your caliper piston will corrode badly.
Remember, don’t let the caliper hang loose. Put it somewhere between the suspension or hook it up to a strong wire.
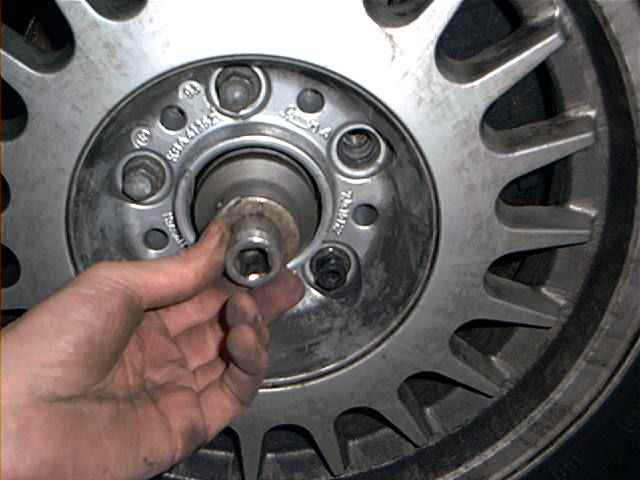
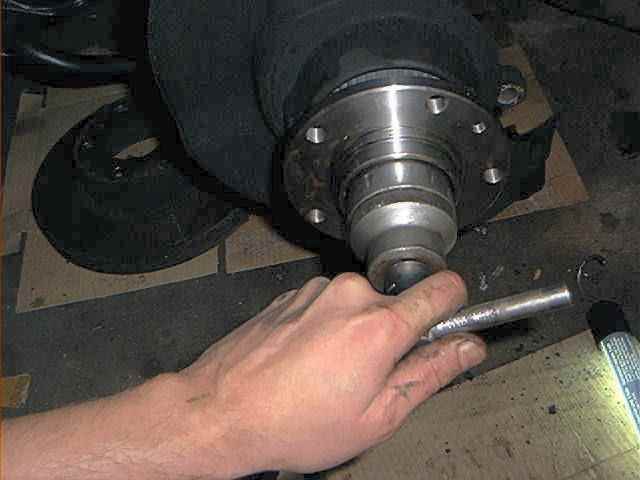
Remove the rotor mounting screw:
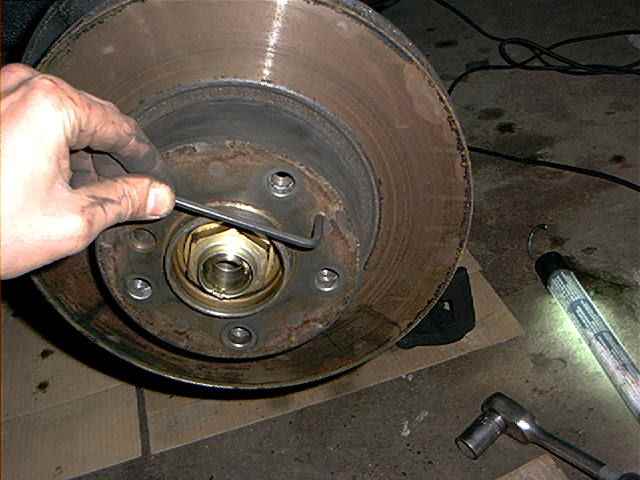
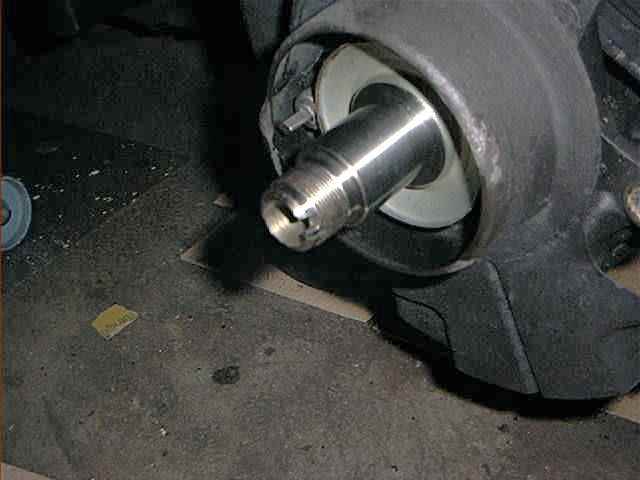
Remove nut from stub axle:
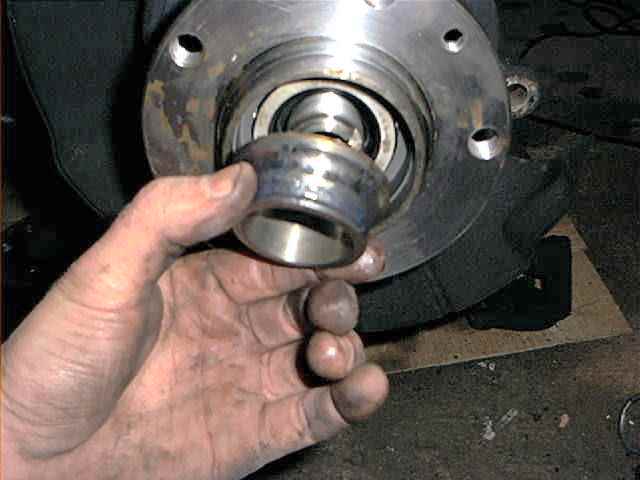
Now comes the tricky part, removing the old bearing from the stub axle. First you can pull with your hands, maybe you have a lucky day. I didn’t (I never have lucky days when it comes to repair my cars) so I used a hammer. Try to beat gently with a hammer on the right, supporting the left side of the bearing with your hand (my right hand was busy taking this photo, but you’ll get the point):
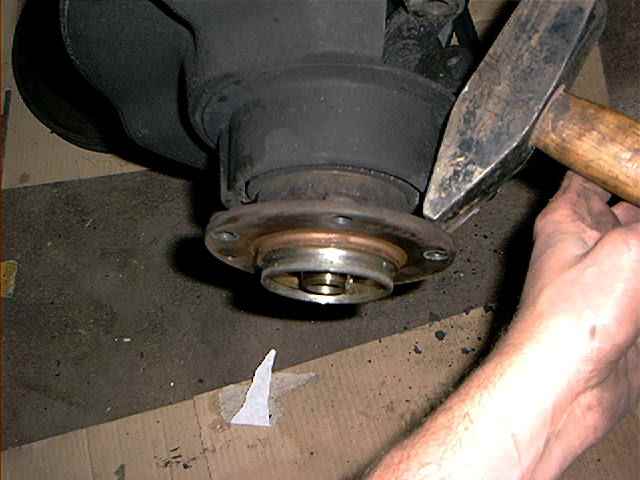
Don’t be afraid to damage something, the entire wheel hub will be replaced. In my case, I succeeded removing the bearing. If the hammering doesn’t work, you’ll need a puller.
Sometimes a part of the bearing (rear inner race or collar) remains on the stub axle. Tap, hammer or pull to remove it, but be very careful that you don’t damage the stub axle.
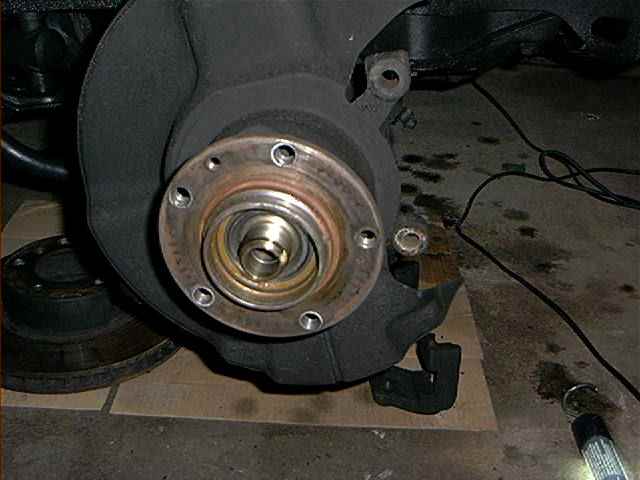
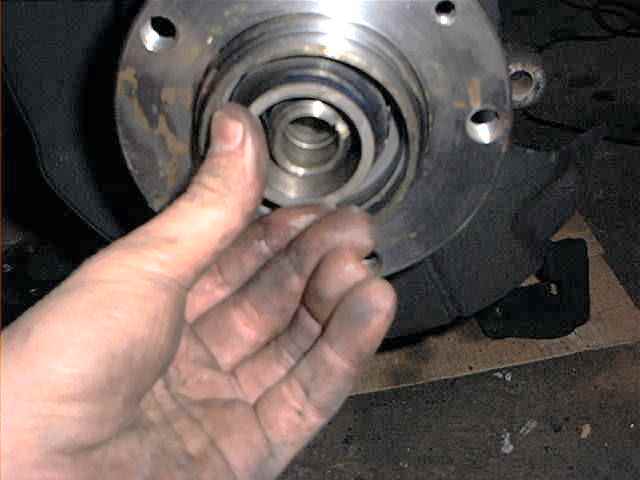
Some others are reporting that the dust cover behind the bearing must be replaced. I can’t agree to this. If its not broken, dented, badly rusted and furthermore in a good shape, leave it on the axle. The dust cover doesn’t wear out (no moving or sealing parts). Clean up the axle, dust cover and ABS sensor:
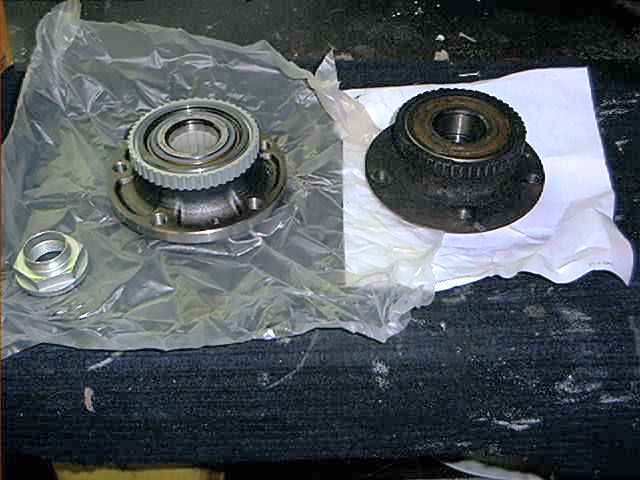
Ok. Now about the new bearing, new versus old (a new locking nut is included with the new bearing). The new bearing doesn’t have to be greased up by you. Its already greased up for life.

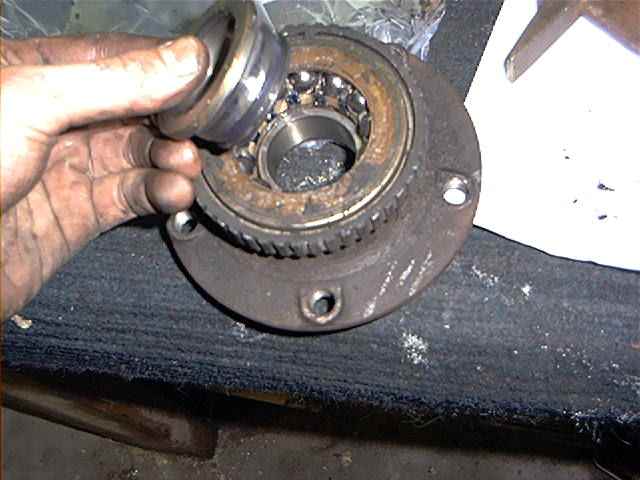
Don’t forget to remove the plastic ‘thingy’ inside the new bearing, it keeps both inner races together. Now remove the old inner race out of the old bearing:
You can use this to tap the new bearing onto the stub axle. But first, insert the new bearing onto the stub axle with your hands:
Mind to keep the inner races together, preventing the balls fall out of the cage. There comes a point you can’t push it much further. Now use the old inner race to gently tap the bearing (with a hammer) onto the stub axle, keep in mind that the old inner race must be positioned against the new inner race:
Just tap enough so you can put the nut on the first threads of the threaded part of the shaft, then discard the old inner race:
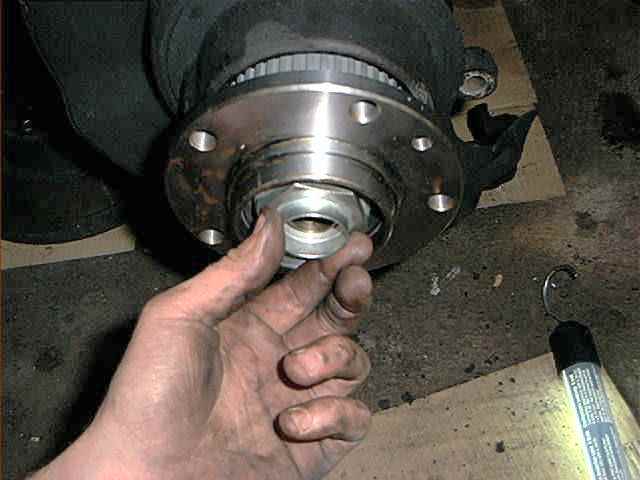
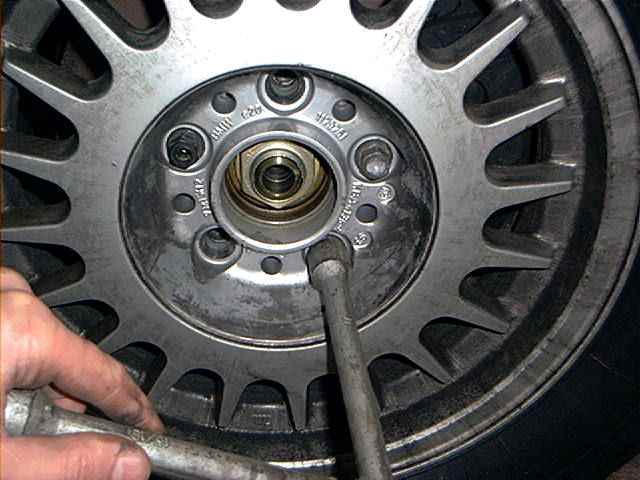
Tighten the nut gently with the 46 mm socket so it’s pushing the new bearing onto the shaft:
After this, tighten the nut firmly but without the extra leverage.
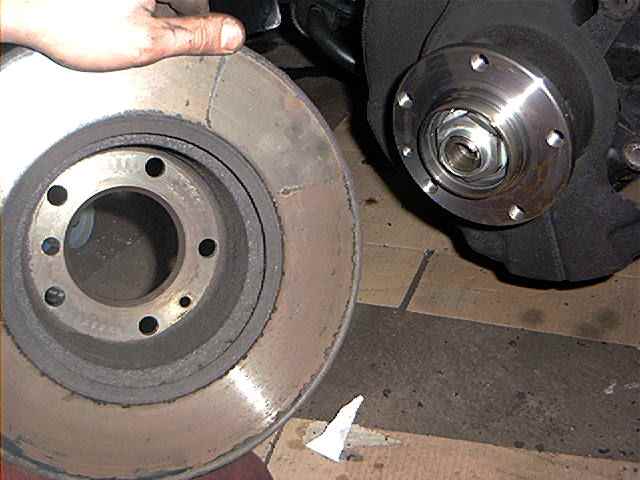
Mount the rotor, and clean the connecting surfaces thoroughly:
Mount the brake caliper and rim. Lower the car, and tighten the nut to 290 Nm (214ft-lb). The problem is that most torque-wrenches won’t go any further than 150 nm. Perhaps you can borrow a larger torque wrench from your local garage, or use the 1.5 meter pipe again and tighten it a few grunts …..at your own risk. Jack up the car, remove the wheel and install the grease cap. Now that wasn’t too bad…..was it?
Total amount of parts and cost (for convenience: 1 Euro equals 1 US dollar) :
Remark: this is Europe. Some prices or part numbers may differ depending on country, model or production year. Check out your dealer for the right part numbers for your car.
| BMW Part Number | Description | QTY | Price |
| 31211129386 | Front Wheel Bearing | 2 | $55.00 |
Total amount of time: 2 hours
Skills needed/difficulty level : some skills are necessary. This ain’t an oil change.
Satisfactory level after the job done : it’s pretty cold here, so I was very glad the job was done. My garage isn’t heated.
Some things I should have done but I overlooked, forgotten, just being too lazy or didn’t replace because I am cheap and now I am regretting that while everything is reinstalled already and I drove it for a few thousand kilometers/miles?
Well…mmmm….maybe I should have bought me a new grease cap instead of using the old one….I know I am cheap….