Article by: Sean
Applies to: all e32 and e34 models. The six cylinder has one pump, the eight and twelve cylinder models have two pumps.
This procedure describes the V12 pump replacement, but I6 is basically the same.
Problem: One nice day, just when I thought I had driven about one month without any problems whatsoever, one of my fuel pumps died.
Yes, one of my pumps, because a 750 has two pumps. The engine ran on 6 cylinders only. So I could make the trip back home. Thank you German engineers.
The 750 can have many reasons to run on 6 cylinders so you must know it for sure. The very first thing I checked out was if the fuel hoses where pressurized during a running engine:
One hose I could squeeze easily by hand, the other couldn’t. Nice identification huh?
The second test was to check if I could hear any noise from the trunk while jumping the terminals of the fuel pump relays (no need to put keys in ignition, it’s hot all times):
Listen carefully with an open trunk. Jumping one relay generated a buzzing/whining sound in the trunk, the other didn’t.
At this point, you must check 2 things: is 12 volt present at the relay terminal. If it isn’t, it could be a blown fuse. Each pump has his own fuse. In my case, the fuse was blown. But shortly after replacing the fuse (pump was still dead) the fuse blew again. So probably a short-circuit inside the pump. Time to replace it.
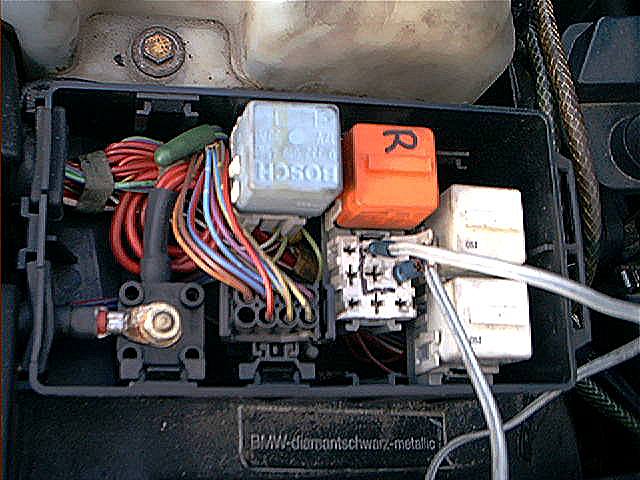
Important remark added: As I found out later, the location of the fuel pump relays can differ from model to model when it comes to the relay box near the right strut tower. At the picture above you see the orange relays. That are my fuel pump relays. Later models can have the fuel pump relays at the rightmost position. In that case they are usually black and have ‘fuel pump relay’ stamped into the surface (well, in German language obviously). Make sure which relays are your fuel pumps relays (check by pulling pump fuses and measure voltage at terminals) and which are the main relays. My main relays are the white ones, later models have them in the center. This means the Bentley Book is showing the correct position of the relays for most models (but not all). The blue relay is the lambda sensors heating relay.
I can assure you that with the DME 1.2 Motronic version no EML light will show up when a fuel pump fails. I don’t know about the DME 1.7 Motronic but I have the strong indication also no EML light will show up.
Background: both fuel pumps are mounted inside the fuel tank (for noise reduction, as I was told) and are immersed in fuel. That is not uncommon. Underneath the pumps is a pre filter element mounted. Fuel pumps and fuel sender come out the fuel tank as 1 unit.
Let’s start unbolting and removing parts:
You don’t have to drain the fuel tank, but it’s nice if it isn’t completely filled up with fuel (like half a tank or so). First, remove pressure of fuel system. Pull the fuel pump relays (or fuses) and start the car over until it stalls. Now get all the junk out of your car’s boot (I got this tip from Johan 😉 in my case this alone took me half an hour. Remove trunk carpet:
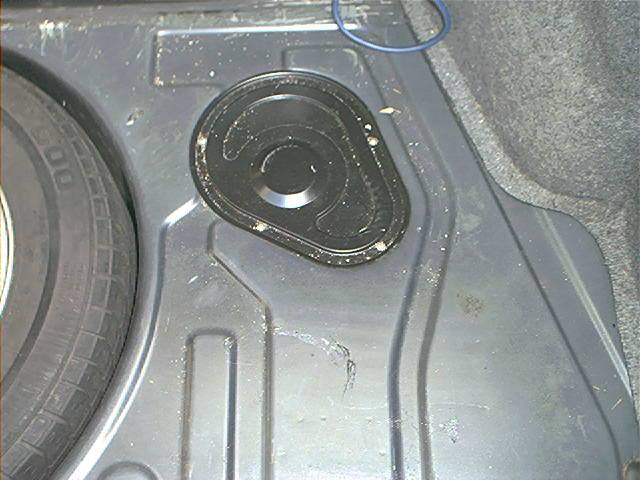
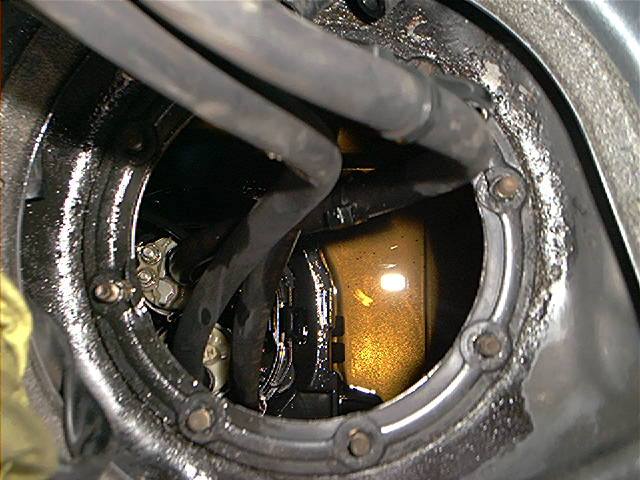
Remove access cover plate:
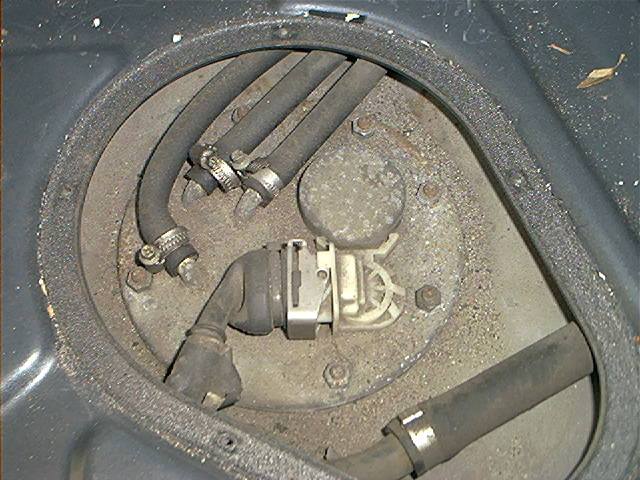
To prevent dirt falling into your tank, clean the area from debris. If you don’t think that will happen:
I managed to drop 3 nuts and a screwdriver into the fuel tank while working on the pumps.
It isn’t looking very professional if you have to put your entire arm into the freezing colt fuel to search for a couple of bolts. I can assure you.

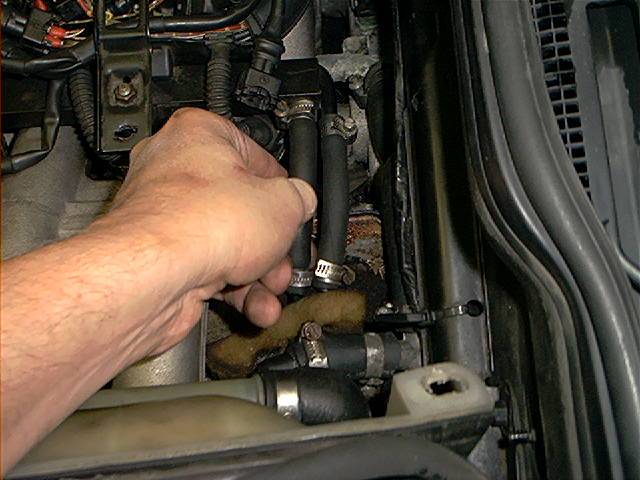
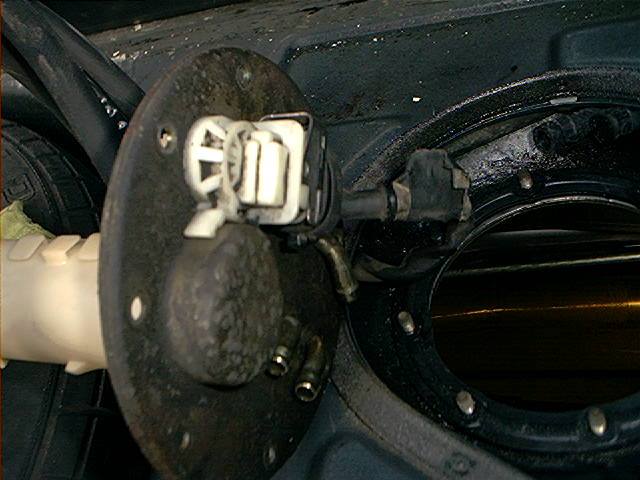
Notice you have 3 hoses. 2 main feeds and 1 return (750 only, 735 has obviously 1 feed). It’s advisable you don’t switch them, so mark them if don’t have a great memory.
Remove the hoses. I forgot to remove pressure from the fuel system. That gave a little shower:
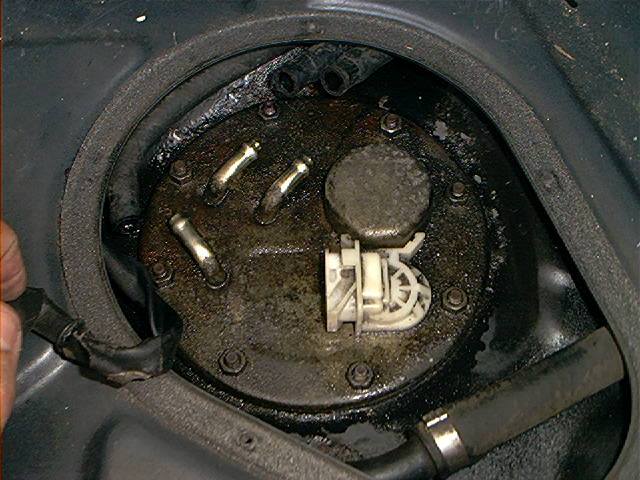
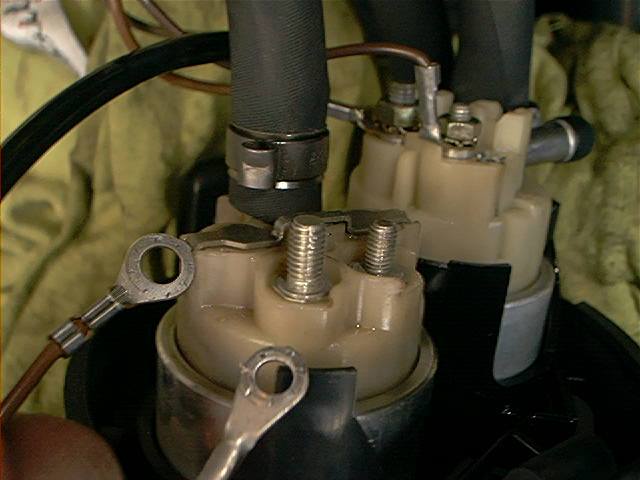
Also disconnect the electrical connector and keep it away with some tape or wire. Remove the nuts of sending unit:
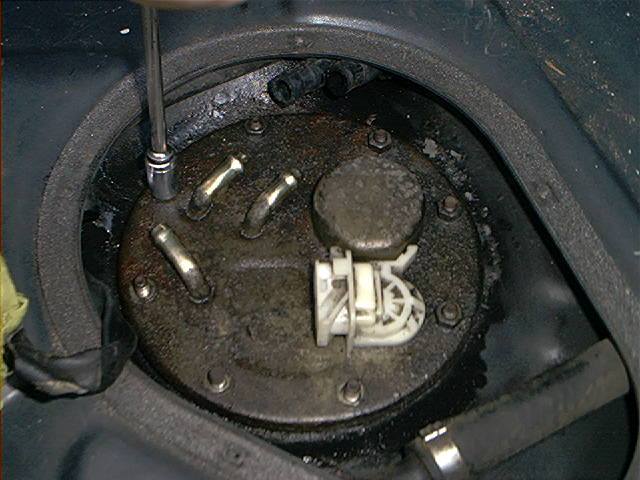
An important remark must be made. These are tiny little nuts and some reported snapping the studs off.
Like the ones in the next picture (different car and ignore the idiot plumbing) were 3 studs snapped right off:

When this happens, you won’t be a happy camper because a solution isn’t easy. Loosen them carefully and use penetrating oil (like WD-40) before you start working.
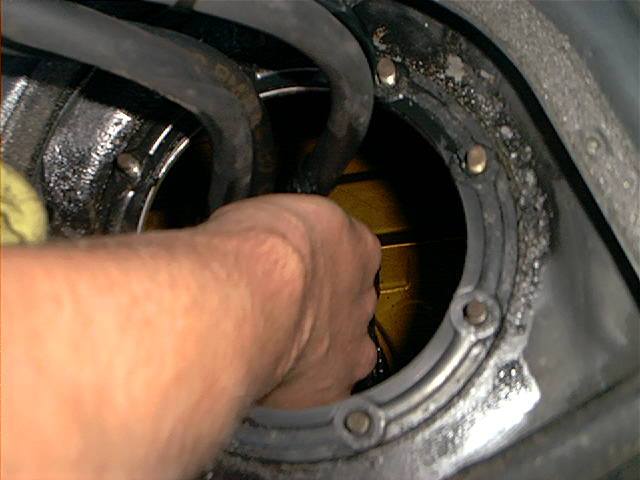
Pull the fuel sender upwards and turn it carefully, mind the inlet:
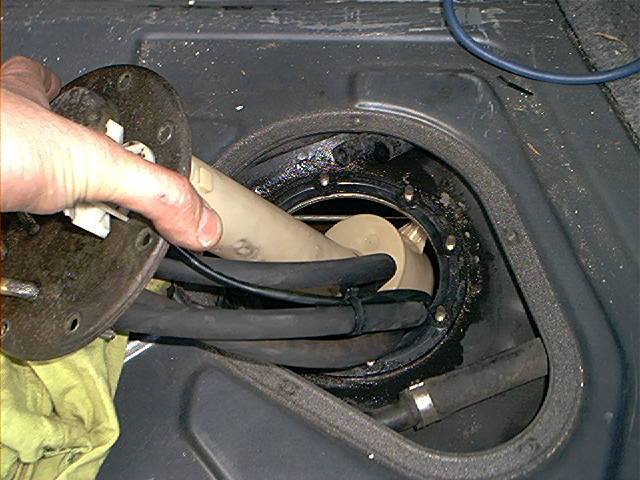
The pumps are at this point still inside the tank. Some fuel will leak out of the sender, so use an old rag:

The pump assembly is mounted into a housing, which sits down at the bottom of the tank. This assembly is secured with 2 plastic tabs.
If you squeeze them it should release the pump assembly so it can be removed (see pictures further down to take a look at these tabs):
And yes:
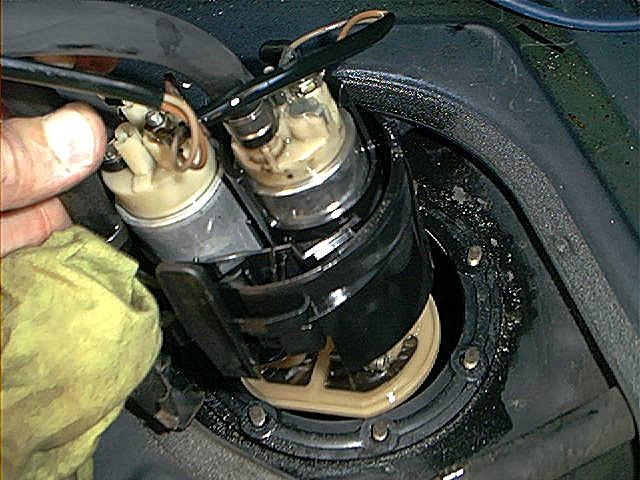
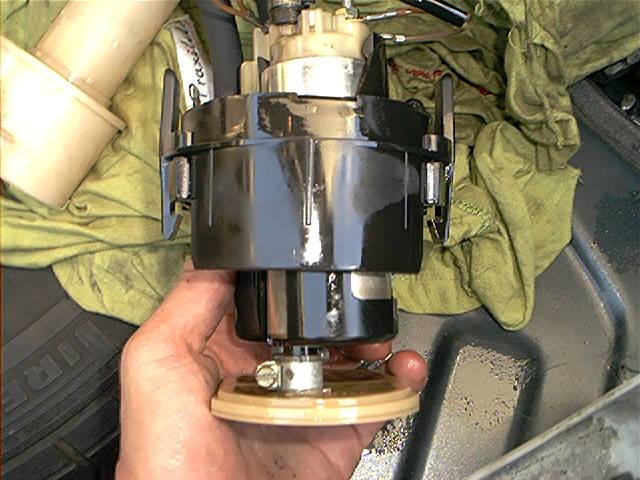
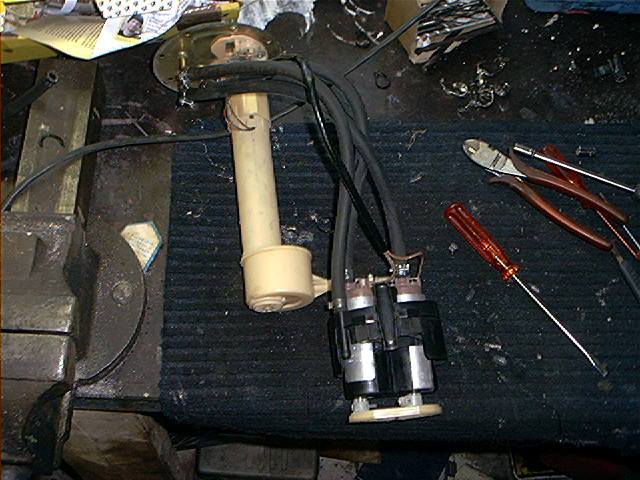
This picture shows the whole pump assembly. Two fuel pumps, mounted in rubber bumpers to isolate the noise. At the bottom the pre-pump filter element:
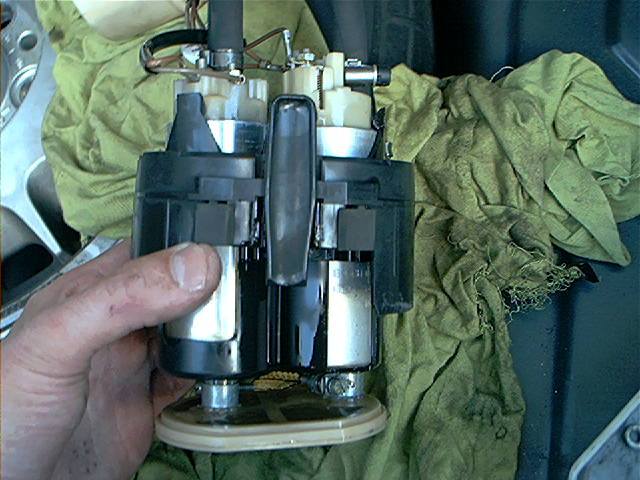
Another picture to show the plastic tabs (left and right) that keep the assembly into the housing. Nice design:
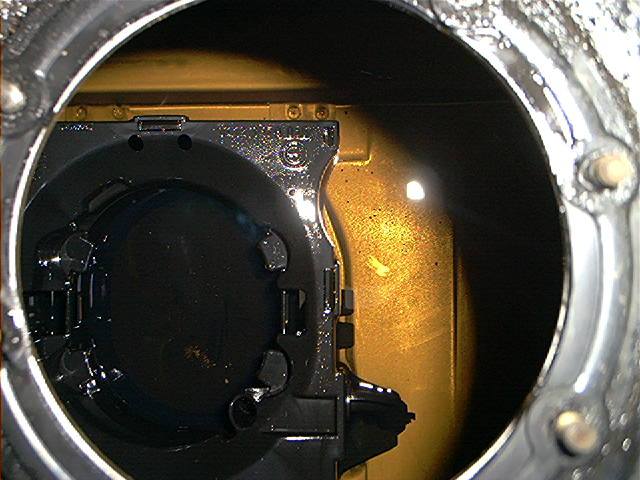
This is the empty housing at the bottom of the tank. I do think it’s a nice looking fuel tank of a 16 year old car:
Great. Very nice job until now. But the 64,000 dollar question is: which pump failed?
I strongly suggest you don’t test the pumps on your workbench, as the other working pump probably will be ruined if it’s running without fuel.
So I removed the electrical connectors of both pumps (I kept in mind which wires where attached to which pump):
Reattached the electrical connector of the sending unit:
And jumpered the terminals of the fuel pump relay of the faulty pump. At that point I checked which set of wires got 12 volt:
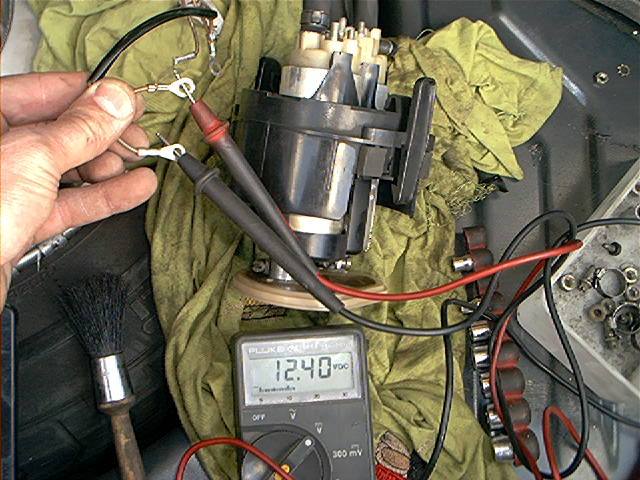
So this must be the faulty pump. This may look like an extensive procedure, but I had to know which pump failed without running the pumps.
Maybe you can figure an easier way out. I marked the faulty pump and took the whole assembly to my workbench:
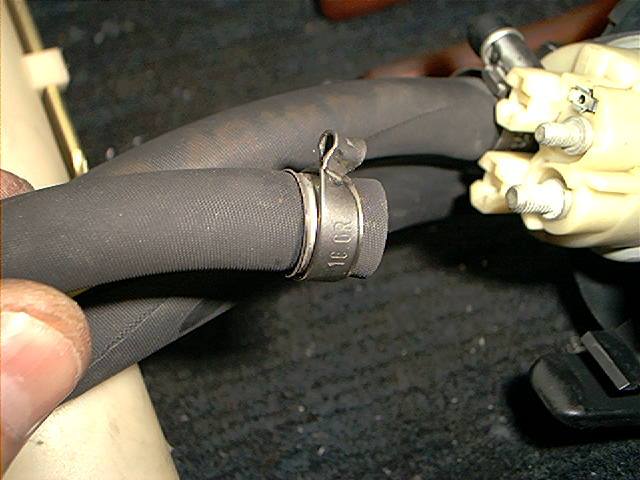
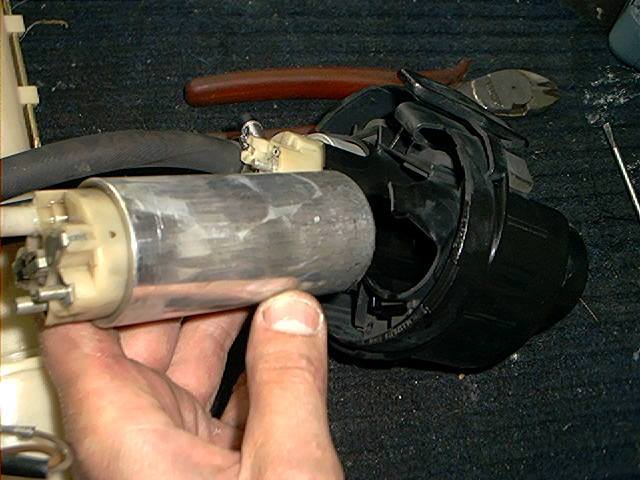
To remove the pump, first remove the fuel hose of the faulty pump.
If this is still the factory pump it probably will have the factory hose clamp which is quite difficult to remove (I got a little frustrated here, couldn’t cut it off):
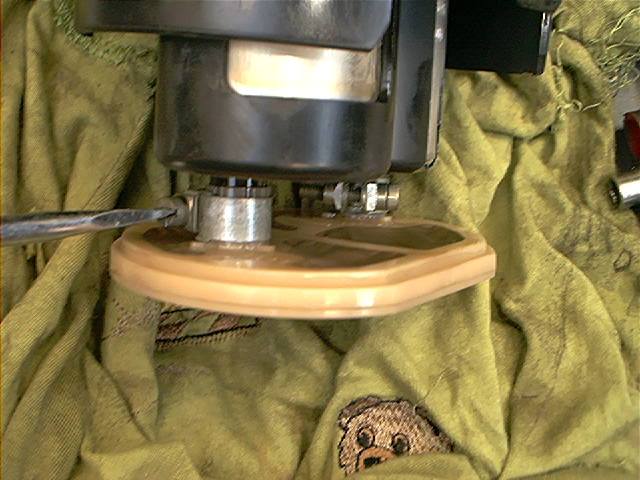
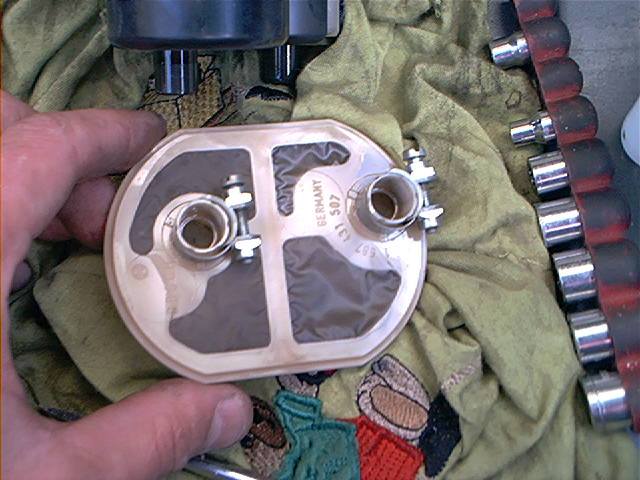
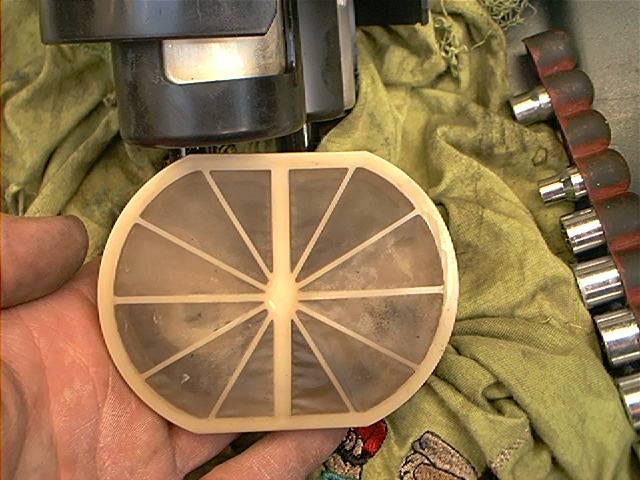
Now removed the pre-pump filter element at the bottom:
And for the record, some nice close-ups:
Pry the pump out of the housing and replace it:
Reinstalling is the same….you get the point. A couple of remarks must be made: consider to replace the gasket of the fuel sender plate.
I am cheap and I didn’t, mine got damaged while reinstalling so I am not happy. But it isn’t leaking. Don’t over torque those tiny 10mm nuts.
Replace rusted hose clamps. Don’t reinstall the cover plate yet but check carefully for leaks with a running engine.
Another remark: if you replace just one pump and the other pump is still the factory pump (check hose clamp), there is a pretty good chance the other pump will fail soon.
Some reported this to me. So consider replacing both pumps at the same time. At my car, one pump was already replaced and the second one died after 75,000 km / 50,000 miles. So you are warned.
Reinstalling is the same….you get the point. A couple of remarks must be made: consider to replace the gasket of the fuel sender plate.
I am cheap and I didn’t, mine got damaged while reinstalling so I am not happy. But it isn’t leaking. Don’t over torque those tiny 10mm nuts. Replace rusted hose clamps.
Don’t reinstall the cover plate yet but check carefully for leaks with a running engine.
Another remark: If you replace just one pump and the other pump is still the factory pump (check hose clamp), there is a pretty good chance the other pump will fail soon.
Some reported this to me. So consider replacing both pumps at the same time. At my car, one pump was already replaced and the second one died after 75.000 km / 50.000 miles. So you are warned.
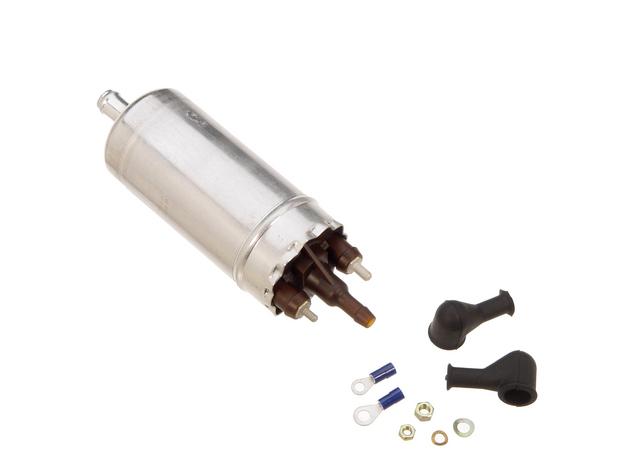
Total amount of costs: An original BOSCH pump is a staggering 295.00 euro/US$. Yes, that is 1 pump only and it isn’t gold-plated with an Elvis inscription.
Due to some financial shortcomings this month, I bought a couple of used ones from a salvaged 750.
Total amount of time: About 3 hours
Skills needed/difficulty level : You are working with fuel. Work in a ventilated area, disconnect the battery from the terminals, don’t smoke . . . you get the point.
Satisfactory level after the job done : Great. Did you expect something else? But it wasn’t comfortable to dive 3 times into the freezing cold fuel (it’s winter here) to search for those #$@ nuts and that screwdriver.
I was also mad enough to take photographs from the inside of my fuel tank and I almost managed to drop my camera into the petrol. BTW, the pictures showed nothing but plain steel and were useless. What a surprise.