Article by: Sean
Article applies to: all models with the M70 v12.

Problem: Could be various. Some canisters suffer from a leaking anti-drain valve (which requires replacing the whole canister or a very creative workaround) causing the low oil pressure warning during start.
Requires immediate action, fix it.
But most of the cases, you just want to remove the canister because now you can reach several other parts of the v12 (like the steering box).
There is just so little clearance to work in the engine bay of a 750 that even a 10mm wrench will have a hard time reaching a d*mn nut.
If the canister mounts are broken, which is a common problem, you don’t have to remove the whole canister.
See section ‘oil canister mount’.
One remark must be made: due to the amount of pictures, this looks likes an extensive operation.
It isn’t. I performed it twice and I am getting quicker.
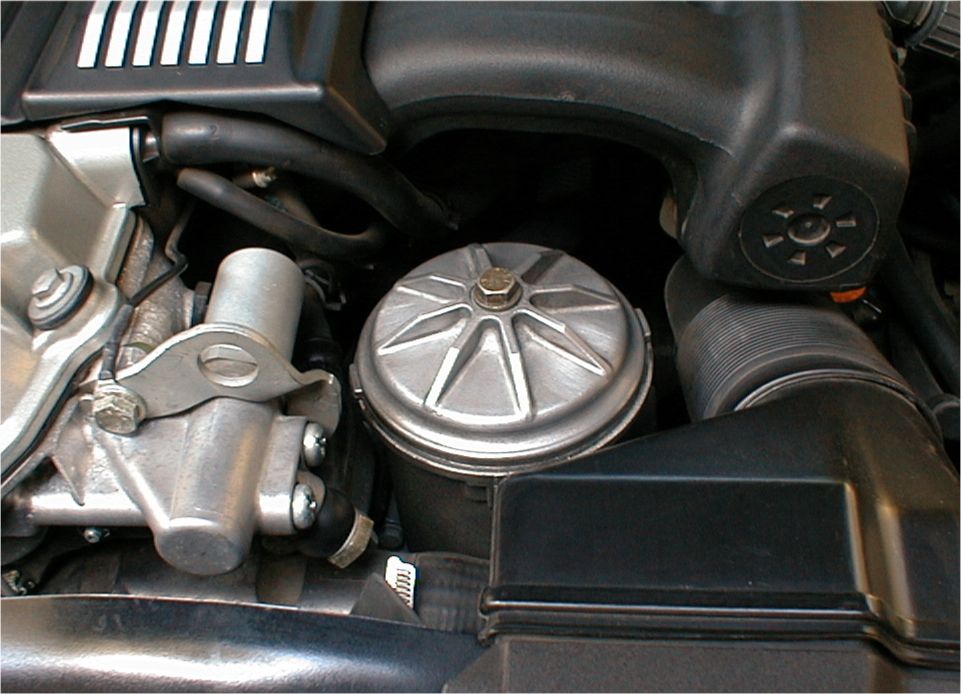
Background: Pretty clever system here. The aluminum oil canister is mounted to chassis with 2 rubber mounts.
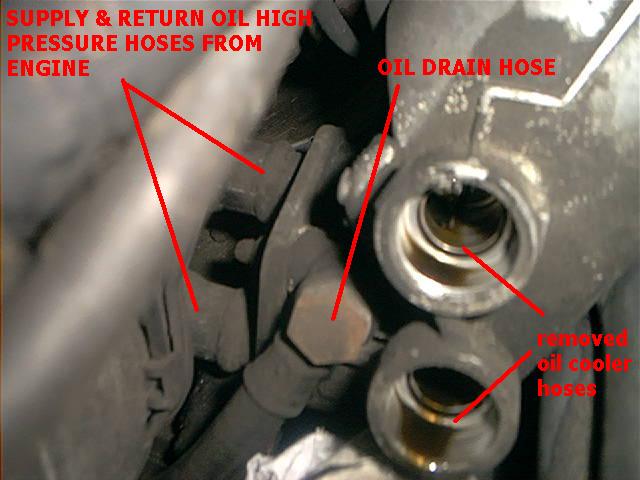
It has several hoses connected to it. 2 oil high pressure hoses are the supply and return from the engine, 2 are the supply and return to the oil cooler and 1 hose for draining the oil from the canister back to the oil pan when removing the lid (changing filter).
And in addition, the oil pressure switch is mounted at the canister.
The system is designed to keep oil in the canister when the engine is not running, ensuring sufficient oil amounts when starting.
If you suffer from oil pressure warnings in the morning when the engine is cold, the problem could be an empty canister. Investigate the problem by removing the lid from canister.
If there is any oil left, it will quickly drain back into the oil pan, so you can’t check it. Screw the center bolt of the cap back into the canister (don’t put the lid on).
This will prevent draining the canister. Pour oil (about 1,5 liter as I can recall) into the chamber and let it sit for a day. The canister should be keeping this amount of oil.
If it isn’t, the anti-drain valve is leaking (no fix for that other than replacing the canister) or the seal of the piston underneath the central bolt is leaking.
This seal is replaceable, remove the center piece of the canister. Piston and springs will come loose, replace the seals of the piston (2 if I remember correctly).
Remark: this is the canister for the early series 750. Later models have a different, smaller canister.
Let’s start unbolting and removing parts:
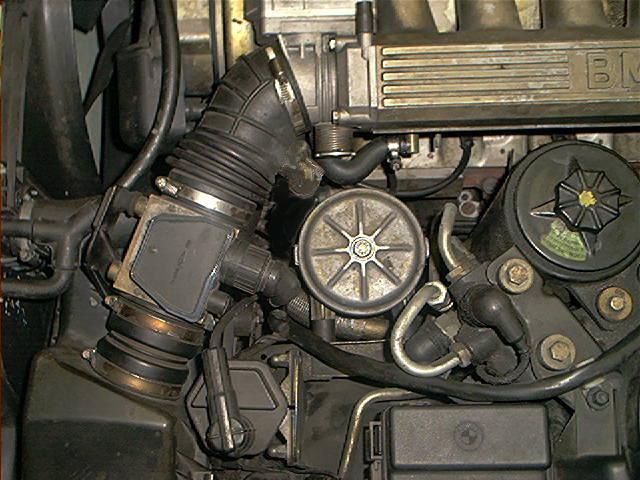
First, remove left air filter box, MAF and air intake boot:
Remove also the lower part of the air filter box.
Remark: you don’t have the hose coming through the intake of the air filter box….remains of an old experiment of mine with the coolant system:
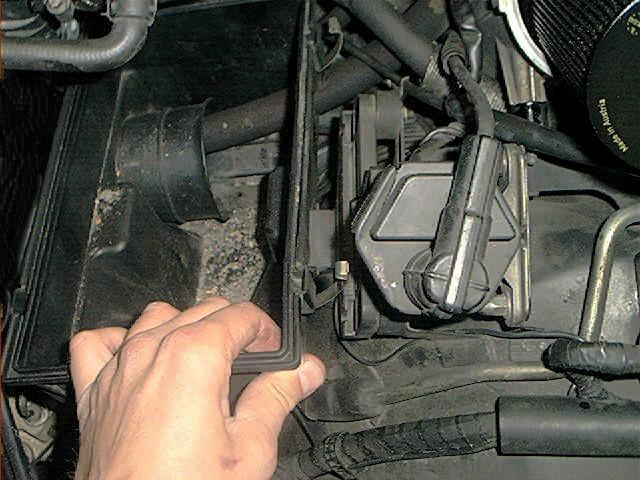
Detach the connector from the evaporator purge valve and put the harness aside, ensuring enough workspace:
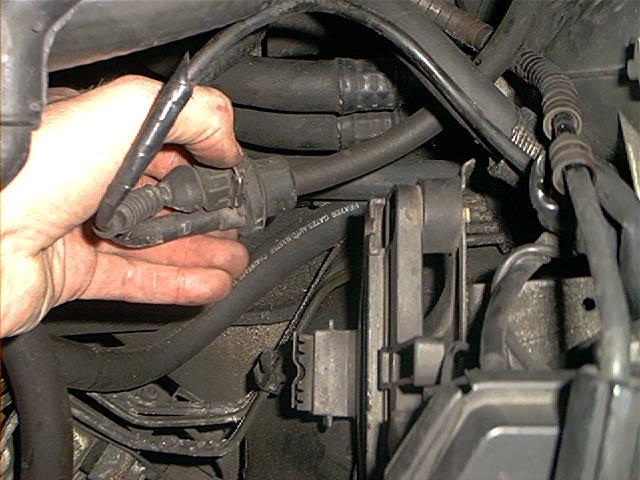
Remove the ignition lead from the coil:
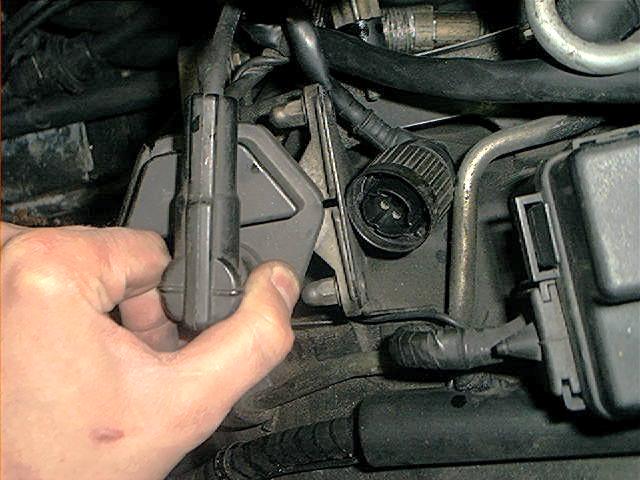
Remove the bolt and cap of the oil canister, remove the filter (good time to change it), let the canister drain.
Pay attention to the engine harness, I put it behind the coil.
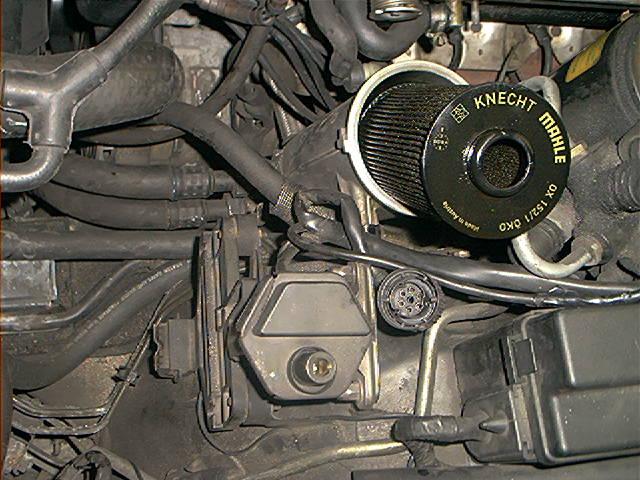
Remark: it is possible that you have another type of oil filter, my canister is retrofitted to fit the new type of filter:
When it comes to remove the canister, the following procedure must be followed:
– remove 2 oil cooler hoses
– remove 2 oil high pressure hoses (to the engine)
– remove drain hose
– disconnected oil pressure switch connector
– unbolt 2 nuts holding the canister to the body
You will spill some oil onto your garage floor, so take preventions like a drain pan. Protect every removed hose fitting with an old rag or towel to prevent any dirt getting in.
You just don’t want to get anything into your hoses.
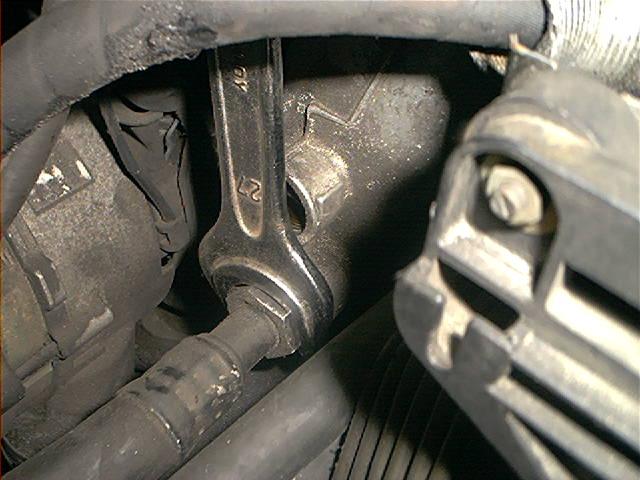
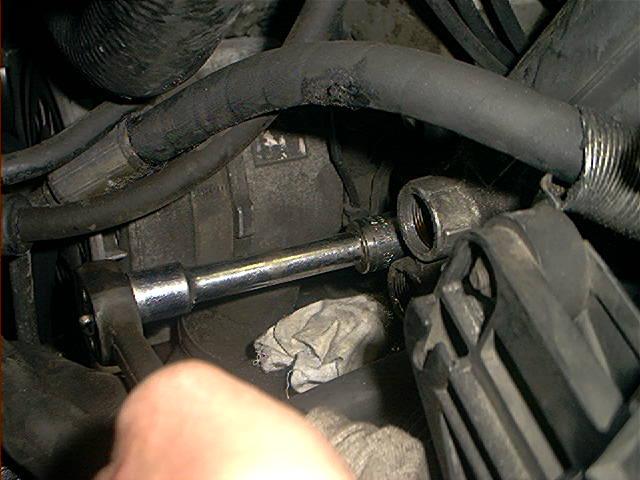
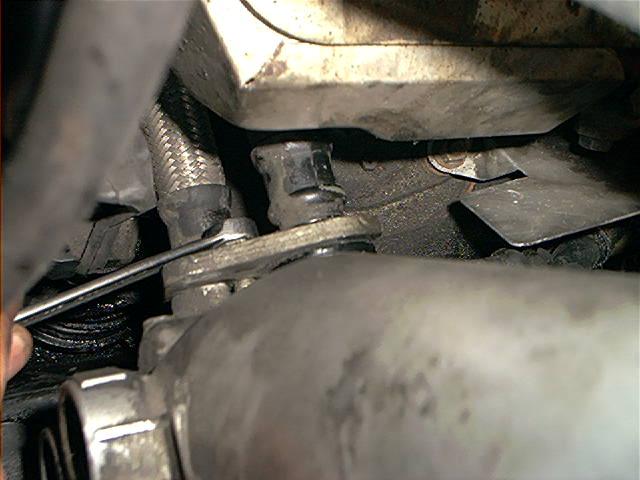
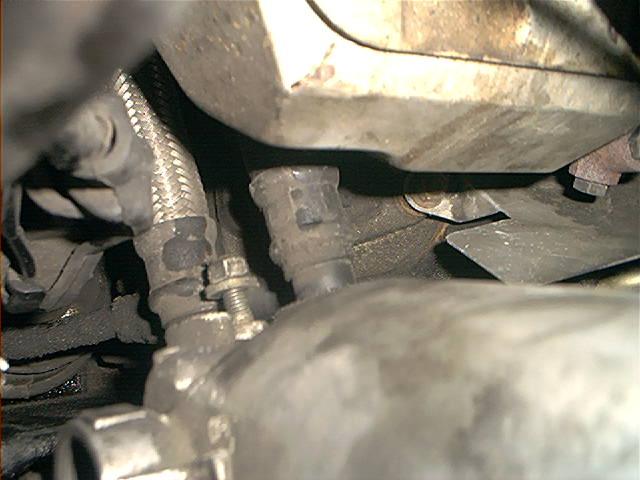
The 2 connections at the bottom left of the canister are the 2 pressure hoses to the oil cooler, located at the bottom of the radiator.
Photo is shows unbolting the upper hose (27mm wrench needed here):

Just turn it 1/4 turn with wrench, rest can be done by hand because the fittings are not rusted (aluminum fittings), besides you just don’t have the clearance to work fully with the 27 mm wrench:
You can replace the O-ring if necessary, I didn’t:

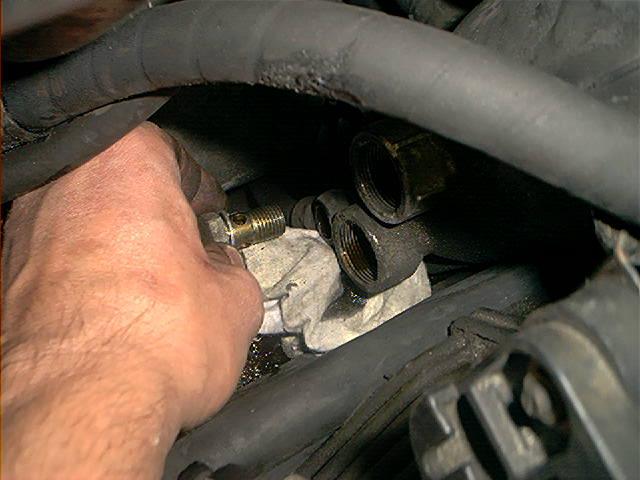
Unbolting lower fitting. At the left you see a bit of the alternator:
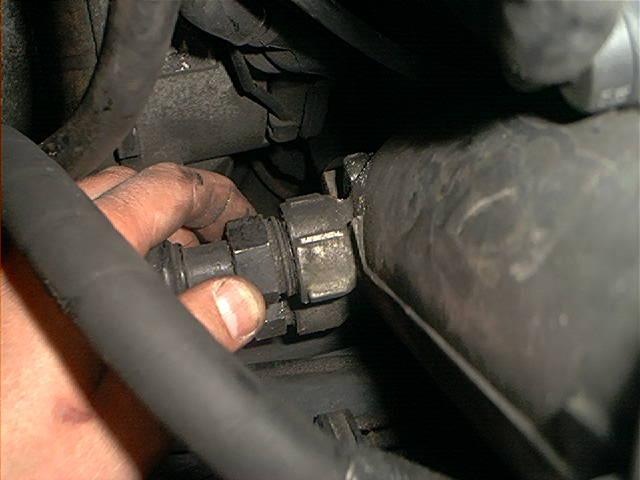
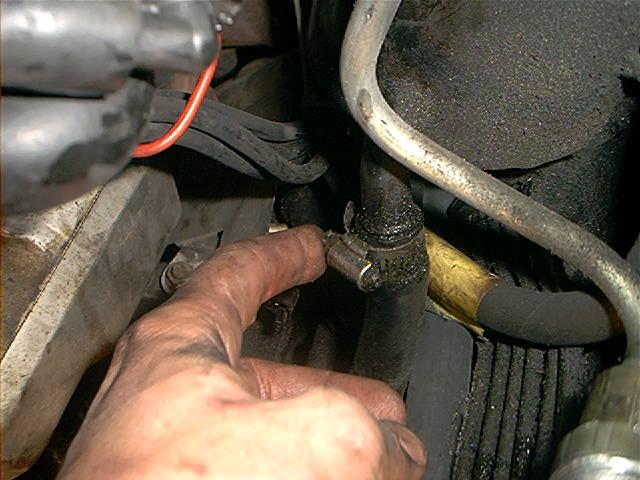
Next stage is to remove the drain hose from the canister.
The drain hose drains the oil back into the oil pan after removing the center bolt of the cap.
The hose is connected to the canister by a banjo fitting and banjo bolt:
Remove banjo bolt:
You can replace the washers if necessary. I didn’t.
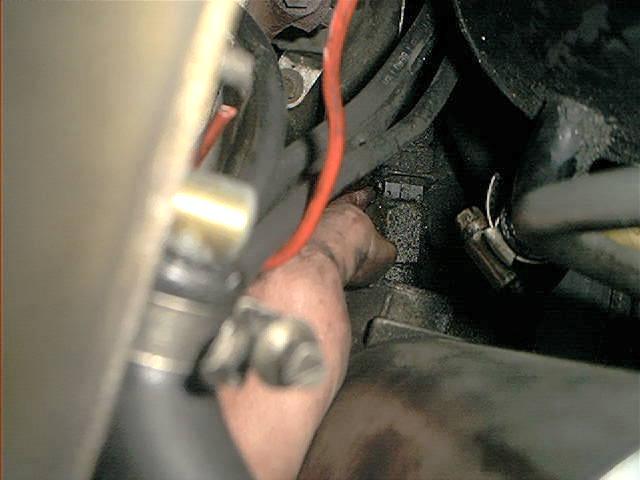
Remove the oil pressure switch connector at the right of the canister.
This connector is pretty hard to reach, maybe you can access it easier when the canister is loose and you lift the canister a bit up:
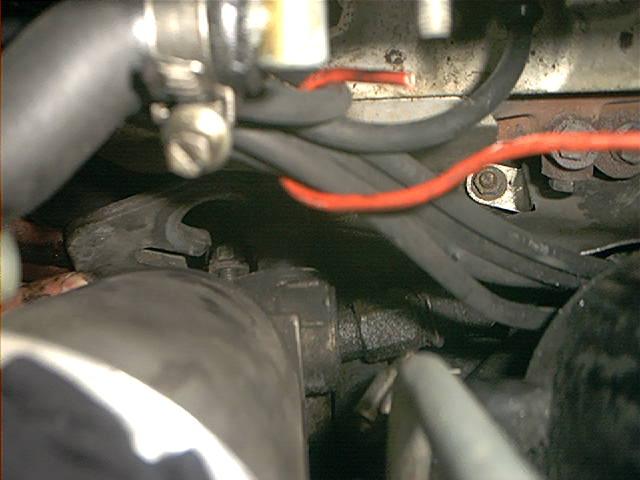
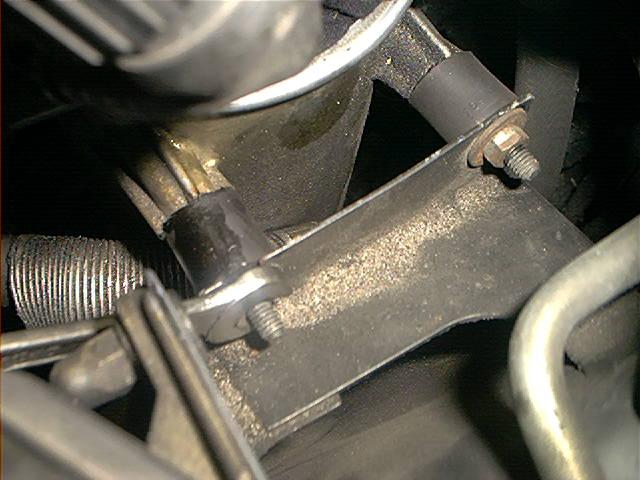
The high pressure hoses from the engine are connected to the canister with some sort of ‘back plate’ with a central nut.
Unbolt the nut but don’t removed it complete (also, you can’t reach it by hand, and it will fall into the engine bay, never to be recovered again..), just enough to remove the back plate:
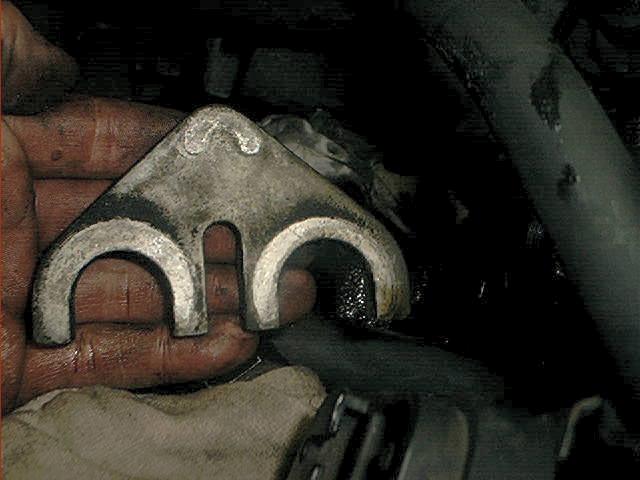
This is showing the actual back plate, it presses the 2 hoses into the canister by tightening the central nut:
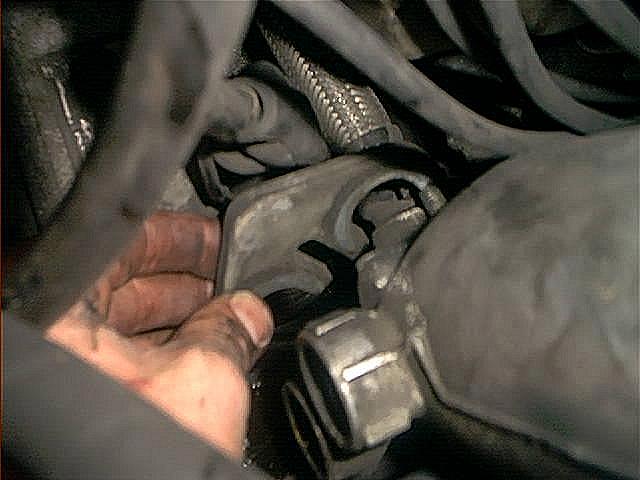
The loose nut, still connected to the canister – important!
Because the engine oil hoses are virtually impossible to reach, you probably can’t pull them out of the canister.
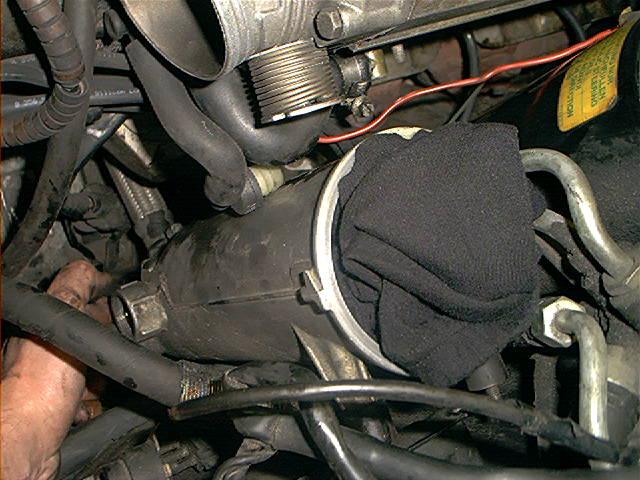
Unbolt the canister first by removing the 2 nuts holding it (remark: these are the upgraded canister mounts):
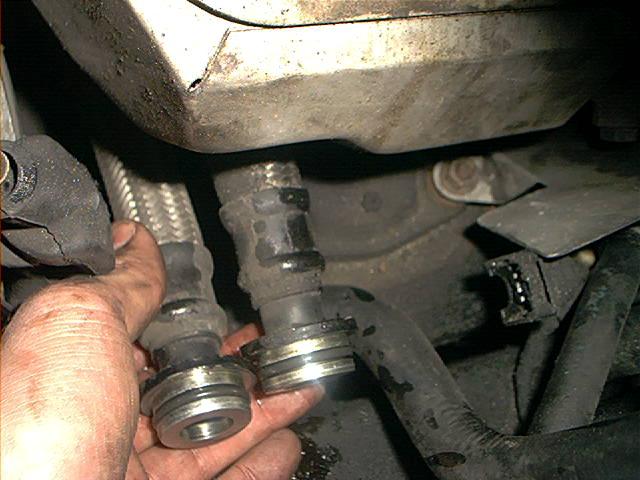
Now gently lift the canister upwards, and try to wiggle the engine pressure hoses loose.
Remark: I put an old rag into the canister, to prevent tools/dirt/bolts/sweat falling down:
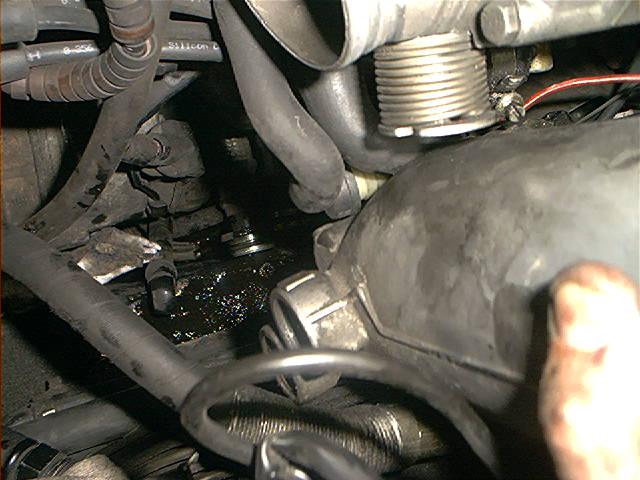
You can’t prevent that some oil will drain out of the hoses:
This picture shows the engine pressure hoses, you can replace the O-rings if necessary (I didn’t).
At the right the connector for the oil pressure switch:
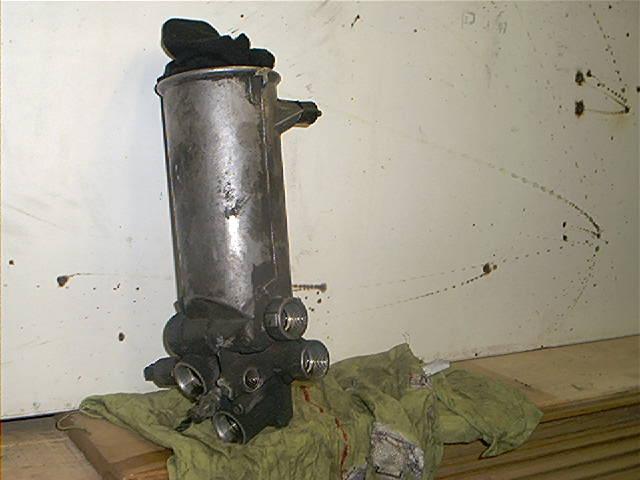
This picture shows the removed canister, so you get an idea of the shape and size:
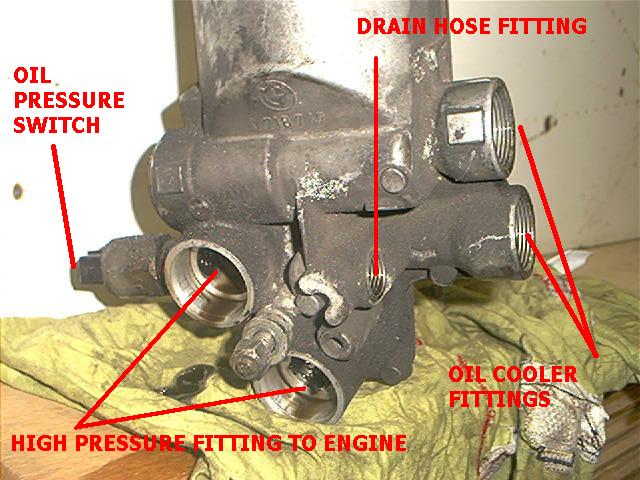
A close up of the bottom, with explanation of the fittings:
A remark must be made. You have now excellence access to several parts, including the Pentosin reservoir.
The fluid return hose has a an original clamp which is prone to leak.
I suggest you replace as you can reach it now (mine is already replaced with a normal clamp):
When reinstalling the canister, insert the engine pressure hoses but don’t try to fully insert them.
Most of the times, due to a lack of clearance, it’s impossible to fully insert them. Reinstall the back plate, tighten the nut and let the back plate ‘press’ the hoses into the fittings:
They will pop into place.
After reinstalling and reconnecting everything, it’s a good idea to fill the canister (after replacing the oil filter) with oil and quickly reinstall the lid and the central bolt to prevent draining again.
This will help the engine to build oil pressure quickly enough during start (or else it would be filling the canister first…it would run a couple of seconds without sufficient oil pressure in your main bearings…I just HATE that idea).
Start the engine up and check for oil leaks.
Total amount of time : 3~4 hours, depending on skills
Skills needed/difficulty level : You definitely need some technical skills to perform such an operation.
But the 750 isn’t a car for someone who has no years of experience with DIY repairs on several cars. Really.
Satisfactory level after the job done : The canister can be removed for a several reasons.
I did it to reach the adjusting bolt of the steering box, which can be easily accessed when the canister is removed.
This trick will save you a lot of time, because it’s virtually impossible to reach this nut while the engine is in the car!