Article by: Sean
Article applies to: all e24, e28, e32, and e34 models (some details regarding automatic transmission lines to not apply to models with standard gear boxes).
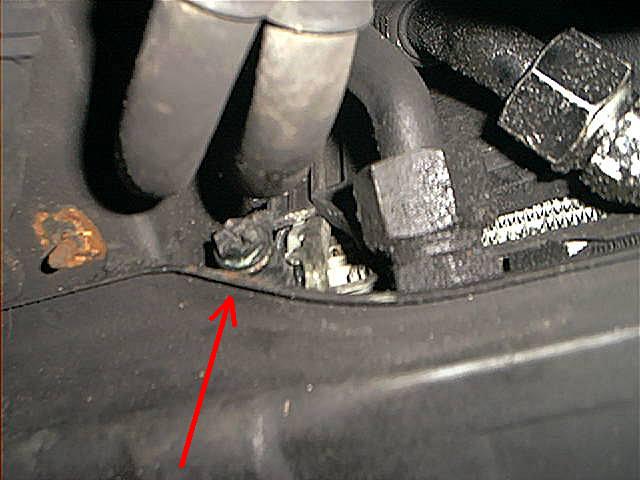
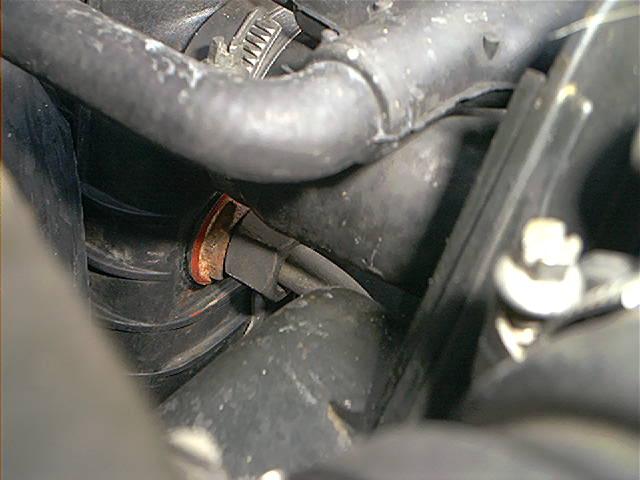
Problem: Leakage of coolant at the point where the upper trans-cooler connection is attached to the radiator body. This is just below the upper radiator hose connection.
This is a very, very weak point of the E32’s. Virtually every E32 will suffer from this problem sooner or later. Some comments from forum visitors about this:
“I just finished a 1300 mile trip and noticed a gray chalky looking substance on the left side of the radiator that runs down the side and underneath,plus the fan seems to have blown it everywhere also.
It appears to be coming from the metal line connection just below the top radiator hose.” ~ Roeder 1991 750il
“Under the upper radiator hose connection is the upper trans-cooler connection. I have an antifreeze leak (green)at the point where a large ‘nut or flange’ attaches to the radiator body.” ~ BrentS
“I have a slight radiator leak on the drivers side of the unit. The leak is coming from under the nut of the transmission cooling lines.” ~ BigAnt
“That’s exactly where mine is leaking and I’m replacing mine in the morning.” ~ Wiley
“Happened to me too… only solution was to replace the radiator. A good aftermarket one should do the job.” ~ Vas2vas
“I’m really dismayed that these radiators break so easily.” ~ Dennis
And so on. It seems that the 750 has this problem more frequently:
“I just replaced what I thought was the original radiator in a 89′ 750iL and was surprised to find the ‘old’ one was made by Reseda Radiator in CA.
That means that this must be the third one. Was leaking at the Trans cooler inlet.” ~ Jim 89′ 750iL
Trying to fix the problem with JBWeld (like Patrick C 750iL did in the picture underneath) or something like that won’t hold:
![Lower_patch[1] (1)](https://www.shiftbmw.com/wp-content/uploads/2013/04/Lower_patch1-1.jpg)
Picture by Patrick C 750il
“As predicted by three seasoned forum contributors a big patch of JBweld with fiber glass reinforcement gave in within three days.
I replaced the radiator with one from radiator.com for $280 somewhere there, lifetime warranted.
Anyway, despite JB-weld/JB-quik being my favorite patch materials, it won’t work well in places in contact with hot antifreeze.” ~ Patrick C 750il
Others about this:
“I learned from previous discussions on this board that repairs using glue/epoxy will work for a while but will eventually fail – probably out on the highway on a hot day.” ~ Dennis
“Far as the radiator goes, I had the same problem on my 750…tried almost everything possible, nothing and I mean nothing would work for long. Ended coughing up $275 for a new radiator. . .” ~ Ron in CA
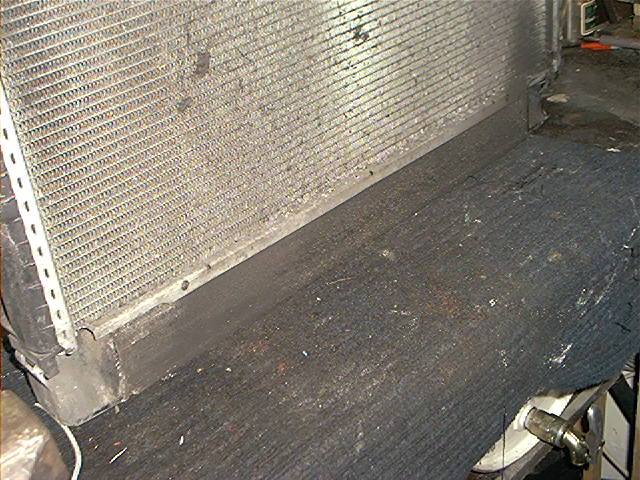
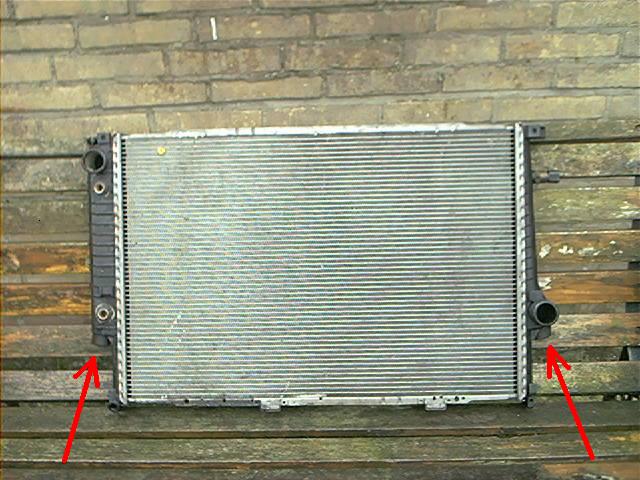
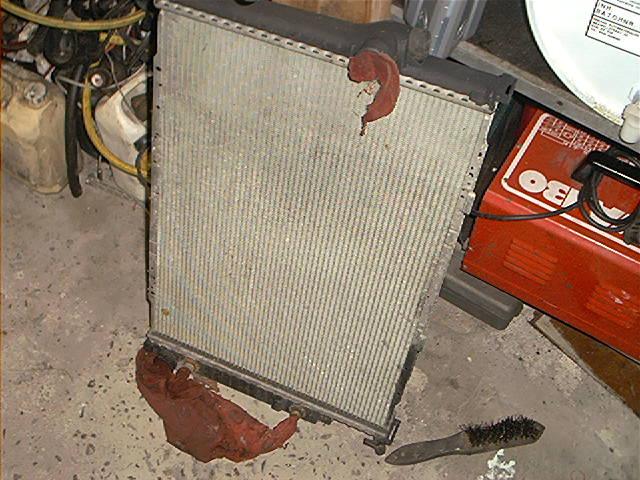
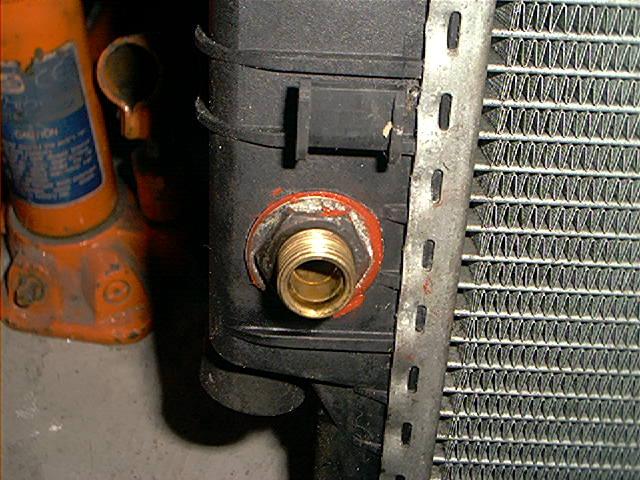
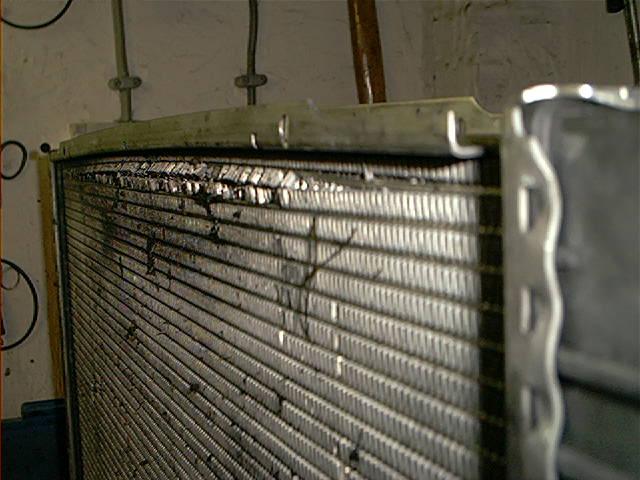
This not the only spot where the radiator will leak. This is a picture of a leak where the plastic tank meets the aluminum body:
![rad[1]](https://www.shiftbmw.com/wp-content/uploads/2013/04/rad1.jpg)
At this point, the only solution to keep out of trouble for at least the next couple of years is to bite the bullet and buy a new rad.
Personally, I prefer the old style copper radiators from the good old days which could easily be repaired . . . but times are a-changing’.
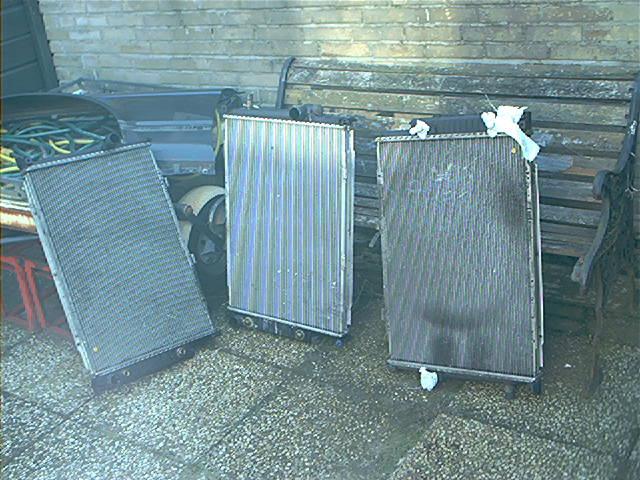
I didn’t buy a new radiator but I got a used one from a salvaged 750. It was in mind condition. almost brand new, and a lot cheaper.
Models: All. This procedure done on my 750. With a 735 you have usually more clearance to work, so consider yourself lucky.
The 750 and 735 rad’s are not interchangeable, but the 750 radiator is identical to the 850 rad. Just FYI . . .
Background: Nothing especially to say here. A standard radiator with plastic tanks and a aluminum body, with an internal transmission cooler. Impossible to repair.
One important thing to notice:
The oil cooler of the engine (and that is not the tranny cooler!) is mounted underneath the rad and they can’t be separated when the rad is inside the car.
When removing the rad, you must also remove the cooler as in one unit.
Furthermore, you must make an important decision. Do you remove the fan or not? This because you don’t have to remove the fan and the fan shroud, but it makes it immeasurably more pleasant to work.
Really. I couldn’t get the fan loose no matter what I tried (sharp whacks..nothing..more whacks…almost destroyed my fan…sigh), so I decided to remove the radiator with the fan (and the shroud) still attached.
Bad decision, it cost me twice the amount of time to do the job.
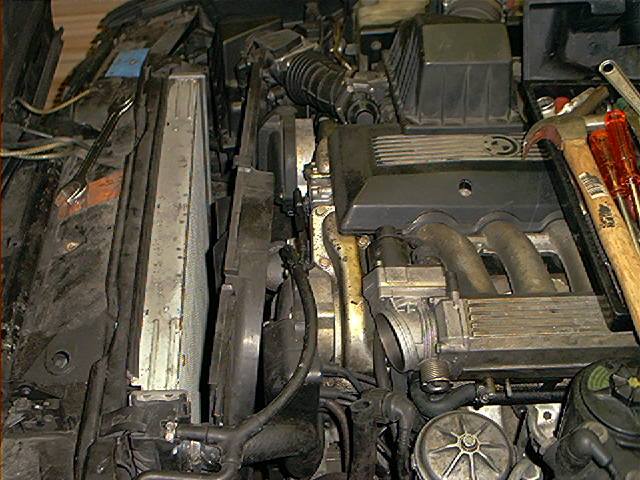
Let’s start unbolting and removing parts:
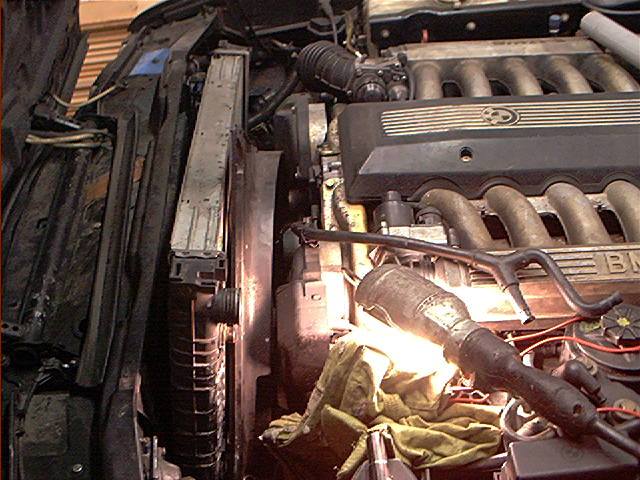
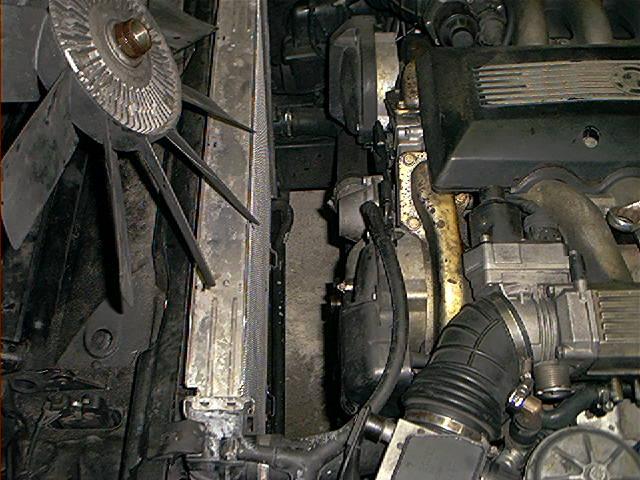
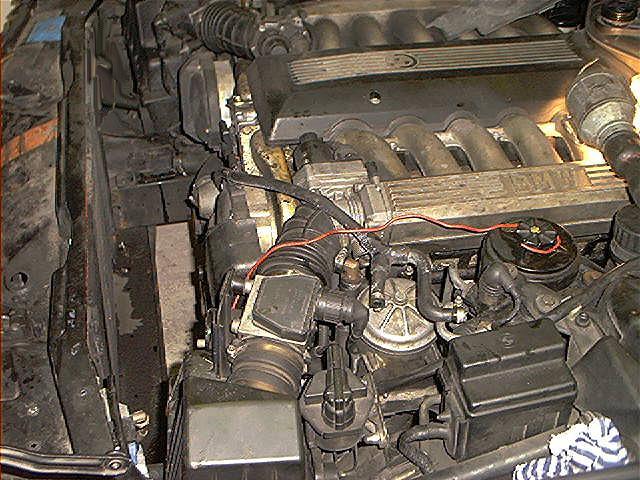
Mmmmhhh . . . how are we gonna get that one out of the car. In case of a 750 it is necessary to remove both MAF’s and air filter boxes (upper half and lower half) to get access to the lower radiator hose and transmission cooler connections.
Only then you have at least some workspace.
It’s a good idea to drain the radiator first.
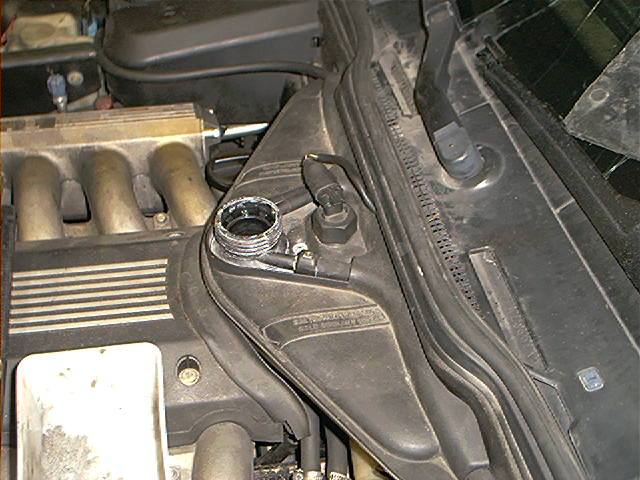
Remove expansion tank cap:
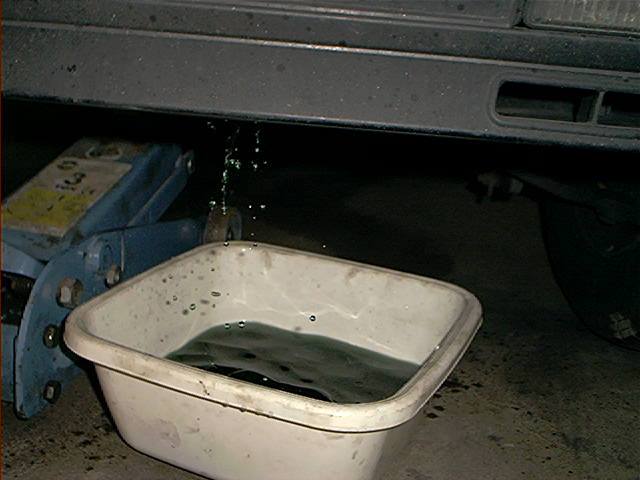
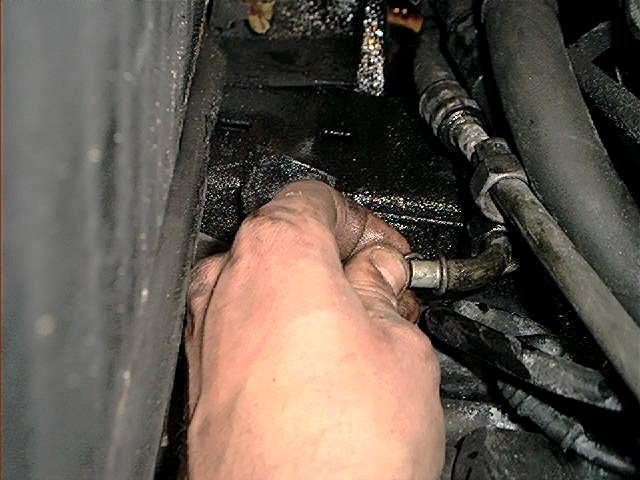
The drain plug is located underneath the radiator, near the oil cooler connections at the drivers’ side (left) and a pain to get to:
No matter how you do it, it’s gonna get messy. Patrick C about this:
“The hardest part was to find a way to collect the coolant neatly when the radiator drain hole was opened. The way I can describe the scenario is like pissing without the proper preparations.”
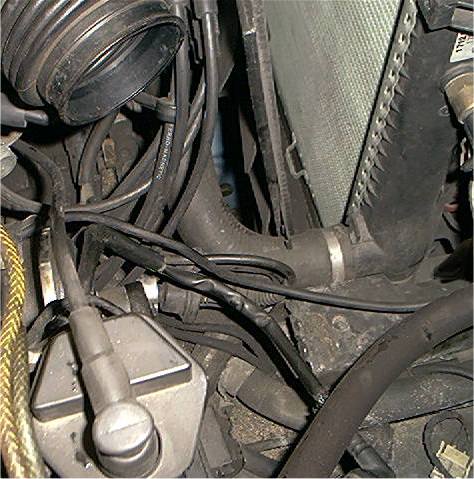
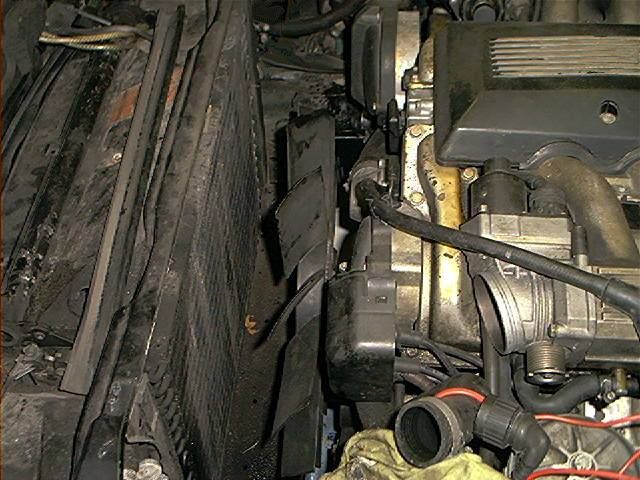
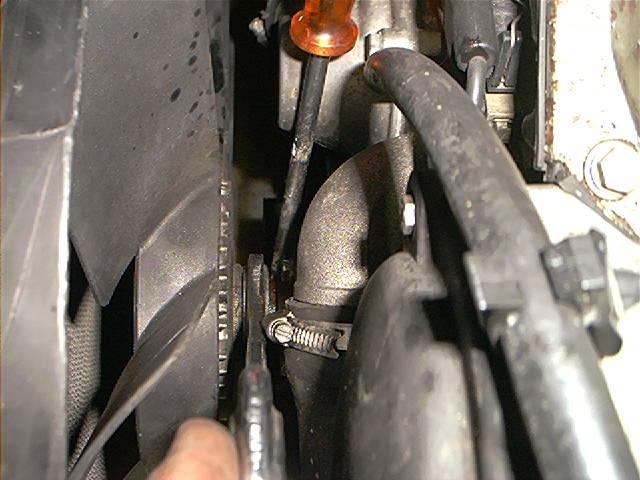
Remove upper hoses:
And lower hose:
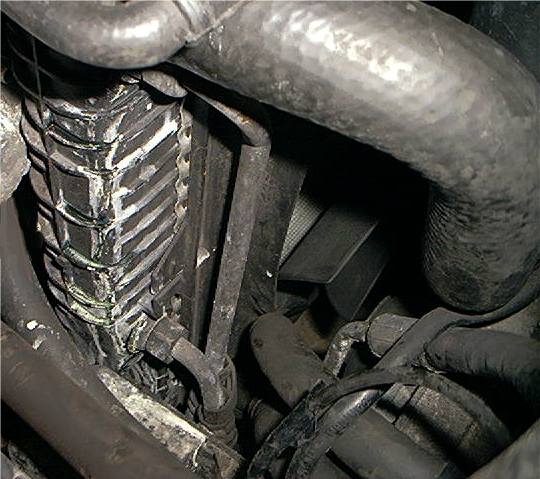
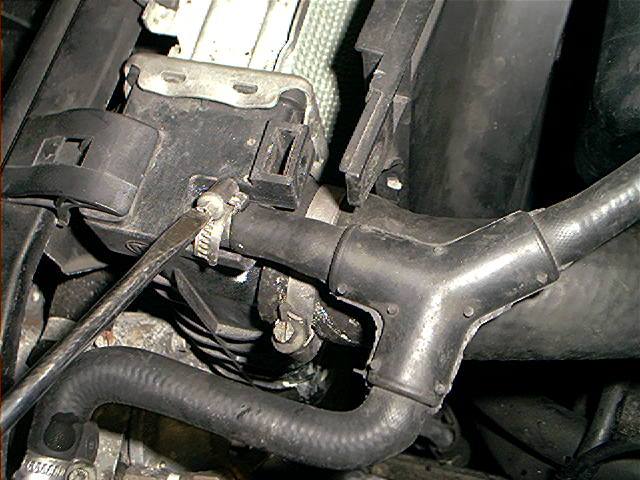
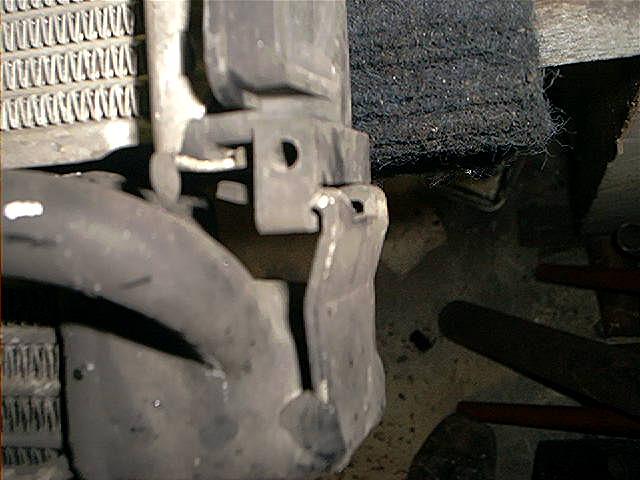
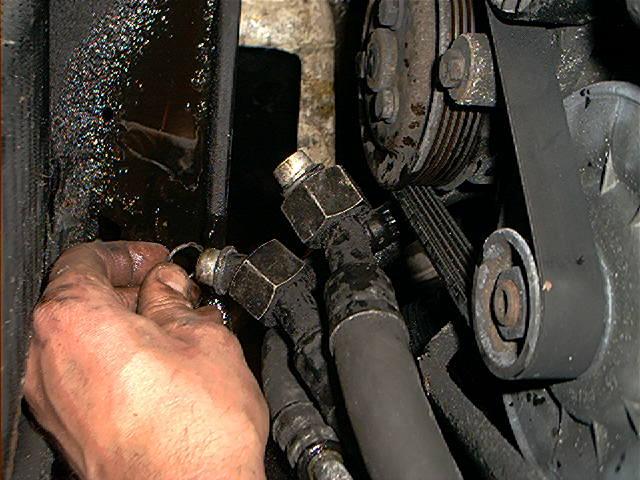
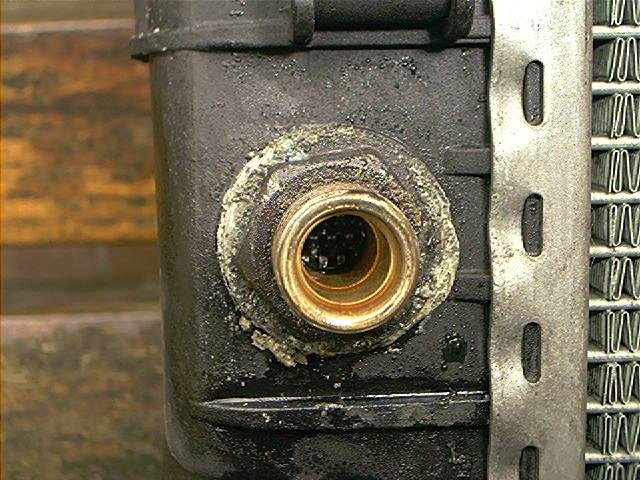
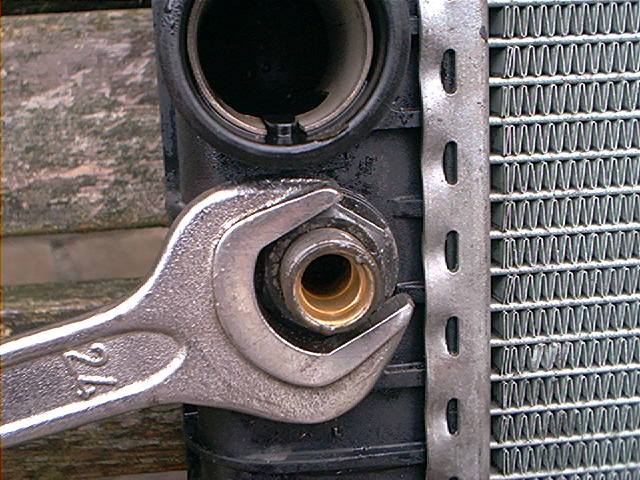
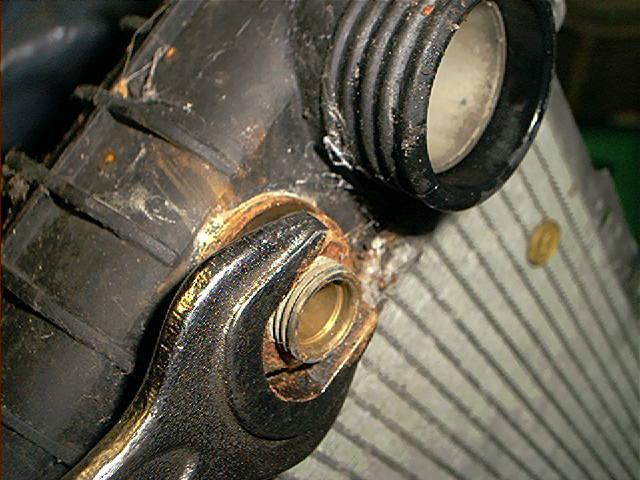
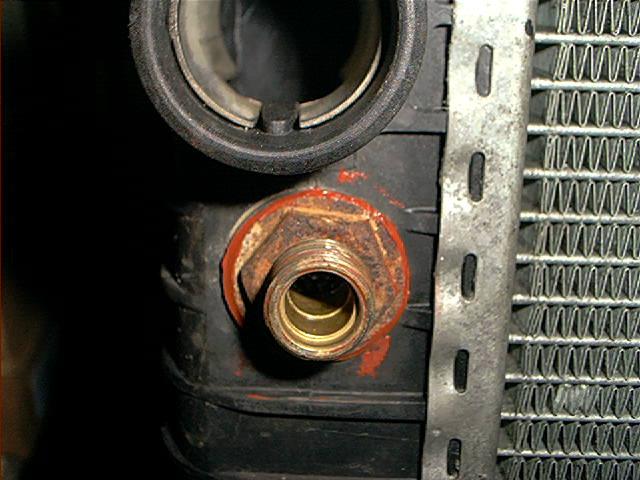
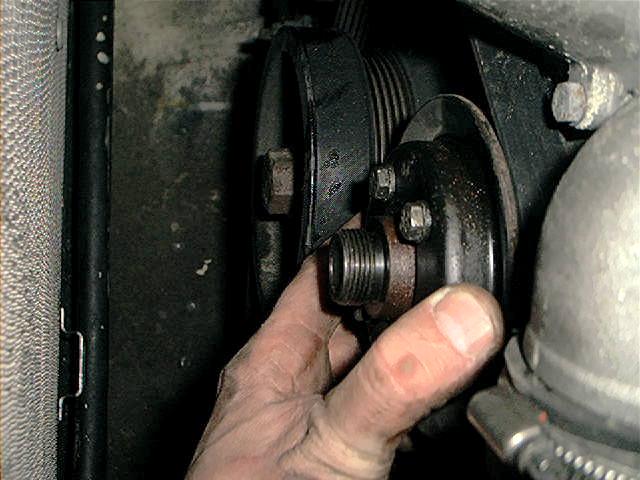
Unbolt upper transmission cooler connection (22mm). Mind the O rings, replace them if necessary:
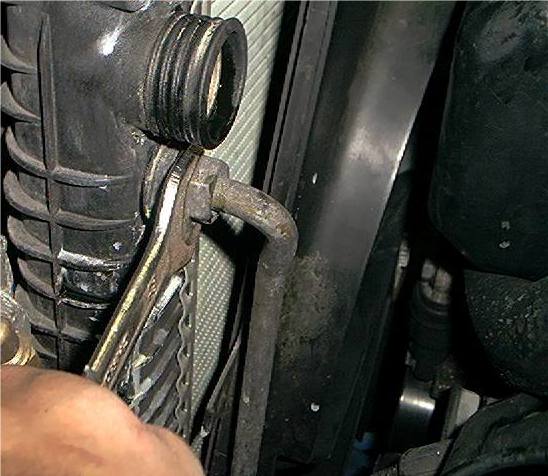
And lower (notice the severe leakage, I had driven months with a leaking radiator . . . it started leaking half a year ago . . . it took me some time to find a used one):
A strange thing is the oil cooler. It’s a separate cooler attached to the bottom of the rad and must come out of the car together with the radiator. No solution for that.
The weird parts is that the Bentley manual is saying nothing about this, even the factory manual doesn’t say a word. But: there seems to be some differences depending on model year.
Frank S about this:
“There must be some differences between model years as I did not have to remove any oil cooler lines from the bottom of the rad. My fan shroud had a cut away at the bottom so it was easy to slide past the fan.
This cut away looked like factory because it looked very smooth like it was supposed to be there.”
I heard others talk about this. Not everybody has to unbolt the lower oil cooler, but it isn’t clear to me if the oil cooler in that case is just not mounted or just doesn’t have to be removed.
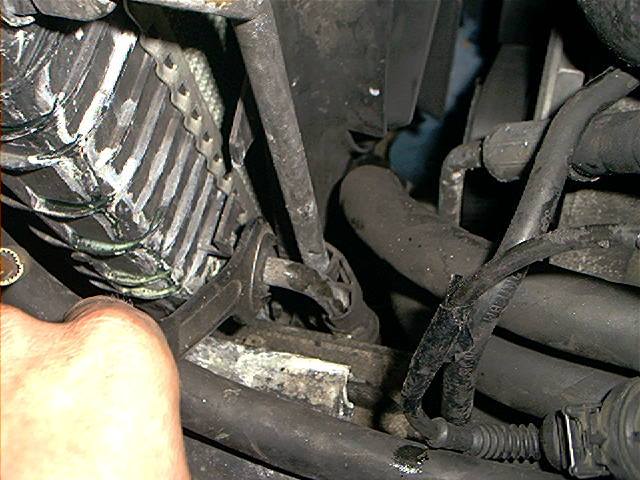
But, in my case, the oil cooler must be removed together with the rad. Unbolt the oil cooler fittings at the bottom (open wrench 32mm and 27mm):
The sequence I followed (draining coolant, loosen transmission fluid lines and now the oil fluid lines) wasn’t smart. While unbolting the oil cooler connections, the coolant was dripping in my face and the ATF fluid was dripping in my hair.
And in the final act a shower of engine oil from the cooler because I wasn’t quickly enough with a bucket.
After I tasted virtually every fluid available in my car you can imagine how I looked, and afterwards my wife refused to let me into the house when she saw my face. That is not uncommon.
Also, the oil cooler connections have some O-rings. Replace them if necessary (I did because the connections leaked very slightly).
Remove the plastic clips holding the fan shroud:
Lift the shroud a bit up and move the shroud as far as you can to the back:
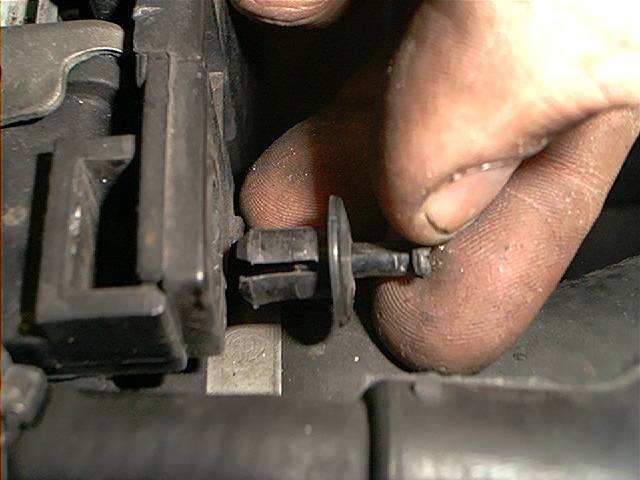
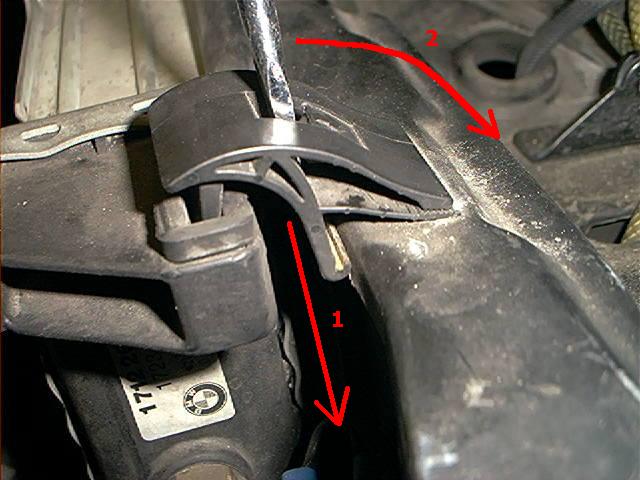
Now remove the plastic clips holding the radiator.
These are some strange clips (I don’t see how someone can invent something like this . . . why not a simple bracket with a screw??) which break easily.
The best way I can describe the removal is this: use a flat-blade screwdriver and insert it into the plastic clip.
Push down the screwdriver and at the same time, tilt the screwdriver forwards:
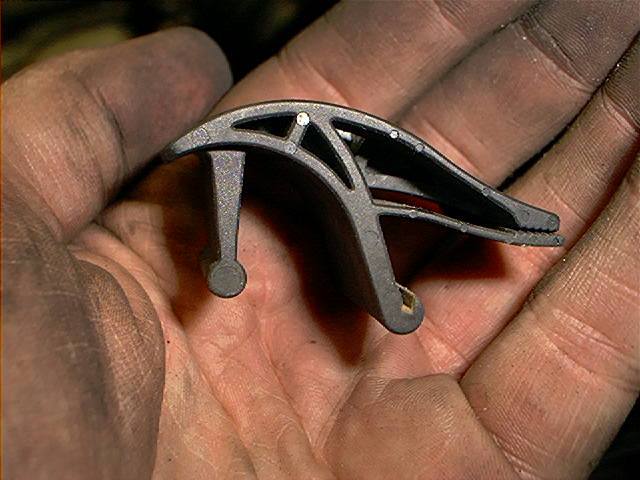
A close-up of the clip:
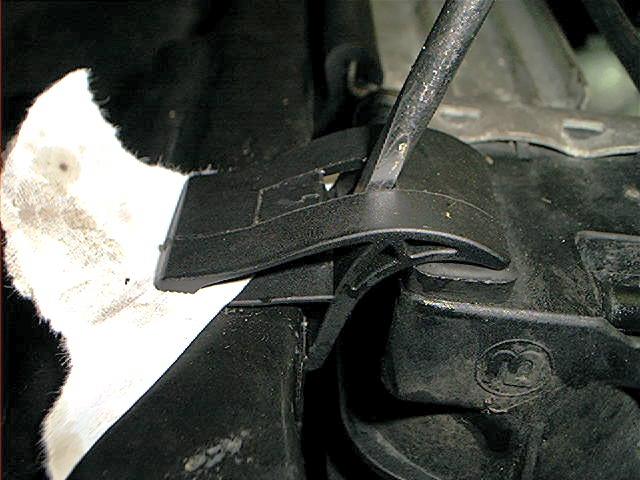
This trick with a piece of paper sometimes helps:
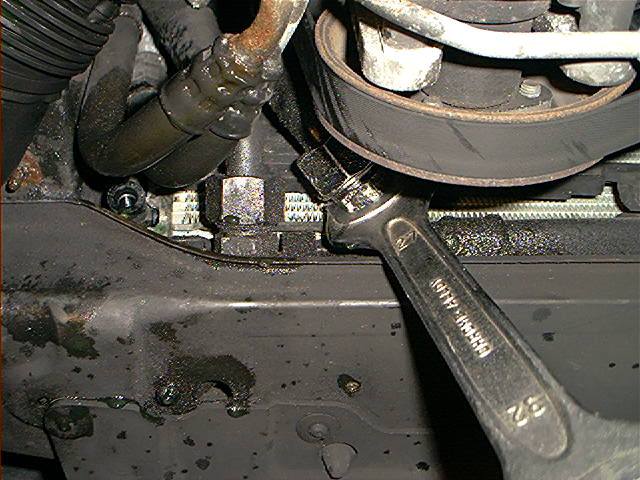
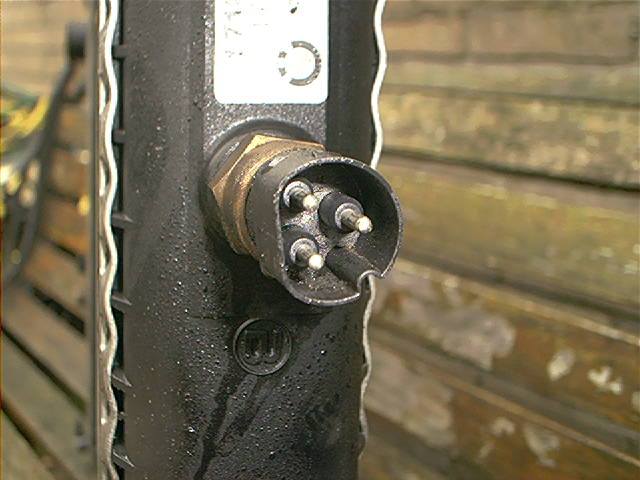
After removing the thermostat switch connection at the passenger side (right from inside of car) of the radiator, you can start carefully lifting it straight out.
You will have some real trouble with the fan shroud fighting against the oil cooler connections:
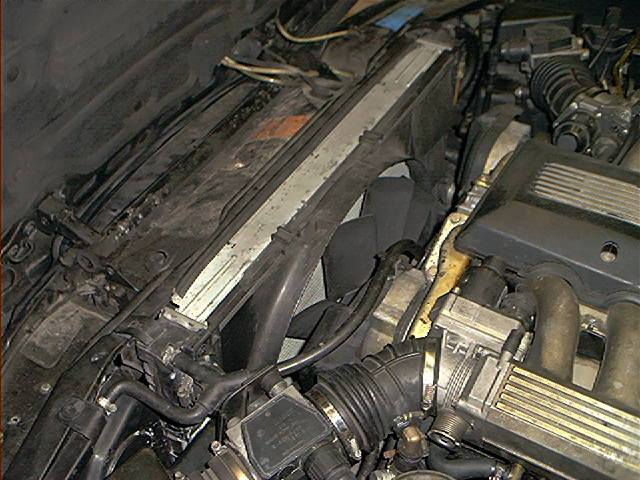
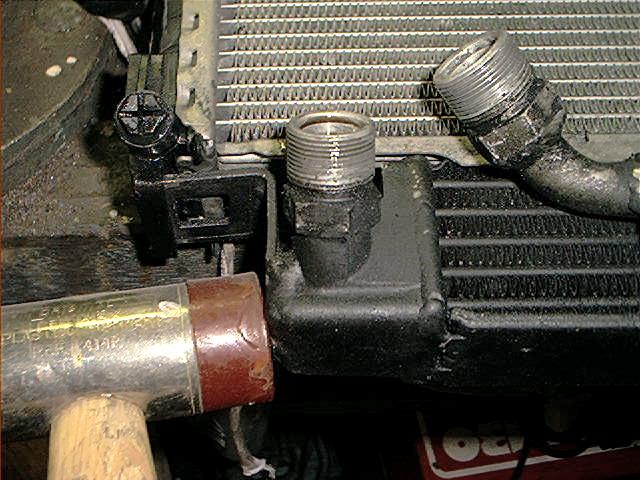
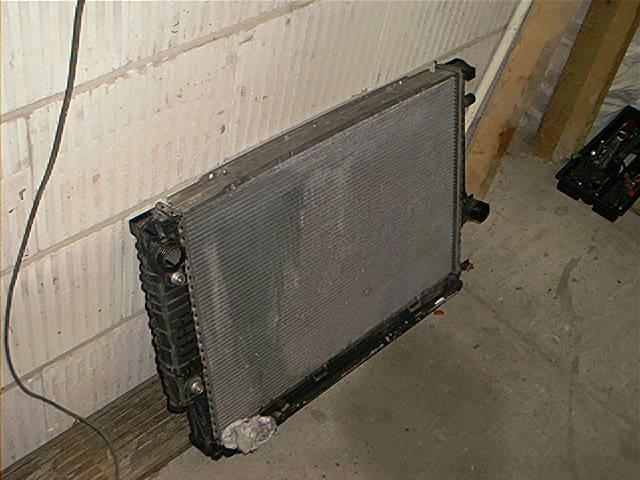
Radiator removed. Mind some coolant will leak out of the radiator. Now you are looking at the A/C condenser:
Ahh . . . at last it was on my workbench. Notice the amount of oil cooler debris, it was fully clogged after 16 year and 400.000 km (250.000 miles) on the highways:
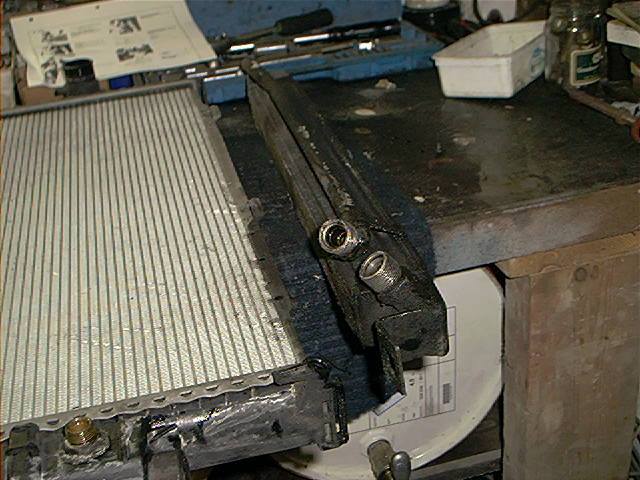
The oil cooler is attached to the radiator in simple way:
Just move it sideways (I used a special soft hammer for this):
I cleaned it thoroughly (using degreaser and compressed air) before reattaching it to the new radiator. Make sure no dirt is getting into the open fittings:
Here you see both mounting points of the radiator, where its supported by the chassis:
Replacing the oil cooler O-rings:
Replacing the transmission cooler O-rings:
When reinstalling the new radiator, I used some wire to keep the shroud aside but it still was a pain:
That was about it. Reconnect every hose and fluid line, top off with some fresh coolant. Take it out for a long test drive and check carefully for oil/ATF/coolant leaks.
Last comment from DSS:
“MAKE SURE you install the temp. sensor on the (US) passenger’s side before you reinstall the radiator.
My Behr replacement had a brass plug installed in the hole for the sensor — it came with a gasket pre-installed, and I just removed the sensor from the old radiator and screwed it in.”
Total amount of time: it took me all afternoon including 2x a drive to the parts seller (obvious with another car). I should have bought the O-rings before I started. I’ll never learn.
Skills needed/difficulty level: for heaven’s sake, remove that fan!
Satisfactory level after the job done: first test drive was with a fully warmed up engine, trans in S-mode and the v12 revving up to 5800 rpm’s.
No leaks. Check coolant level again when the car is cooled down, it’s not uncommon that you’ll add some coolant the next days due to air bubbles leaving the coolant system.
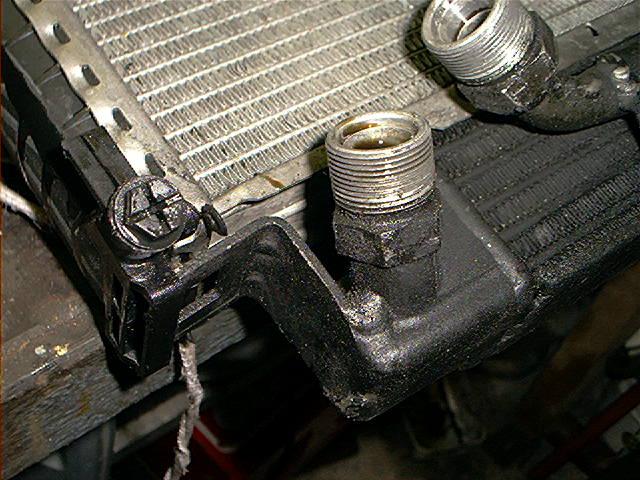
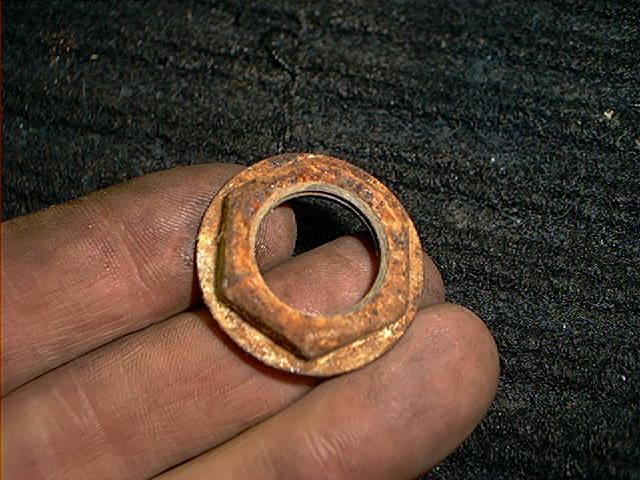
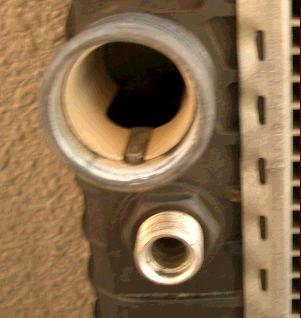
Remark after a week or so: when I was about to discard my old radiator, I looked carefully where the coolant leak started, at the transmission fluid lines connections:
At that point I realized it was some sort of collar nut, holding the internal transmission cooler. I was wondering if I could get it loose:
And I could:
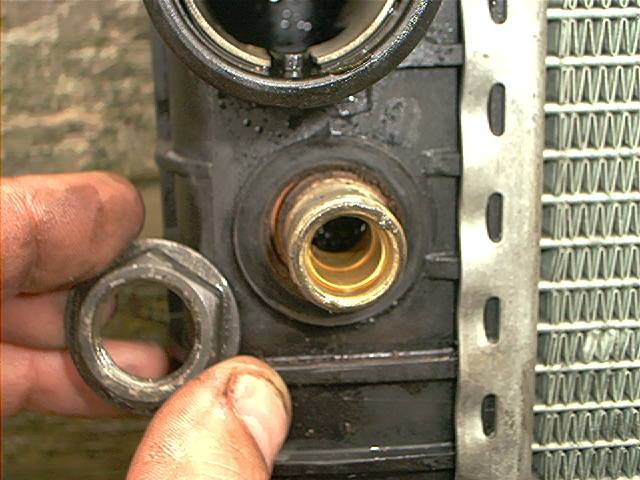
This was probably the point where it leaks, between the collar nut and the plastic tank.
So perhaps there was a good chance I could fix the leak if I just drained the radiator and put some sealant between the nut and the plastic tank instead of replacing the whole rad.
William Tsang performed this little trick:
“The final fix (I hope), was to unscrew the collar nut, clean the contact surface of the nut, which I can tell was not a smooth surface, and instead of using those wet sealant, I used the teflon tape, put about 9 to 10 rounds to the base of the threaded screw first, put on the collar nut, tighten to about 0.5 mm gap between the radiator housing and the nut, then run the teflon tape again to fill the gap, then tighten the nut. It worked!!”
But not always, as I noticed. Read on:
Radiator Replacement – Update 1
The following part was added a year after the replacement: I never considered myself being a lucky man. I always tend to loose in the casino, the lotto, and life in particular.
Well, it sure felt like this when I blew my rad again, just after 1 year of driving. Now I must admit, the previous time I didn’t purchase a new one but I installed a used one.
But it was in pristine condition, almost brand new and I was very happy I could find one for a decent price.
BUT: the last couple of weeks I smelled the sweet, very peculiar odor of coolant after driving for a couple of hours. I popped the hood and saw this:
This just wasn’t a slight leak. It looked like a flooding season had started. At first I thought it was leaking between the aluminum body and the plastic tank, but that wasn’t the case.
This was a whole new variant. At a certain point I saw this (pay attention to the top of the radiator):

Notice the upper part of the radiator was blown (it should be straight but it’s actually bended). It had to be replaced.
This was a good chance to reuse the old radiator (which I had kept in my garden….luckily I didn’t discard it) and fix the leak between the collar nut and the plastic tank to see if this is the solution.
This is the old radiator, just pulled out of the bushes (not much of a garden man here):
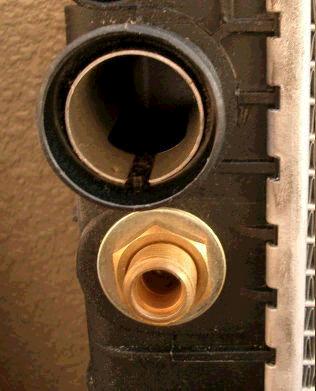
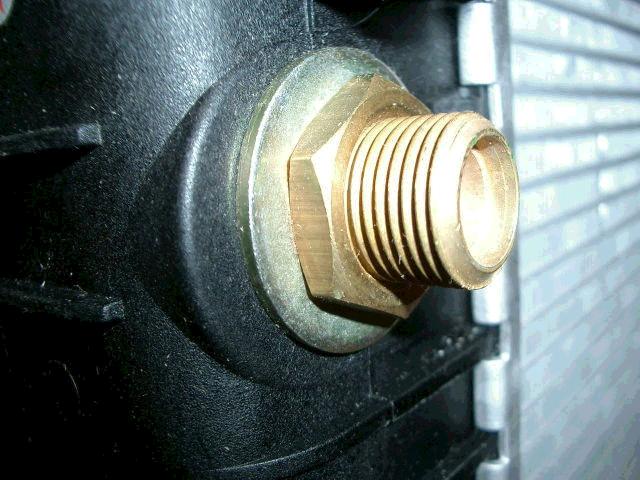
I removed the collar nut, which was quite rusty after a year. It seems the collar nut is made from plain steel:
I cleaned, slightly sanded and degreased contact surfaces thoroughly. Now applying a bed of sealant:
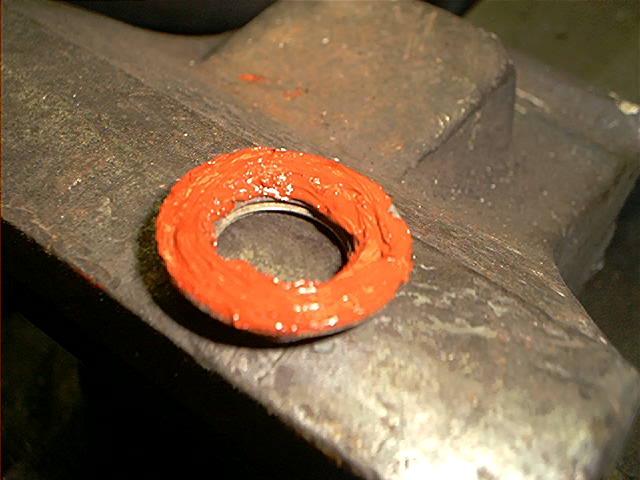
And tightening the collar nut:
To be sure, I also performed this at the lower collar nut:
Now I had to remove the blown rad. Again. This time, I want to do things quicker and decided to leave the air boxes (upper and lower half) and filters installed.
But I surely want to remove that damn viscous fan this time. First, I applied some penetrating oil like WD-40.
After that, I jammed a large screwdriver between the water pump shaft and bolts holding the pulley and used a 32 mm open wrench to loosen it (I still *can’t* get used to left hand thread which by the way gave me a fun time to get it back on):
Yes!:
Fan shroud already removed. Everything is sooo much easier to access now.
I checked also the water pump pulley for play:
I think you guessed what I felt….shaft play. Great.
That is another story, OK?
So I drained the radiator, removed coolant hoses, disconnected oil cooler and transmission cooler fittings, disconnected temp sensor and simply tilted the radiator out of the car with a bit fiddling.
You see you don’t have to remove so much parts as in part I:
Removed radiator, notice the coolant leakage:
A close up of the damage, it just popped!:
After reinstalling the other radiator, I kept an close eye to the notorious transmission cooler fitting. Things are looking good, for the moment:
But it leaked again after a couple of days. The leak isn’t between the collar nut and the plastic tank, but the plastic tank is simply cracked near the fitting by a bad design.
I did the best I could, but it seems you have to bite the bullet and buy yourself a new radiator.
A visitor of our site, Yuuya Murakami, did replace his radiator for an imitation (Nissens) instead of a used one:
“I choose Nissens because it was much cheaper than BMW genuine part. But I was surprised that coolant started to leak at the same point only after 6 months and 1500km run!”.
The following picture is of the new Nissens:

Alex Lynch about the Nissens radiator:
“I replaced it with a Nissens which lasted exactly thirteen months, one month past the warranty period. The fittings for the transmission coolant lines on the Nissens both failed.”
A Behr replacement seems better. Yuuya about this: As you know, the original E32 genuine radiator is made by BEHR. And I noticed that the new one had some differences from genuine part:
1. The way to connect plastic tank and core.
2. The number of core lines.
3. Plastic tank shape around trans-coolant connection.
They seemed to fortified the notorious connection.
Alex Lynch about the Behr radiator:
“After the failure of the Nissens, I took the time to examine the differences between the Nissens and the Behr.
One of the principal differences was that the Behr had internal re-enforcing collars on the inlet and outlet connections which were not present on the Nissens.
The overall quality of the Behr radiator was also better”.
Original Behr design / Nissens design Improved Behr design
Another close-up of the fortified trans cooler connection from Behr.
Pay attention that your new radiator has these modified fittings:
Yuuya, thanks for these pictures!
It seems that the 750 puts more stress to the radiator as the 730/735.
The Nissens don’t last long in the 750 but a 735 can run without any problems. Johan’s car has a Nissens radiator and doesn’t experience any problem at all.
Radiator Replacement – Update 2
The following part was added a few months after part II..should rename this to the never ending story:
Well, after those tons of bad radiator luck a glance of hope brought some relief. I have bought myself a scrapped 750iL for parts and it had an almost brand new new style Behr radiator.
So I installed this (third and still counting) radiator in my car and things are looking good now. I also bought an additional old style Behr radiator (used), as a spare part. Guess I never learn.
New style radiators, old style radiators, leaking radiators, spare radiators . . . I lost somehow control:
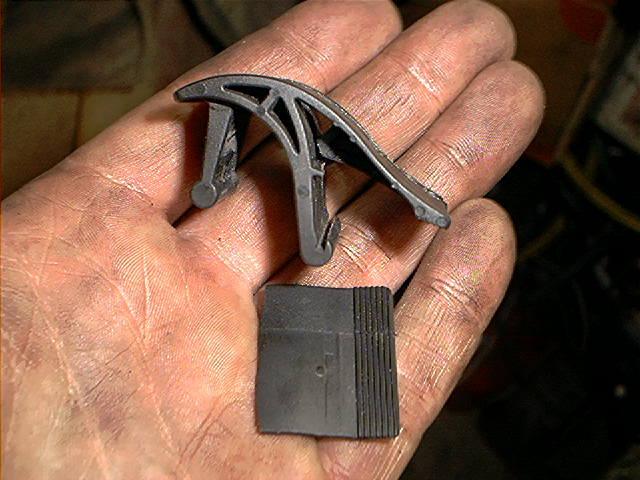
This was a brand new radiator clip. They are not expensive, but I just hate this design.
Needless to say I was not amused: