Article by: Sean
Article applies to: all models with the M70 V12 engine.
Problem: How do I remove that #@!#? spark plug near the firewall (drivers’ side)
Used technique: Somebody said once to me, when we both stared at the loaded engine bay of my 750: ‘
“It looks like they dropped the engine from the top of the ceiling of the factory right into the engine bay, slammed the hood down and didn’t expected it to be opened for any maintenance or replacing parts until its salvaged!”
That’s a bit over the top, but a fact is that some parts are really difficult to reach. Ever replaced an alternator or starter engine of a M70 engine?
Even obvious less difficult jobs, like changing sparks plugs, can be a real challenge on this engine. The 6 plugs on the passenger side are relative easy. Just remove the washing fluid tank (1 nut) and they are pretty easy to reach.
On the driver’s side, things are starting to get a bit serious.
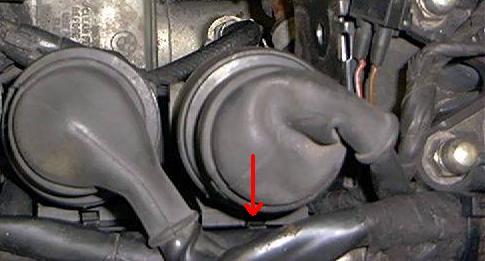
The first 4 can be done, but the last 2 and particular the last near the firewall is virtually impossible to reach, unless you want pulling the engine (my first thought when I replaced them).
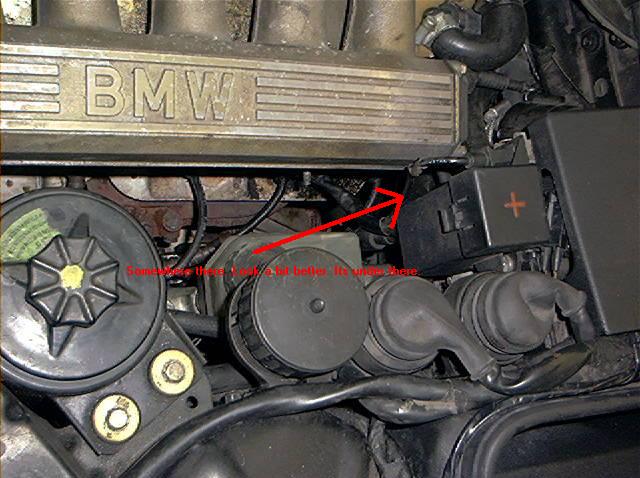
Yes, it’s there. Take a good look. The red arrow is pointing at it. You still can’t see it? Neither do I.
Later I found out that I am not alone on this planet facing the dreadful #12. A couple of remarks found on several BMW forums about changing spark plugs on a M70:
“. . . man those things are a bear to get to…any tips to simplify the process?!”
“. . . you will need a lot more patience (and if you are inclined, a few beers) to do the six plugs on the driver’s side. Plan on an afternoon for the whole job if it is your first time.”
“I am in the process of replacing the spark plugs on my ’88 750IL. Initial inspection has led me to believe that the removal of these spark plugs is not an easy task.”
“Now for the dreaded 12th plug. This one is the real challenge, so do all the other 11 first and don’t break into your beer until you get this one out (motivation, and keeps you from breaking too many parts).”
“You thought the passenger’s side was hard… just wait. The two plugs closest to the firewall are not accessible without removing some part of the engine or brake system.”
“I would like to get some feedback from anyone who has changed the spark plugs themselves on their 750iL. I would just like to know if it’s humanly possible?”
‘I think 3 hrs is about the right time frame for #12, that is how long it took me to change mine”
Lets say you’re really convinced now. Furthermore, you must be really careful working your arm into the area between the engine and the brake fluid reservoir:
“Don’t push on the brake fluid reservoir, otherwise if it decides to leak, you’ll need to replace the two rubber grommet between it and the booster, and a 4-wheel bleed.”
“***Warning, be very careful around the master cylinder as it can’t easily be broken off as you contort your arm in this area***”
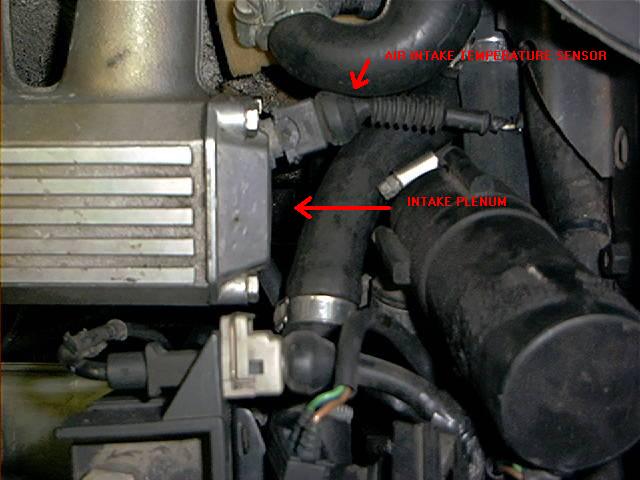
An often mentioned solution is taking of the intake manifold plenum (at the back of the manifold, where the air intake temperature sensor is located):
“My best advice is to try what I did, which was removing the end cap (4 bolts and air temp probe) from the intake plenum.
This gave me just enough room it gradually work my arm into position to loosen and tighten the plug. Take your time.
Think about your movements before you make them and be very patient (almost like “Zen and the Art of BMW plug replacement”).”
“For plug #12, remove the air temp sensor and the end cap with 4 10-mm bolts to make room.
To install end cap, use new gasket or reuse old gasket with gasket sealant. Still, socket extensions and swivel joints are necessary.”
Indeed, you can do this. But there is an easier method, avoiding removing parts from the engine, and thus avoiding possible problems like intake leaks (false air) using this method.
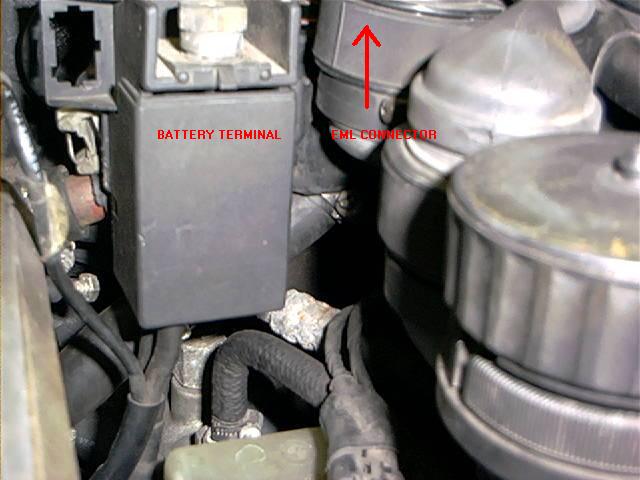
Lets start unbolting things: The final solution, simple and perfect (according to my experiences) is to remove the battery terminal. To remove it, follow the next instructions:
Remove the screens from the valve heater and battery terminal.
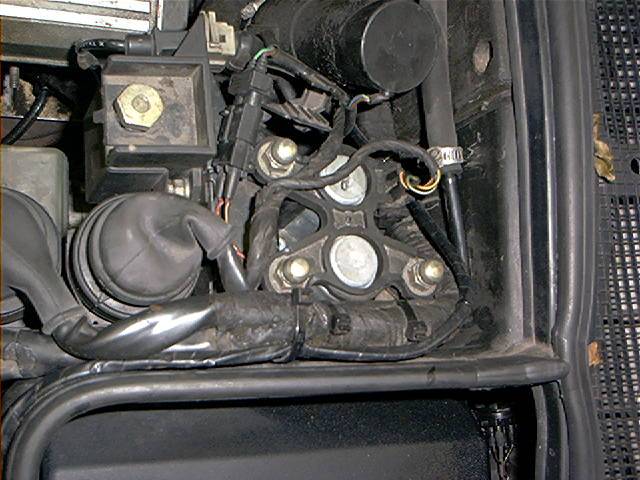
Remove the starter connector:
Pry this (see photo underneath) forward and lift the EML harness connector a couple of centimeter up. Do not remove the entire harness.
From left to right you have 3 connectors: diagnostic connector, main engine harness connector and EML connector. Only the EML connector needs to raise a bit:
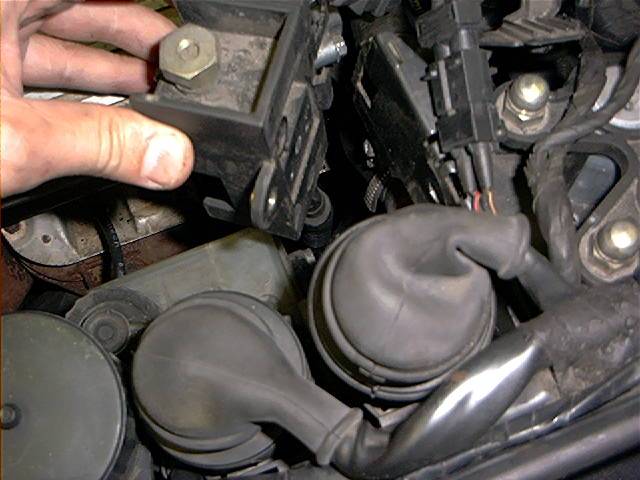
Now you can remove the cover of the battery terminal:
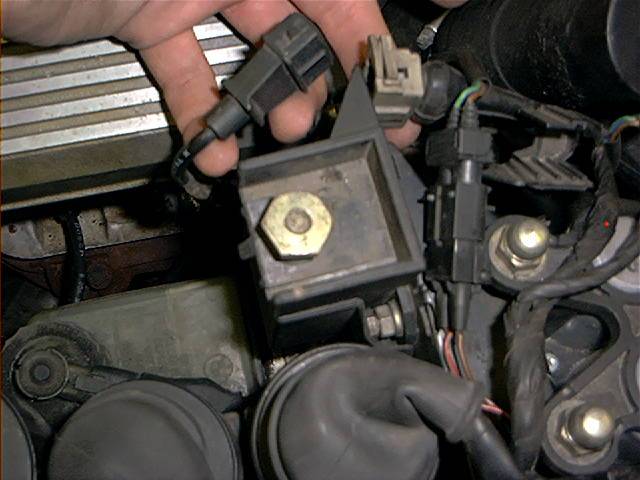
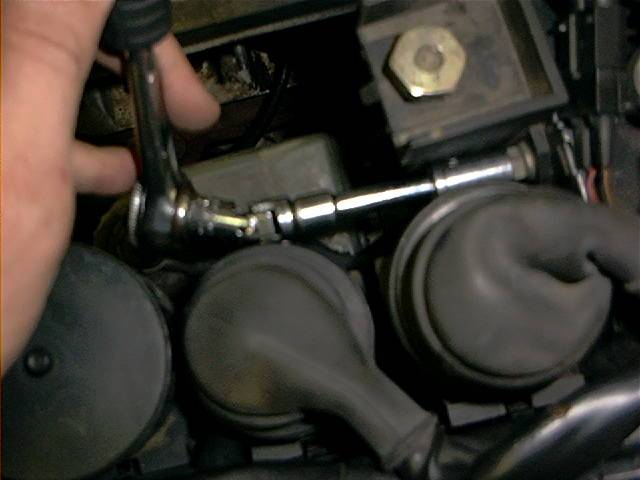
This bolt, has to be removed. A small ratchet, swivel and socket (10mm) will do:
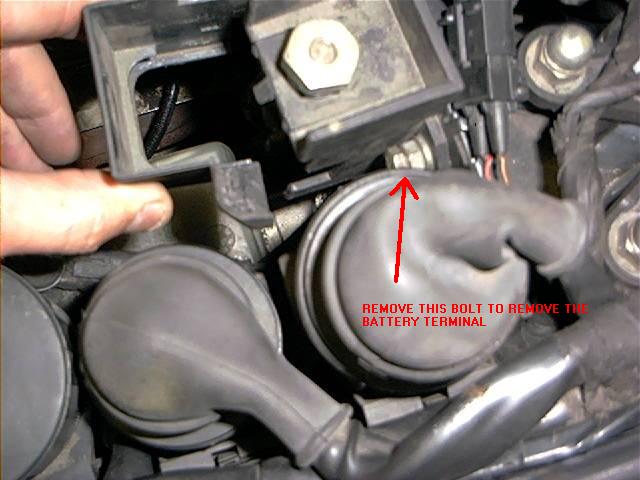
My excuses for the not-so-sharp-picture. Remember, this bolt is only accessible when the EML connector is lifted up far enough:
When you removed the bolt, you can simply pull the entire terminal away:
The battery terminal has its name for obvious reasons. That’s means that you must be careful that the terminal doesn’t touch the chassis, if you don’t like nice sparks and a bit welding at this moment.
No fuses here. I wrapped the terminal with an old rag to prevent touching any ground.
A remark from Jason Fox: “. . . when you remove the battery terminal, you can replace the covers so that the rag is not necessary to be wrapped around it.”
And let there be workspace…….as you can see now, there is plenty of workspace to put your arm in, leaving the brake reservoir untouched:
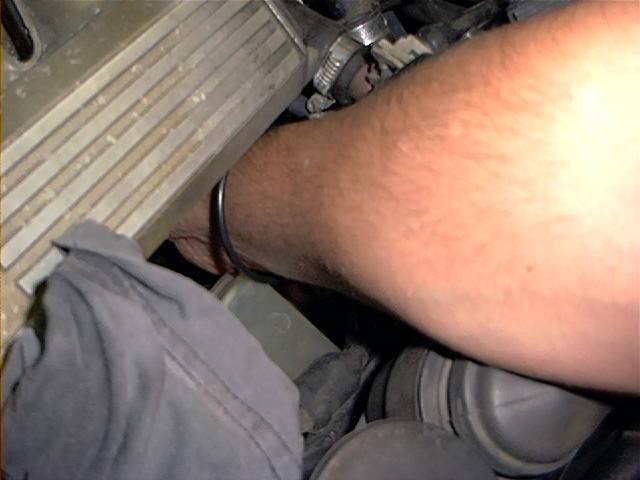
Both spark plug #11 and #12 are easy to access now. Not convinced yet? This photo underneath shows my hand on the spark plug connector #12:
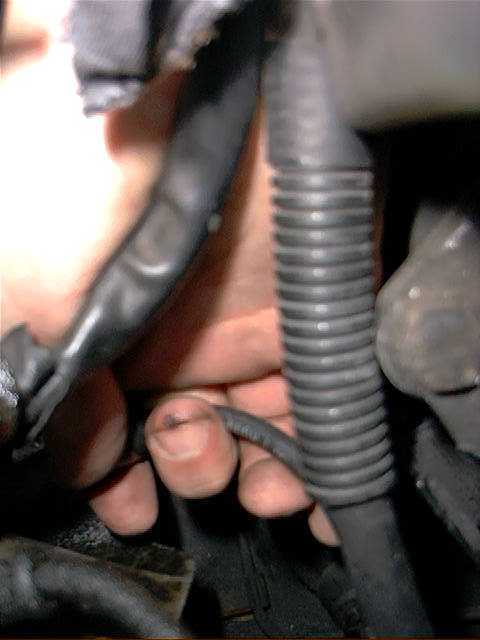
Now this photo was difficult to make……and yes, its #12. Number #11 is also easy to reach now.
Of course when you replaced the spark plug, reinstall the terminal, don’t let it hang loose.
Maybe, if you see all these photos, you’ll still think that its a lot of work. It isn’t. Try it.
Total amount of time: Just number #12? 1/2 hour!
Skills needed/difficulty level: No problem